EasyManuals Logo

Dell Latitude 7390 2-in-1 User Manual

Dell Latitude 7390 2-in-1
72 pages
To Next Page IconTo Next Page
To Previous Page IconTo Previous Page
Page #26 background imageLoading...
Page #26 background image
Installing the display assembly
1 Place the base of the computer on a at surface.
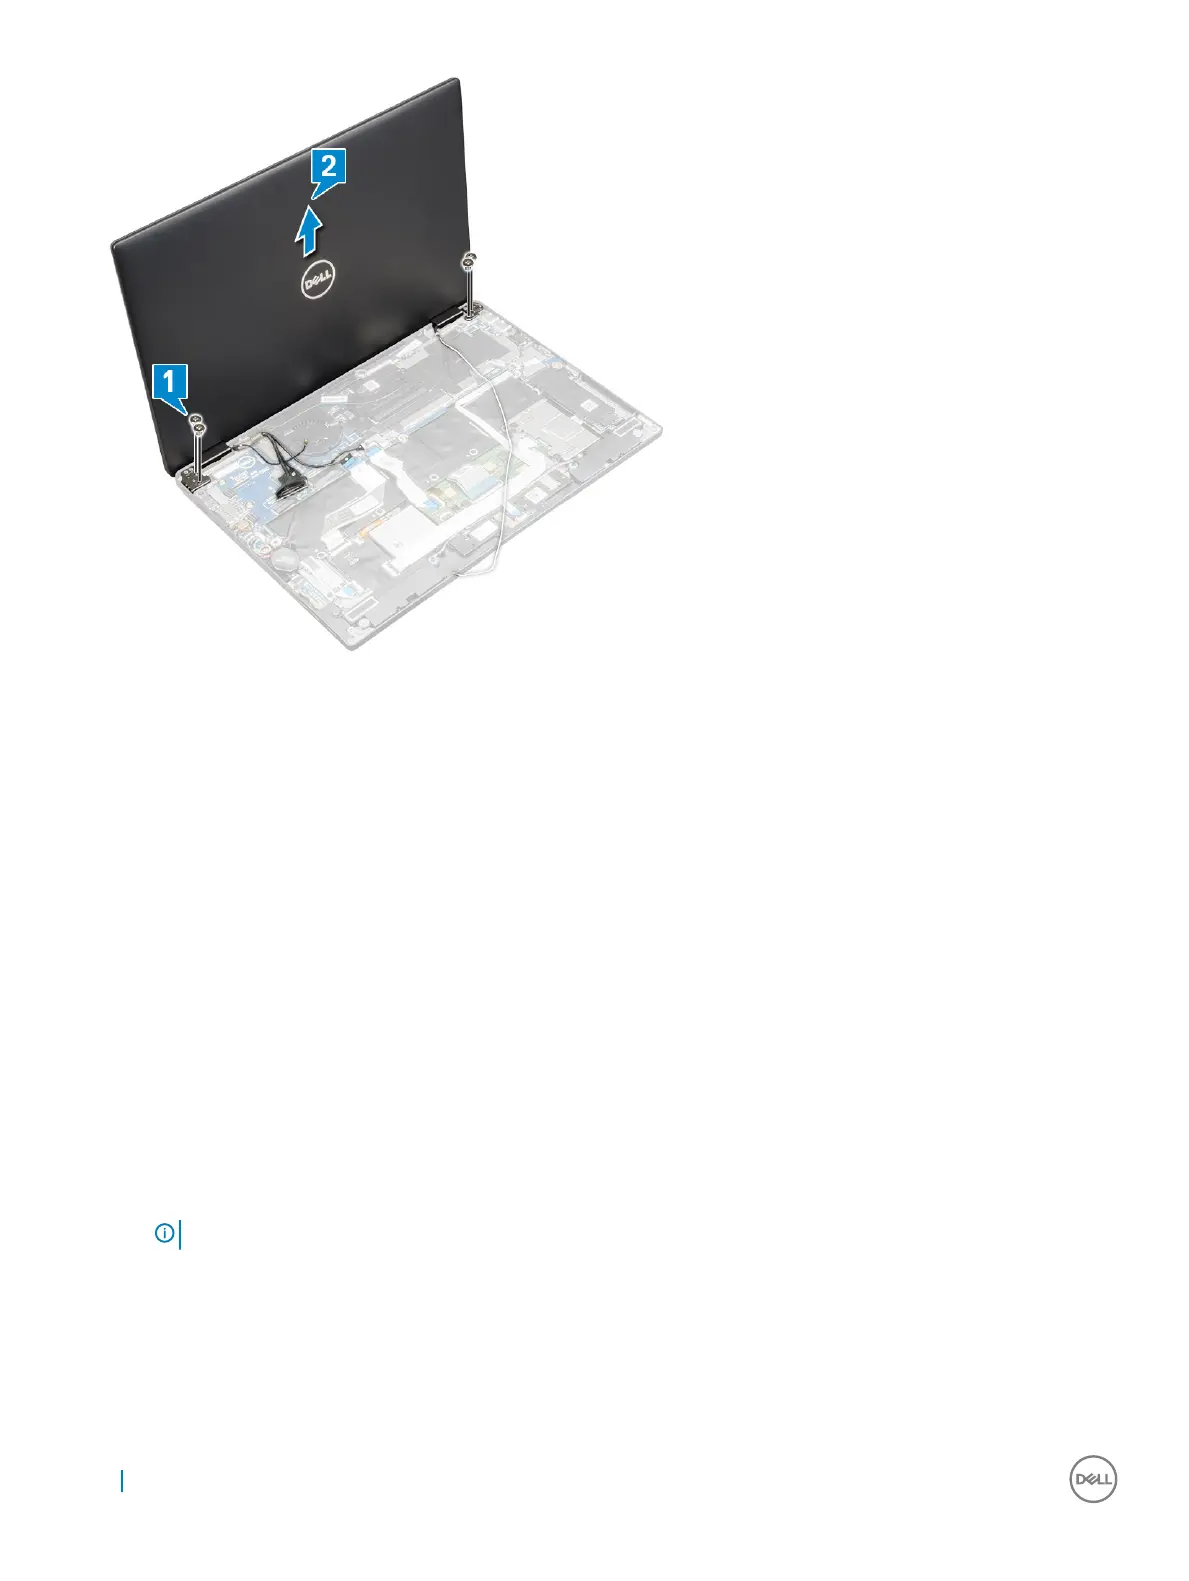
2 Align the display assembly with the display hinge screw holders.
3 Replace the 4 (M2.5 x 4.0) screws to secure the display assembly.
4 Close the display assembly and ip the computer.
5 Connect the cables:
a G-sensor and eDP cable
b Place the eDP bracket on the eDP cable and replace the 2 (M2 x 2) screw on the bracket.
c IR camera and touch screen cables
6 Route the antenna cables through the routing clips
7 Ax the tapes to secure the antenna cables to the system board.
8 Install the:
a WWAN card
b WLAN card
c Battery
d Base cover
e SIM card tray
f MicroSD card
NOTE
: To install both cards if equipped.
9 Follow the procedure in After working inside your computer.
System Board
26
Removing and installing components

Table of Contents

Other manuals for Dell Latitude 7390 2-in-1

Questions and Answers:

Question and Answer IconNeed help?

Do you have a question about the Dell Latitude 7390 2-in-1 and is the answer not in the manual?

Dell Latitude 7390 2-in-1 Specifications

General IconGeneral
GraphicsIntel UHD Graphics 620
Operating SystemWindows 10 Pro
Processor8th Generation Intel Core i5/i7
Display13.3-inch FHD (1920 x 1080) touch screen
RAM8GB or 16GB LPDDR3
StorageUp to 1TB PCIe SSD
Battery4-cell 60Whr
Weight1.42 kg (3.12 lbs)
Ports1 x microSD card reader, 1 x headphone/microphone combo jack
WirelessIntel Dual Band Wireless-AC 8265, Bluetooth 4.2
Webcam720p

Related product manuals