Steps
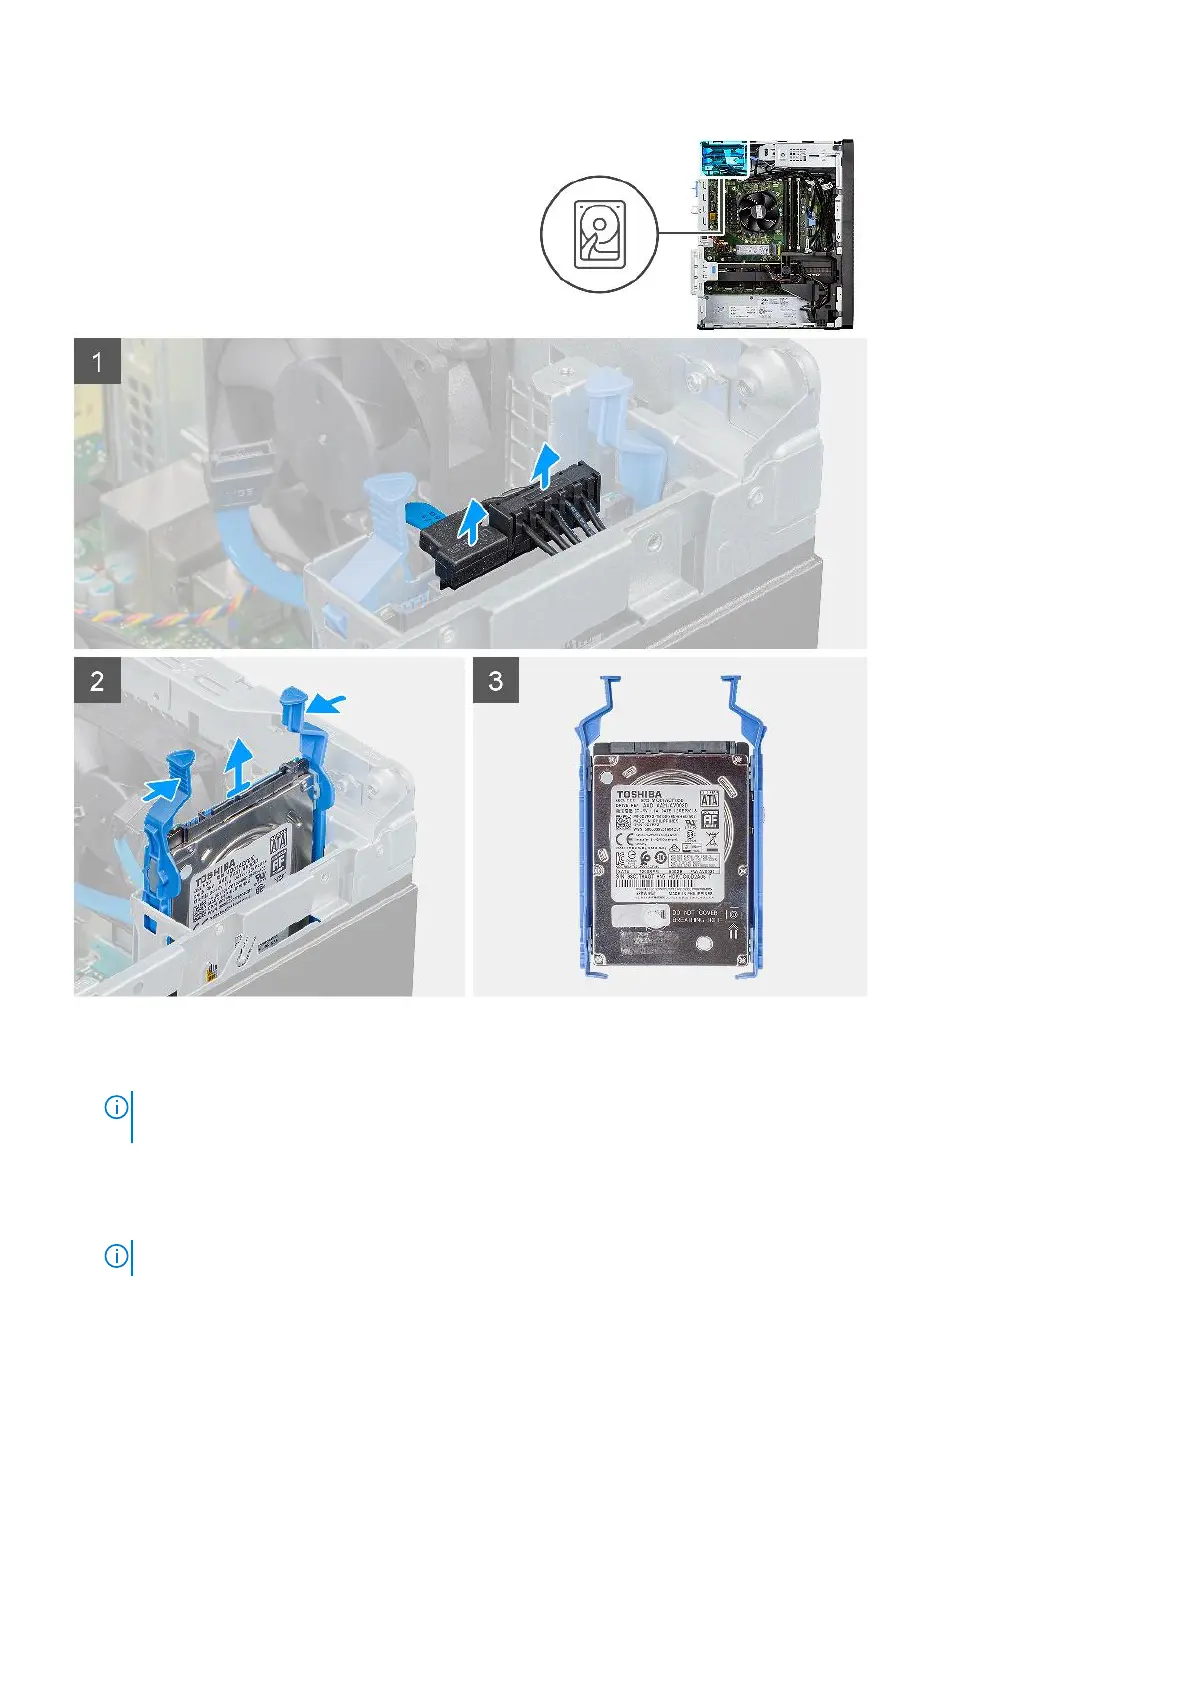
1. Disconnect the power cable and the black hard drive data cable from the connectors on the 2.5-inch hard-disk drive.
NOTE:
For secondary 2.5-inch hard-disk drive, the other end of the black hard drive data cable is connected to the
SATA1 and SATA2 connectors on the system board.
2. Press the release tabs on the hard-disk drive bracket and slide the hard-disk drive assembly out of the hard-disk drive
bracket.
3. Lift the hard-disk drive assembly from the computer.
NOTE: The orientation of the hard-disk drive so that you can replace it correctly.
Removing the 2.5-inch hard-disk drive bracket
Prerequisites
1. Follow the procedure in before working inside your computer.
2. Remove the side cover.
3. Remove the 2.5-inch primary hard-disk drive or 2.5-inch secondary hard-disk drive.
18
Removing and installing components