Setting up the monitor │ 53
Connecting your monitor
WARNING: Before you begin any of the procedures in this section,
follow the Safety instructions.
NOTE: Dell monitors are designed to work optimally with Dell
supplied inbox cables. Dell does not guarantee the video quality and
performance if non-Dell cables are used.
NOTE: Route the cables through the cable-management slot before
connecting them.
NOTE: Do not connect all cables to the computer at the same time.
NOTE: The images are for the purpose of illustration only. The
appearance of the computer may vary.
To connect your monitor to the computer:
1. Turn off your computer and disconnect the power cable.
2. Connect the USB-C (C-C), USB-C (C-A), DisplayPort, or HDMI cable from
your monitor to the computer.
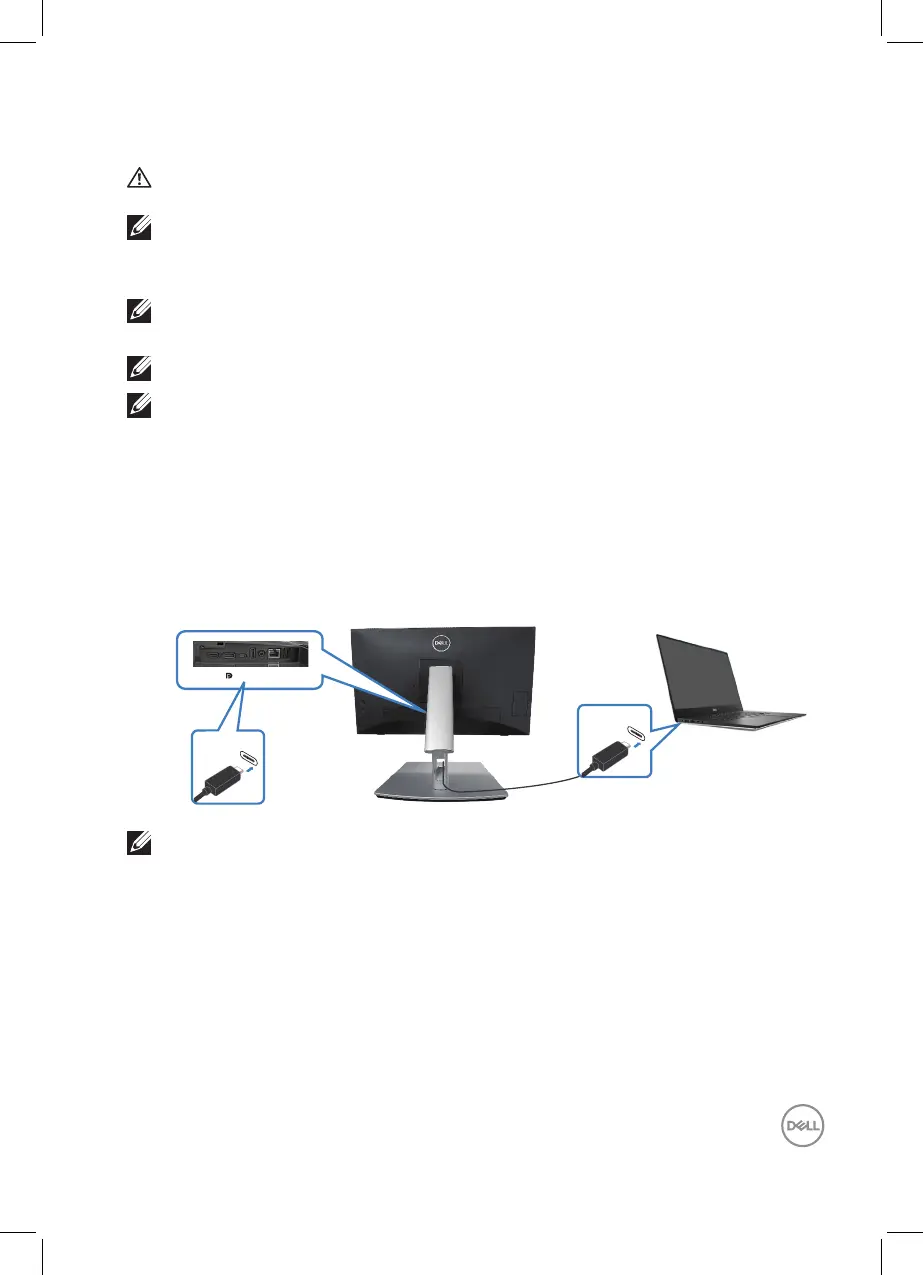
Connecting the USB-C (C-C) cable
HDMI USB-C
USB-C
USB-C
NOTE: Use the USB-C (C-C) cable shipped with monitor only.
• This port supports DisplayPort Alternate Mode (DP1.2 standard only).
• The USB-C power delivery compliant port (PD Version 3.0) delivers up to 90 W
of power.
• If your notebook requires more than 90 W to operate and the battery is drained, it
may not be powered up or charged with the USB PD port of this monitor.
• If not using USB-C (C-C) connection, then need to connect a DisplayPort or an
HDMI cable and a USB-C (C-A) data cable.