92 Installing System Components
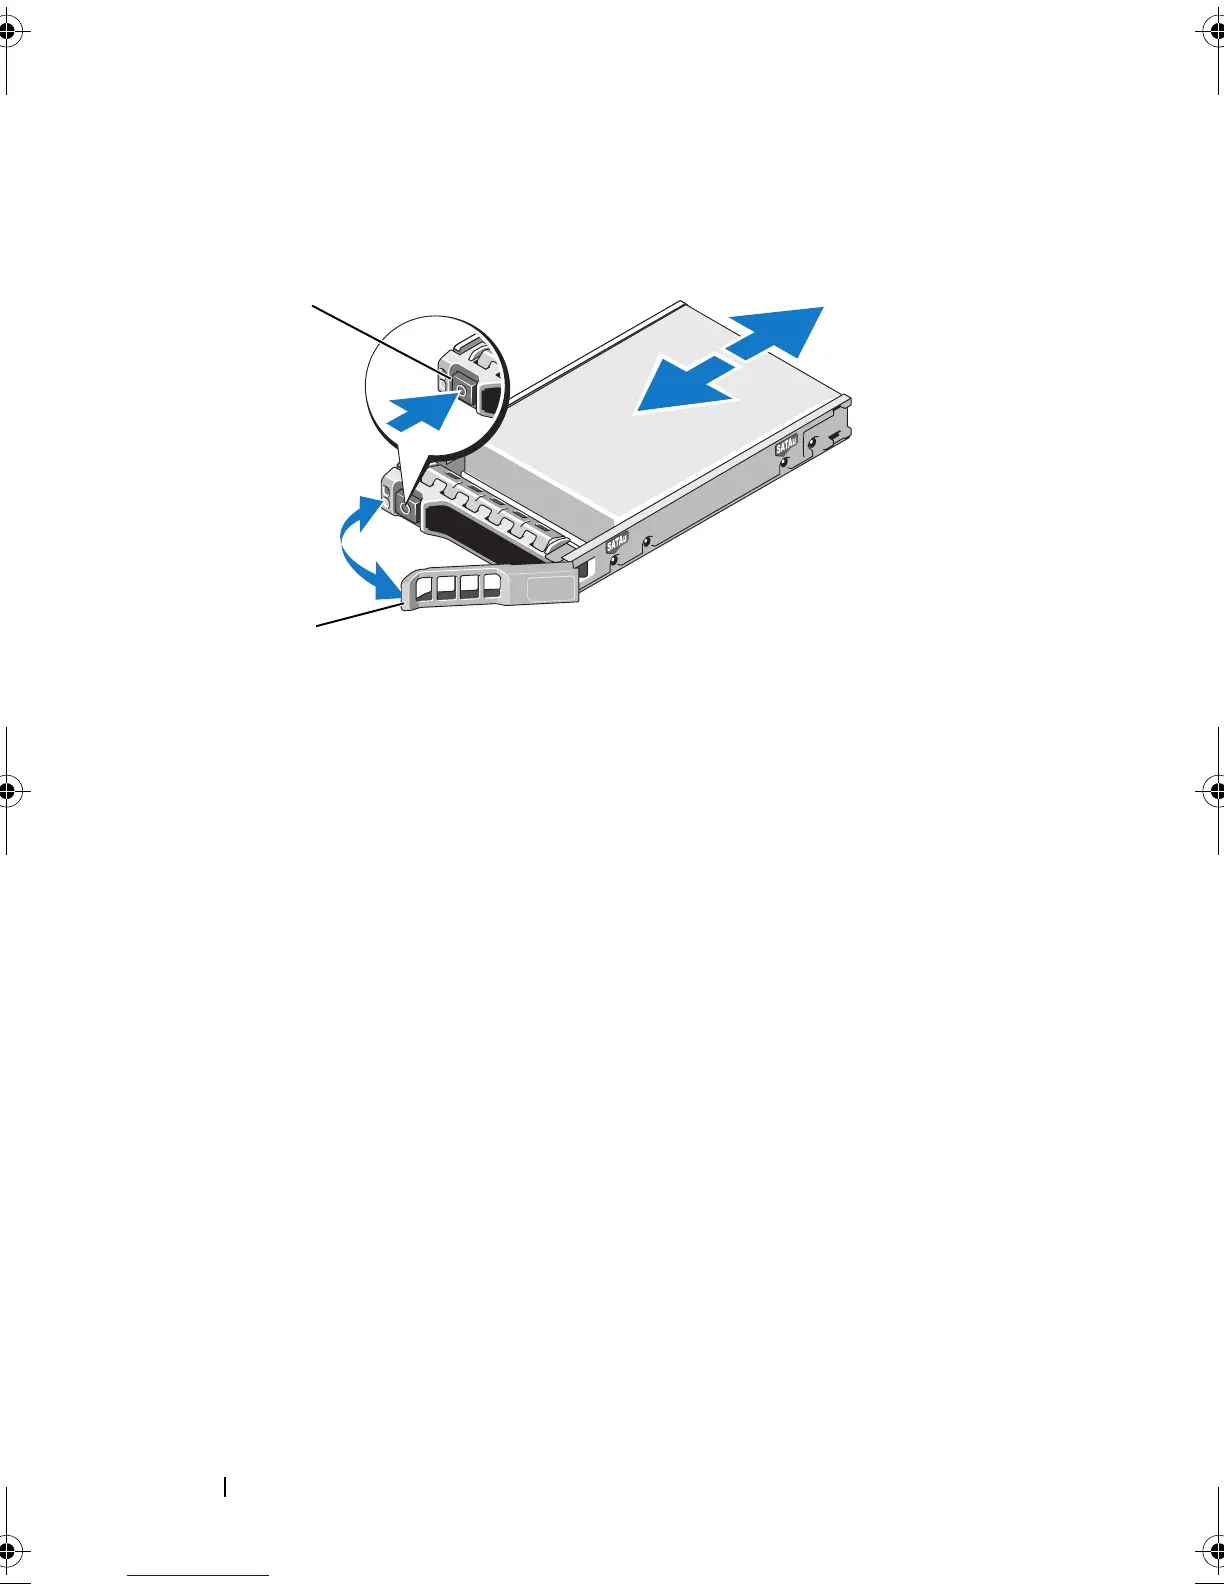
Figure 3-7. Installing a Hot-Swap Hard Drive
3
Install the hot-swap hard drive.
a
Press the button on the front of the drive carrier and open the handle.
b
Insert the hard-drive carrier into the drive bay until the carrier
contacts the backplane.
c
Close the handle to lock the drive in place.
4
Replace the front bezel. See
"Installing the Front Bezel
" on page 85
.
Removing a Hard Drive From a Hard-Drive Carrier
Remove the screws from the slide rails on the hard-drive carrier and separate
the hard drive from the carrier. See
Figure 3-8
.
1 release button 2 hard drive carrier handle
2
1
book.book Page 92 Monday, June 15, 2009 11:33 AM