Removing and Installing Parts 169
8
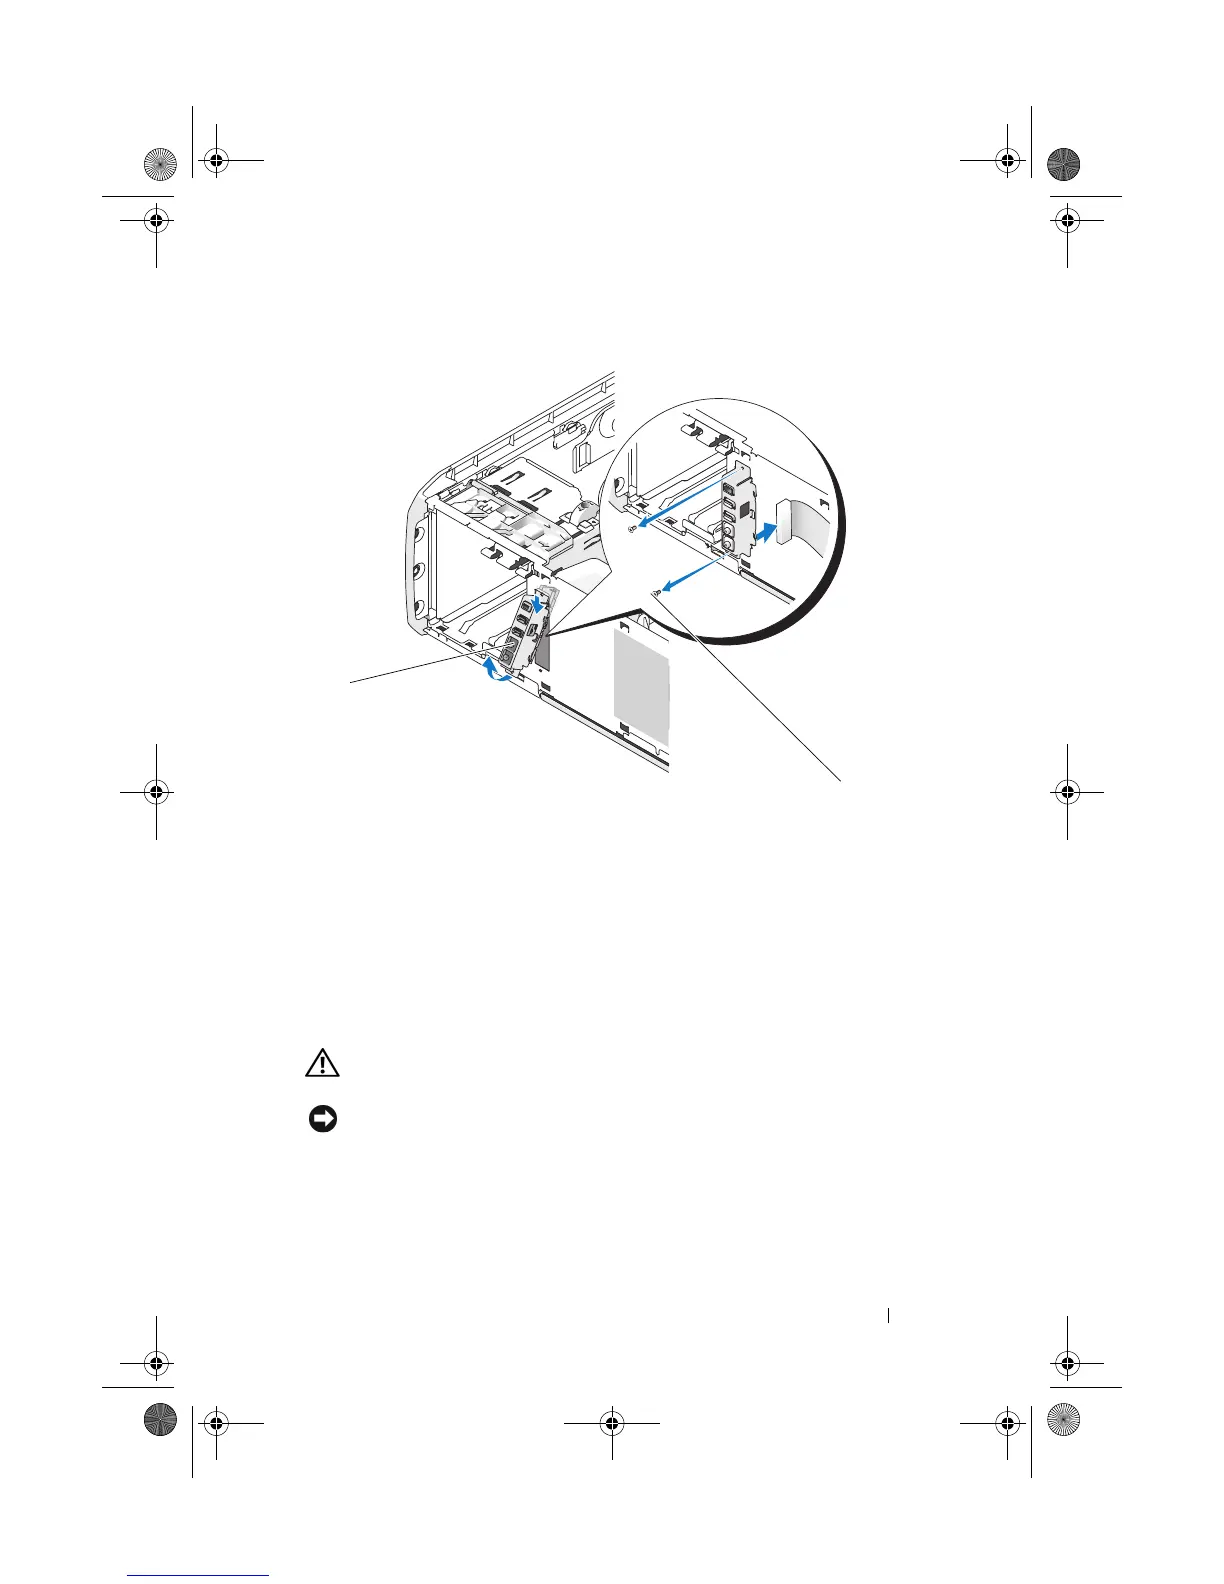
Remove the two screws that hold the I/O panel assembly to the front of
the chassis.
9
Gently ease out the lower end of the I/O assembly first from its groove on
the chassis followed by the upper end.
Installing the Front I/O Panel
CAUTION: Before you begin any of the procedures in this section, follow the
safety instructions in the Product Information Guide.
NOTICE: Ensure that you replace all cables originally attached to the I/O panel or
you computer may not function properly.
1
Follow the procedures in "Before You Begin" on page 99.
2
Remove the computer cover (see "Removing the Computer Cover" on
page 101).
1 Front I/O panel 2 mounting screws (2)
1
2
book.book Page 169 Tuesday, November 27, 2007 10:29 AM

 Loading...