Maintenance
Maintenance Manual 44
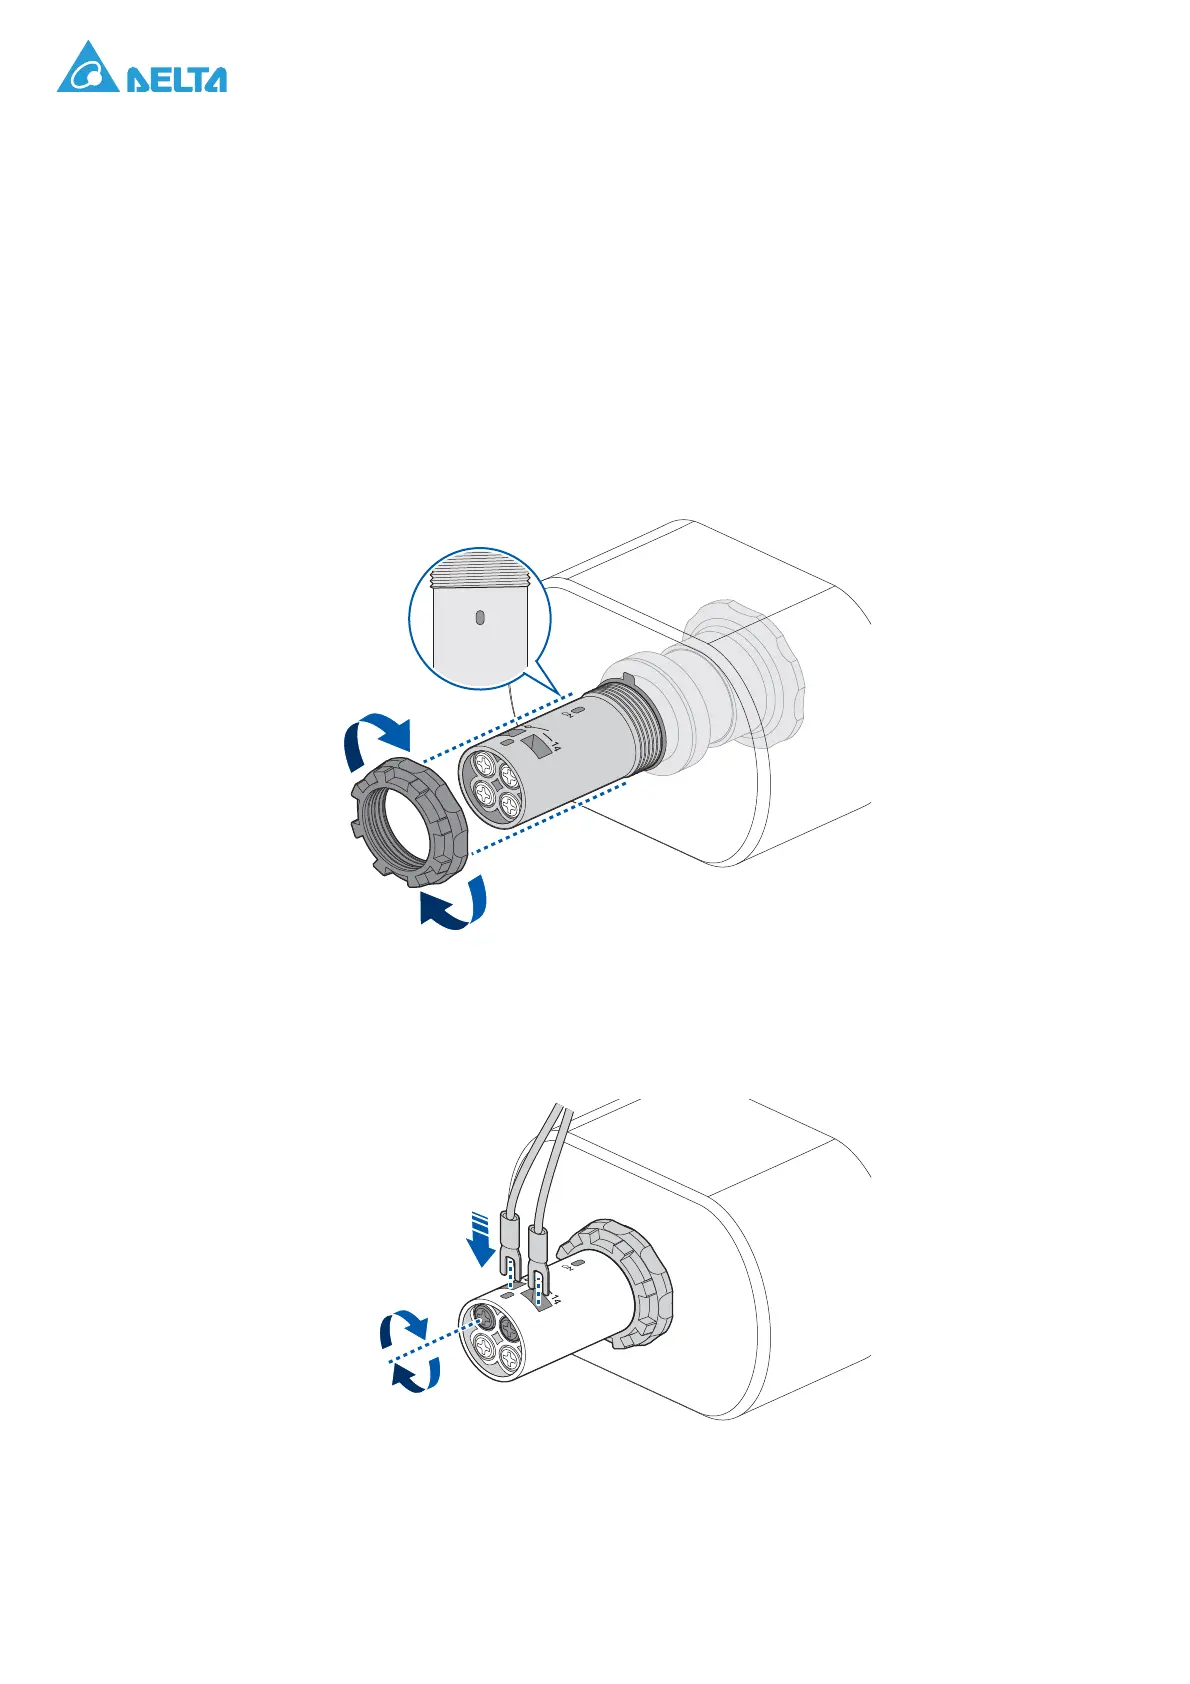
5. Position yourself to view the inner side of the front door. From this angle the bottom side of the
plunger mechanism is visible.
6. Inspect the mechanism to make sure it is inserted correctly. The screw threads on the barrel
should all be visible if the mechanism is seated correctly.
7. Make sure the CN guide marks are facing upwards
8. Take a locking nut and position it so that the flat side faces the housing mechanism.
9. Insert the nut through the barrel until it reaches the threaded section. Turn the nut until it is flush
with the mechanism.
Make sure the plunger mechanism is seated securely in the housing before continuing with the
remaining procedures.
If the mechanism is loose, remove the locking nut and realign the plunger mechanism before
attempting to secure it with the locking nut once again.
Figure 56. Installing a Locking Nut
10. Before inserting the connection wires, makes sure the CN marking is facing upwards.
11. Insert the connect (13) wire into the connector and turn the captive screw to secure it.
12. Once the first wire is secured, continue in the same way with the disconnect (14) wire.
Figure 57. Connecting Wires on the Emergency Stop Switch
13. Close the front door. See “Closing a Front Door” on page 22.