Getting Started Connections Settings Playback Remote ControlMulti-zone Information Troubleshooting SpecificationsSettings
ENGLISH
Making Detailed Settings (Manual Setup)
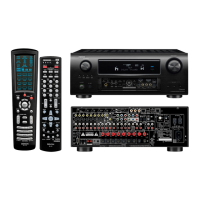
Main remote control unit
operation buttons
:Displaying the menu
Cancel the menu
:Moves the cursor
(Up/Down/Left/Right)
:Confirm the setting :Return to previous menu
Setting items Setting contents
Channel Level
(Continued)
Default : Reset all distance settings to factory default.
Yes : Reset to the defaults.
No : Do not reset to the defaults.
•
•
Crossover Frequency
Outputs at below set
frequency, each speaker’s
bass signal output from
the subwoofer. Set this
according to the low
frequency reproduction
capabilities of the speakers
you are using.
40Hz / 60Hz / 80Hz / 90Hz / 100Hz / 110Hz / 120Hz / 150Hz / 200Hz /
250Hz : Set the crossover frequency.
Advanced : Specify crossover frequency for each speaker.
Front / Center / Surround / Surround Back / Front Height / Front
Wide : Select the speaker.
40Hz / 60Hz / 80Hz / 90Hz / 100Hz / 110Hz / 120Hz /150Hz / 200Hz /
250Hz : Set the crossover frequency.
Can be set when the “Speaker Configuration” – “Subwoofer” (vpage
40) setting is “Yes”, or when you have a speaker that is set to “Small”.
Always set the crossover frequency to “80Hz”. When using small
speakers, however, we recommend setting the crossover frequency to
a higher frequency.
For speakers set to “Small”, sound below the crossover frequency is cut
from the sound output. The cut bass sound is output from the subwoofer
or front speakers.
The speakers that can be set when “Advanced” is selected differ
according to the “Subwoofer Mode” setting (vpage 41).
When “LFE” is selected, speakers set to “Small” at “Speaker
Configuration” can be set. If the speakers are set to “Large”, “Full
Band” is displayed and the setting cannot be made.
If set to “LFE+Main”, this setting can be made regardless of the
speaker size.
•
•
•
•
•
•
•
•
Speaker Impedance
Set the impedance of
connected speakers.
8Ω/ohms : Select when the impedance of the connected speaker is 8
Ω/ohms or more.
6Ω/ohms : Select when the impedance of the connected speaker is at
least 6 Ω/ohms but less than 8 Ω/ohms.
Check the speaker impedance (Ω) shown on the back of your speakers
or in the instruction manual beforehand.
Setting items Setting contents
RGB Range
Set the video range of RGB
output from the HDMI
terminal.
Normal : Output with RGB video range (16 (black) to 235 (white)).
Enhanced : Output with RGB video range (0 (black) to 255 (white)).
This setting is valid when using a TV equipped with a DVI terminal.
Vertical Stretch
Expand image signal in
vertical direction.
ON : Expand image signal in vertical direction.
OFF : Do not expand signal in vertical direction.
This setting is valid with respect to the HDMI output when using an
HDMI-compatible TV. When not using an HDMI-compatible TV, it is
valid with respect to the analog output.
Auto Lip Sync
Automatic compensation
for timing shift in audio and
video output.
ON : Compensated.
OFF : Not compensated.
HDMI Audio Out
Select HDMI audio output
device.
Amp : Playback through speakers connected to the receiver.
TV : Playback through TV connected to the receiver.
When the HDMI control function is operating, the setting of audio
playback in the connected TV takes priority (vpage 90 “HDMI
Control Function”).
Monitor Out
Make settings for HDMI
monitor output.
Auto (Dual) : The presence of a TV connected to the MONITOR 1 or
MONITOR 2 terminal is detected automatically, and that TV connection
is used.
Monitor 1 : A TV connected to the MONITOR 1 terminal is always used.
Monitor 2 : A TV connected to the MONITOR 2 terminal is always used.
If both the Monitor 1 and 2 connectors are connected and “Resolution”
(vpage 60) is set to “Auto”, the signals are output with a resolution
compatible with both TV.
With “Resolution” (vpage 60) not set to “Auto”, check whether
the TV you are using is compatible with the resolution under “HDMI
Information” – “Monitor 1” and “Monitor 2” (vpage 87).
Depending on the monitor you have connected, the display may not be
correct when you set to “Auto (Dual)”. In such a case, set to either
“Monitor 1” or “Monitor 2”.
You can also set “Monitor Out” by pressing M.SEL on the main remote
control unit.
•
•
•
•
Make settings for HDMI video/audio output.
Making the HDMI Settings (HDMI Setup)
Default settings are underlined.
 Loading...