3
Press .
The setup screen disappears.
Press .
The display brightness each time the button is
pressed.
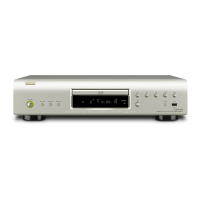
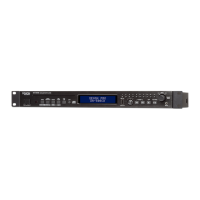
Normal Dim Dark Off
Changing the Brightness of the
Display (Dimmer Control)
Even when “Off” is selected, the status of operations that are
performed appears momentarily on the display if “Display Setup”
– “Temporary Display” on the GUI menu is set to “On” (vpage 30).
When you make an HDMI connection with a TV or AV Amp compatible
with DBP-4010UD and HDMI control functions, you can perform the
following operations by setting the HDMI control function of each
device.
TV or AV Amp power is turned on by operating
the DBP-4010UD, and functions change with DBP-
4010UD input.
Turning off the TV’s power turns the DBP-4010UD’s
power to standby.
Operating the DBP-4010UD via the TV’s remote
control.
(When the TV’s remote control has player operation buttons)
n
n
n
If the HDMI control function does not operate properly, check the
following points.
Is the TV or AV Amp compatible with the HDMI control function?
Are the HDMI control function settings of all equipment correct?
(Step 3)
After setting, did you add another HDMI device connection or
make any changes in the connections? In this case, perform setting
again.
•
•
•
HDMI Control Function
NOTE
The HDMI control function controls operations of a TV that is
compatible with the HDMI control function. Make sure that the TV
and HDMI are connected when you perform HDMI control.
Some functions may not operate depending on the connected TV
or AV Amp. Check the owner’s manual of each device for details
beforehand.
When “Other Setup” – “Power Saving” on the GUI menu is set
to “Power Saving Standby” or “Normal Standby” (vpage 31),
the player’s power cannot be turned on using the HDMI control
function.
When “HDMI Setup” – “HDMI Control” – “Power Off Control” on the
GUI menu is set to “Off” (vpage 24), the DBP-4010UD is not set
to standby even if the connected device is in the standby mode.
When “DENON LINK Setup” – “DENON LINK Mode” on the GUI
menu is set to “4th”, the HDMI control function is enabled for the
connected devices.
•
•
•
•
•
1
Set HDMI control function to “On”.
On the GUI menu, set “HDMI Setup” – “HDMI Control” (vpage
24).
2
Turn the power on for all the equipment connected by
HDMI cable.
3
Set the HDMI control function for all equipment
connected by HDMI cable.
On the GUI menu, set the DBP-4010UD with “HDMI Setup”
– “HDMI Control” (vpage 24).
Please refer to the owner’s manual as regards setting of connected
devices.
Carry out Steps 2 and 3 should any of the equipment be
unplugged.
b
b
4
To ensure that the DBP-4010UD’s HDMI video output
is projected on the TV screen, change the input
function of the TV and AV Amp.
5
When you turn the TV’s power to standby, check that
the power of the DBP-4010UD and AV Amp also goes
on standby.
HDMI Control Function
 Loading...