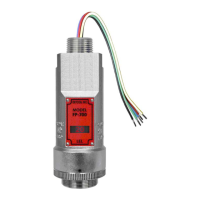
Model FP-700
FP-700 Instruction Manual Rev. 5.1 Page 25 of 46
Set Cal Factor is used to make the appropriate signal sensitivity adjustment when the cal gas is a gas other than
methane. This is necessary because the catalytic bead sensor has different signal strengths for each combustible
gas and all reading calculations are made based on a reference to methane. The cal factor value is adjustable
from 0.2 to 5.0. It represents the translation between the cal gas and methane gas, where methane has a
normalized cal factor = 1.0. For example, the cal factor for butane is 1.71 because the signal strength of butane
is 1.71 times lower than methane. The current setting can be viewed in View Program Status.
Table 2 shows the Cal Factors of most combustible gases that will be used as span calibration sources. Find the
gas of interest and enter that value the Cal Factor. For example, if propane were used as the cal gas, the correct
cal factor would be 1.81.
The menu item appears as: “Set Cal Factor”.
From the Set Gas Factor text scroll, hold the magnet over PGM1 or PGM2 until the “◄” prompt appears and
continue to hold the magnet in place for an additional 3-4 seconds (until the display starts to scroll “Set Factor”).
The display will then switch to “ X.XX“ (where X.XX is the current cal factor). Swipe the magnet momentarily
over PGM2 to increase or PGM1 to decrease the gas factor level until the correct value is displayed. Hold the
magnet over PGM1 or PGM2 for 3-4 seconds to accept the new value. The display will scroll “Factor Saved”,
and revert to “Set Cal Factor” text scroll.
Move to another menu item by executing a momentary hold, or, return to Normal Operation via automatic
timeout of about 15 seconds (the display will scroll “Set Cal Factor” 4 times and then return to Normal
Operation).
3.5.6 Set Serial ID
Detcon Model FP-700 sensors can be polled serially via RS-485 Modbus™ RTU. Refer to Section 4.0 for details
on using the Modbus™ output feature.
Set Serial ID is used to set the Modbus™ serial ID address. It is adjustable from 01 to 256 in hexadecimal
format (01-FF hex). The current serial ID can be viewed in View Sensor Status using the instruction given in
Section 3.5.2 View Sensor Status.
The menu item appears as: “Set Serial ID”.
From the “Set Serial ID” text scroll, hold the programming magnet over PGM1 or PGM2 until the “◄” prompt
appears and continue to hold the magnet in place for an additional 3-4 seconds (until the display starts to scroll
“Set ID”). The display will then switch to “XX“ (where XX is the current ID address). Swipe the magnet
momentarily over PGM2 to increase or PGM1 to decrease the hexadecimal number until the desired ID is
displayed. Hold the magnet over PGM1 or PGM2 for 3-4 seconds to accept the new value. The display will
scroll “ID Saved”, and revert to “Set Serial ID” text scroll.
Move to another menu item by executing a momentary hold, or, return to Normal Operation via automatic
timeout of about 15 seconds (the display will scroll “Set Serial ID” 5 times and then return to Normal Operation).
3.5.7 Set Bridge Voltage
Each Detcon plug-in combustible gas sensor requires a one-time setting for optimal bridge voltage. This is set
automatically during the “Set Bridge Voltage” sequence. The “Set Bridge Voltage” sequence determines the
required bridge voltage such that every plug-in sensor operates at exactly 200mA current. This technique
provides for tremendous uniformity in sensor-to-sensor operational performance, and it is notably better than
sensors that are operated on a common fixed bridge voltage platform. The range of bridge voltages required for
Detcon sensors is generally between 2.5 – 2.9VDC.