Model FP-700
FP-700 Instruction Manual Rev. 5.1 Page 33 of 46
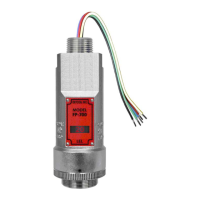
5.4 Replacement of Plug-in Combustible Gas Sensor
.
Caution: Hazardous areas must be declassified before opening the junction box or
removing and replacing the plug in sensor
a) Open the junction box and remove power to FP-700 sensor by lifting the + 24VDC wire in J-Box
b) Use a M1.5 Allen wrench to release the locking setscrew that locks the ITM and bottom housing together
(One turn will suffice – Do not remove setscrew completely).
04) Remove splashguard. Unthread and remove the Bottom Housing from the ITM.
04) Gently pull the plug-in combustible gas sensor out of the ITM. Orient the new plug-in sensor so that it
matches with the female connector pins. It may be necessary to look from below to assure alignment is
correct. When properly aligned, press the sensor in firmly to make the proper connection.
04) Thread the Bottom Housing onto the ITM to a snug fit and tighten the locking setscrew using the M1.5
Allen wrench. Reinstall the splashguard.
04) With the new plug-in sensor physically installed, two menu functions are required to be performed. 1)
The Set Bridge Voltage function must be performed to match the new sensor with the ITM (Section
3.5.6). 2) Perform a successful AutoZero and AutoSpan to match the new sensor with the ITM (Section
3.4).
5.5 Replacement of ITM
Caution: Hazardous areas must be declassified before opening the junction box or
removing and replacing the ITM
04) Open the junction box and remove power to FP-700 sensor by lifting the + 24VDC wire in J-Box
04) Use a wrench and loosen the locking nut at the top of the ITM and unthread the ITM from the junction
box.
04) Use a M1.5 Allen wrench to release the locking setscrew that locks the ITM and bottom housing together
(One turn will suffice – Do not remove setscrew completely).
04) Remove splashguard. Unthread and remove the Bottom Housing from the ITM.
04) Gently pull the plug-in combustible gas sensor out of the ITM and set it aside along with the bottom
housing and splashguard. Orient the plug in sensor so that it matches with the female connector pins on
the new ITM and press the sensor in firmly to make proper connection.
04) Thread the bottom housing onto the ITM until snug, tighten the locking setscrew and reconnect
splashguard.
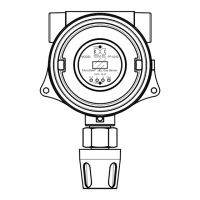
g) Feed the sensor assembly wires through the ¾” female NPT mounting hole and thread the assembly into the
J-box until tight and the ITM lens faces toward the front access point. Connect the sensor assembly wires inside
J-Box (Refer to Section 2.6, and Figure 14).