dS2824
dS2824 User Manual v4.12
The UID buttons will have the UID’s found, listed in ascending order (not the physical position
on the bus). If you need to identify which module assigned to that UID, click the button and all
LEDs on the module will flash. Only one module will be in identify mode at any time. If you
click another button, then that modules LEDs will flash and the first module will stop. Click the
button again, or click an empty (0) button to stop the flashing and clear identify mode.
Note that normal operation of the dSx modules is inhibited in identify mode.
Mapping the dSx modules.
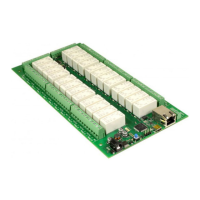
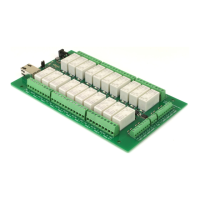
Each dSx module has 2 outputs and 4 inputs. The 2 relays may be mapped onto any of the 32
relays (real or virtual). Mapping a module to position 25 means that relays 1 and 2 on the dSx
module will be controlled by virtual relays 25 and 26 on the dS2824. The mapping can be
changed by selecting a new mapping with the drop-down box.
dSx Mapping Table
Mapping
Relay 1 Relay 2 Input 2 Input 2 Input 3 Input 4
1 1 2 100* 101* 102 103
3 3 4 104 105 106 107
5 5 6 108 109 110 111
7 7 8 112 113 114 115
9 9 10 116 117 118 119
11 11 12 120 121 122 123
13 13 14 124 125 126 127
15 15 16 128 129 130 131
17 17 18 132 133 134 135
19 19 20 136 137 138 139
21 21 22 140 141 142 143
23 23 24 144 145 146 147
25 25 26 148 149 150 151
27 27 28 152 153 154 155
29 29 30 156 157 158 159
31 31 32 160 161 162 163
* Note that inputs 100 and 101 are not available, either as analogue or digital inputs. If you
need to use all inputs on the dSx module, map it something other than 1.
This is because A100 and A101 are historically used for the on-board temperature and DC volt-
age inputs.
Clicking the “dSx42 Overview” link will take to to a test page where you can view the selected
Copyright © 2016-2021, Devantech Ltd.
All rights reserved.
www.robot-electronics.co.uk
24