2322
To change exposure settings press each of the buttons to toggle through the choices:
1) the Patient Size (adult or child)
2) the Image Receptor (film, phosphor plate, or sensor)
3) the Tooth Group (anterior, posterior, or bitewing)
Examples from factory default settings:
Child, Sensor, and Anterior = 0.09sec
Adult, Film, and Posterior = 0.38sec
When necessary, use the Increase or Decrease buttons to adjust the time in 0.01 second
increments. Adjusted exposure settings may be saved, replacing factory settings (see
Section 4.9 Technique Factors Settings and Adjustments).
4.4 Ready the Device
Properly position patient and operator before readying the NOMAD Pro 2.
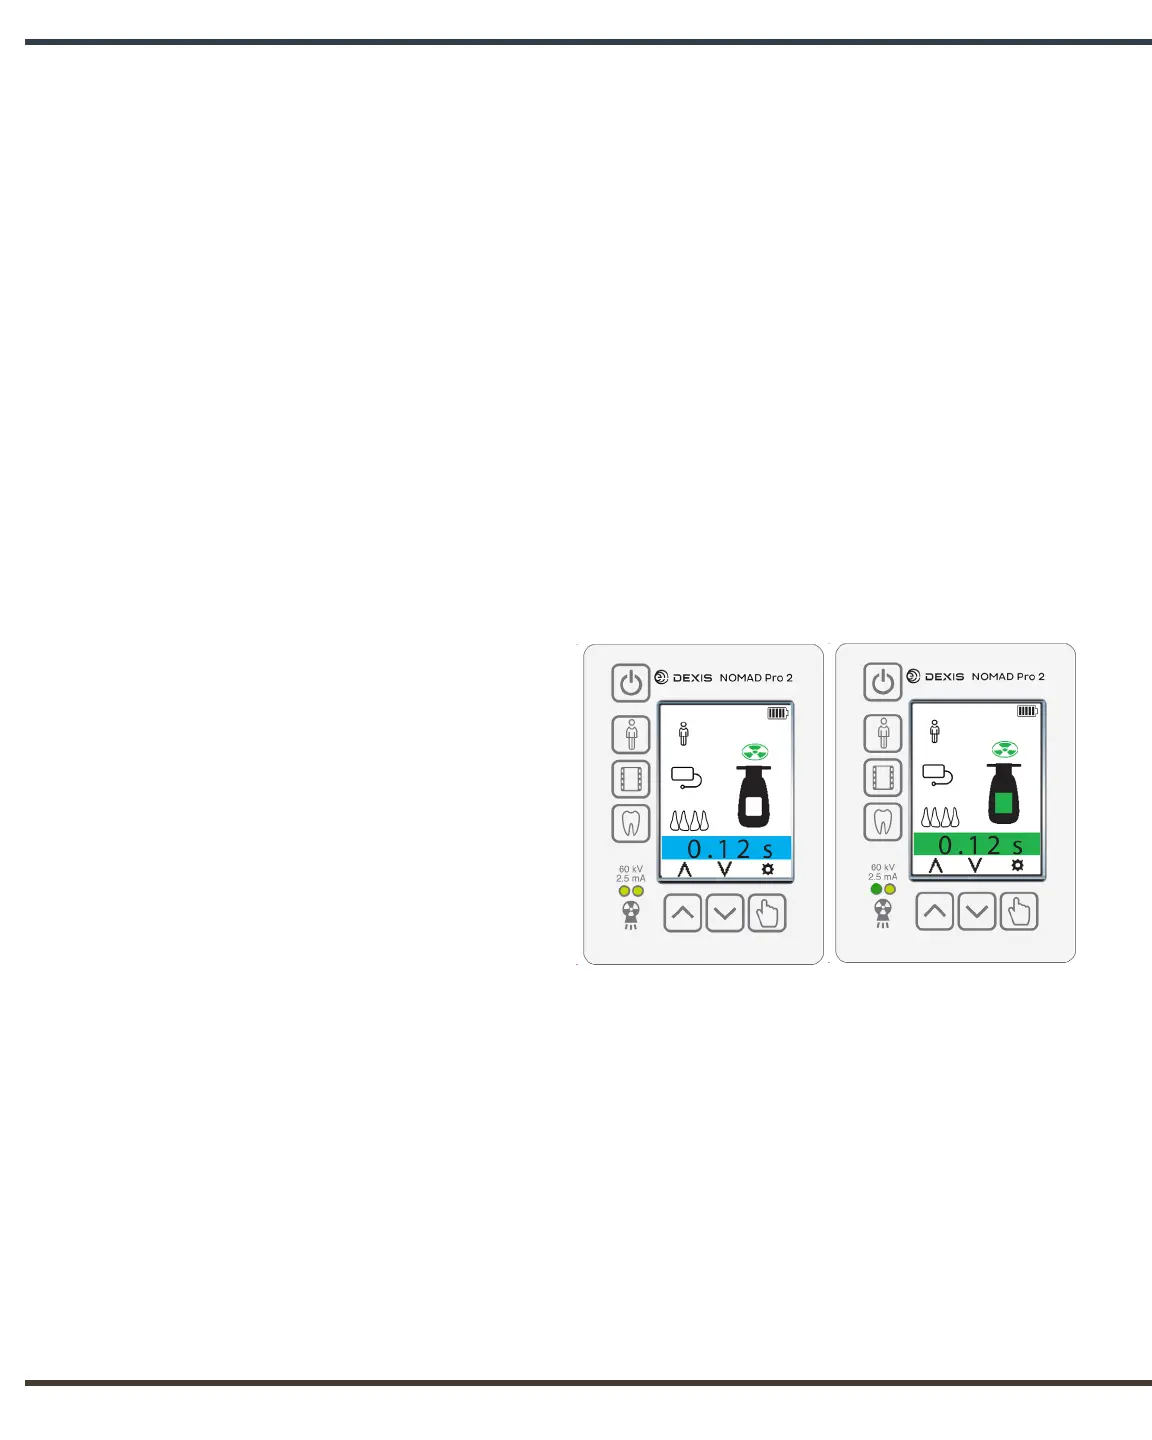
Press and release the trigger once
to ready the device. A green trefoil
will briefly appear on screen above
the X-ray tubehead, which is the
Enabling X-rays alert. Once the
device has shifted to the Ready
alert, the inside of the tubehead, the
time display, and the LED will also
turn green. These visual indications
and a double tone alert confirm that
NOMAD Pro 2 is prepared to fire
X-rays.
The Ready alert continues until either
an exposure is initiated or time-out
occurs after 15 seconds of inactivity (accompanied by a double tone and the return to
normal operations).
While the device is in the Ready state, any changes to the settings (pressing any user
interface panel button) will end the state.
NOTE: As a safety precaution, if the trigger is held longer than one second or pulled a
second time while still displaying the Enabling X-rays alert, the device will not transition
to the Ready alert. (This is to prevent an accidental activation of the device by unintended
triggering.)
Enabling X-rays Alert Ready State