2524
NOMAD
4.8 Ensuring Image Quality
The following NOMAD Pro 2 features contribute to high image quality:
• DC voltage X-ray generation is efficient in delivering energy at the level optimised for
diagnostics, with shorter exposure times required.
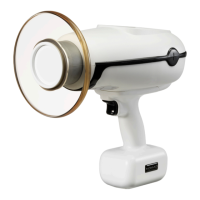
• The smaller the focal spot, the better the resolution. The NOMAD Pro 2 has a small
0.4mm focal spot.
• Absorption of scatter by the NOMAD Pro 2 backscatter shield reduces incidence of
noise for the image receptor, which tends to increase image contrast.
Motion during Exposures
As with the suspended tubehead of a conventional wall-mounted X-ray system, some
motion of the tubehead during actual exposures is possible. Use both hands to hold
the NOMAD Pro 2 during the exposure and keep steady. The pistol-grip style is ideal for
keeping hands behind the backscatter shield, positioning and aiming (with line of sight
through the clear shield) so as to achieve a quality image and avoid cone-cutting or
retakes.
Time Settings, Sensors, and Complete Exposures
To ensure image quality, use correct time settings. The NOMAD Pro 2 comes with pre-sets
to give you a starting point. However, these time settings can be adjusted to achieve the
desired image quality and then saved for future use. See Section 4.10 Settings Menu for
further help.
The NOMAD Pro 2 works with fast sensor technologies to assure that exposure times are
as short as possible, also limiting any effects of motion.
Make sure you are as close to the patient’s cheek as possible without touching. If your
sensor holder prevents you from getting close enough, you may want to use the Short
Alignment Bars, enabling the NOMAD Pro 2 to be placed directly against the positioning
ring.
Always double-check for the Incomplete Exposure alarm on the NOMAD Pro 2 display.
The Incomplete Exposure alarm indicates that the trigger was released prematurely,
resulting in an incomplete exposure. To achieve complete exposures, do the following:
quickly press and release the trigger to enable the X-ray and wait for the device to shift to
the Ready state; press and hold the trigger until the audible tones and the display indicate
the X-ray Complete alert.