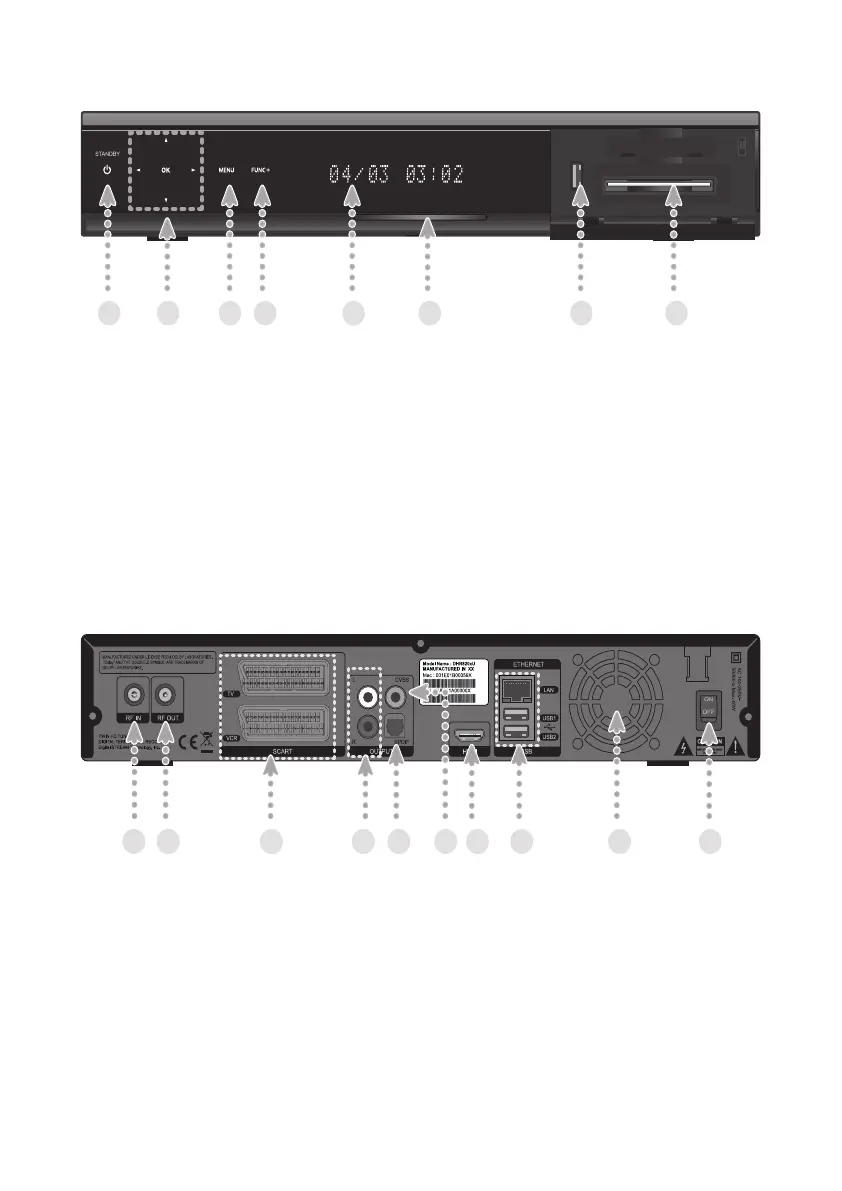
Front Panel Overview
Rear Panel Overview
1. Standby Button: Sets the product to On or Standby.
2. Menu up/down Buttons: Works as arrow buttons, moving up and down.
Menu left/right Buttons: Works as arrow buttons, moving left and right.
OK Button: Can be used to select or to conrm menu options.
3. Menu Button: Can be used to access the menu.
4. FUNC+ Button: Allows access to various Menu items or key features easily.
The FUNC+ button can replace all of the colour buttons on the remote control.
5. Front Display: Displays Service Name, Time, Date and etc.
6. Blue LED: Indicates power status of the product.
7. USB: Used to connect USB memory device such as memory stick or HDD.
8. CI Module Slot: Used to connect CI Module.
1. RF IN: Used to connect your aerial.
2. RF OUT: Used to connect RF (ANT) input jack to your TV or VCR.
3. TV SCART: Used to connect to your TV SCART input.
VCR SCART: Used to connect to your VCR or DVD input.
4. Audio L/R: Used to connect audio signal to your TV or VCR.
5. SPDIF: The connector outputs digital audio signal.
6. CVBS: Used to connect composite video signal to your TV or VCR.
7. HDMI: Used to connect HDMI to your TV.
8. ETHERNET: Used for Ethernet port connection(for future use).
USB: Used to connect USB memory device such as memory stick or HDD.
9. FAN: Ventilation hole for FAN.
10. Power Switch: Power switch for your product.
8