12 www.dimplex.com
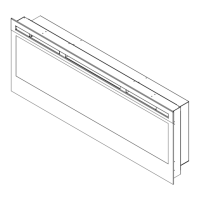
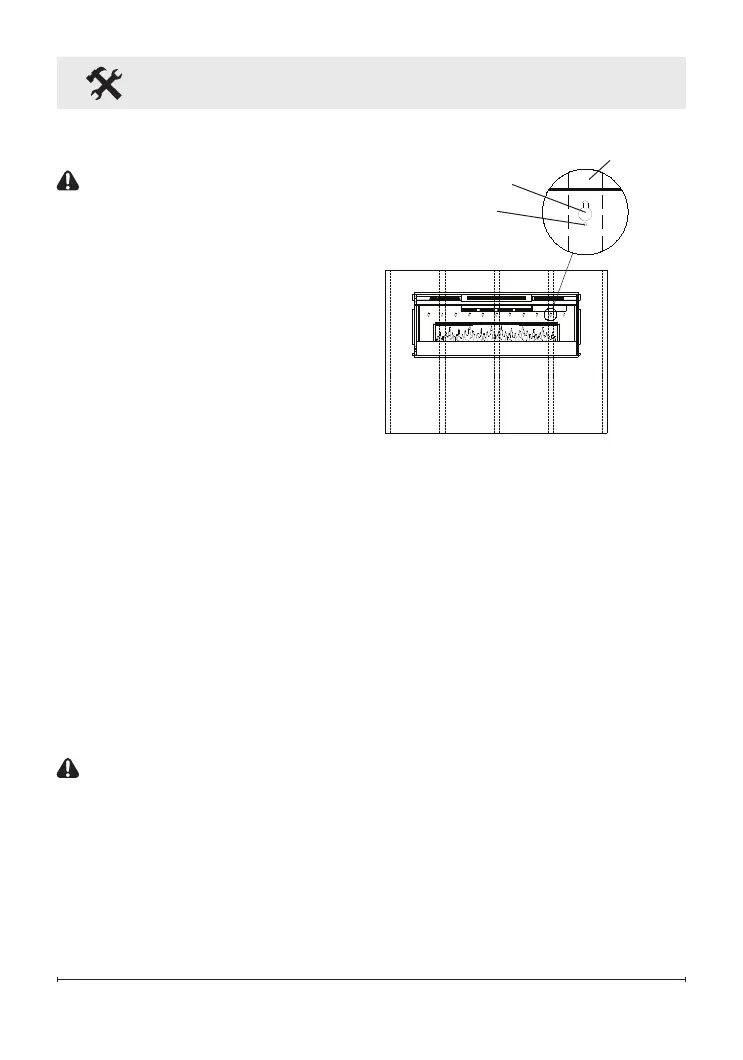
Figure 9
Key-hole
Wall stud
Permanent
mounting hole
Surface Installation
CAUTION: Two people may be
required for various steps of this
procedure.
1. Choose a location which has
a minimum of two wall studs
available for mounting.
2. Choose your method of supplying
power to the unit:
• Plug into an existing outlet or
install an outlet nearby.
• Hardwire the replace - follow the
hardwiring instructions on page 9.
3. Remove the partially reective
glass from the replace:
• Lay the replace on its back.
• Remove the two Phillips screws
from each of the two glass
brackets (Figure 3, page 9).
• Remove the glass brackets.
• With one hand keeping pressure
on the partially reective glass, tilt
the replace upright and slightly
forward to allow the partially
reective glass to fall out of the
inside framing.
CAUTION: Do not bump or drop
the partially reective glass to
avoid breakage and personal
injury.
• Remove the partially reective
glass from the replace.
4. Position the replace on a wall
at the position where it will be
mounted (Figure 9). Use a bubble
Fireplace Installation
level (one is supplied) to ensure
that replace is level on the wall.
5. Ensuring that at least two
keyholes line up with a wall stud
(keyholes are spaced at 4 in. (10.2
cm) centers), mark the location
of the four screw locations on the
wall (through the keyholes).
6. Remove the fireplace from the wall
and store it in a safe place away
from traffic.
7. Where marked screw locations do
not line up with a wall stud, insert
(screw in) one of the two supplied
wall anchors (pre-drill if required).
Repeat if only two screws line up
with a wall stud.
8. Screw all four supplied #8, 1½ in.
(3.8 cm) square head mounting
screws and washers into the wall
and/or wall anchors leaving ¼ in.
(6.5 mm) of thread.
9. Align the chosen keyholes with