15
Fireplace Installation
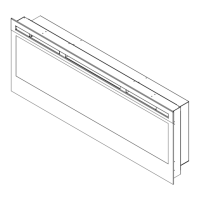
3. Lift the replace and insert into the
opening. The replace's mounting
trim should be ush against the
wall (Figure 13).
4. Use the supplied bubble level
to level the replace within the
framing. Adjust as required.
5. Drive four supplied mounting
screws through the four mounting
holes located on the inside surface
of the replace chassis, into wall
studs (Figure 13).
6. Refer to Front Glass Installation
section for nal installation
procedures.
Figure 13
Mounting hole
Mounting hole
Wall
surface
Installation in a Dimplex
Media Console
1. Insert the replace into the
opening of the media console from
the front.
2. Drive four supplied mounting
screws through the four mounting
holes located on the inside surface
of the replace chassis, into the
walls of the media console.
3. Refer to Front Glass Installation
section for nal installation
procedures.