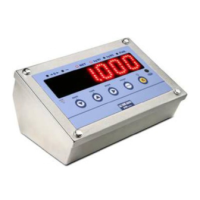
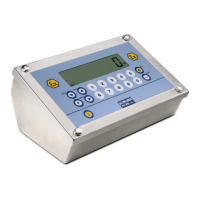
DFW series indicators DFW_03_12.07_EN_U
34
- Scroll until one finds the “ir.ConF” parameter and select it.
- With the ZERO or TARE keys select the possible options: “none” (disabled remote control), “rd 1” and “rd.br 1” (all the
remote control keys function as the TARE key) or “rd 6” and “rd.br6”(the remote control keys functions as ZERO, TARE,
MODE, ENTER/PRINT, C/DEL and Fn).
All other options refer to other types of remote controls
- Confirm with ENTER/PRINT.
- Press the C key various times until the message “SAVE?” appears on the display.
- Press ENTER/PRINT to confirm the changes made or another key to not save.
The remote control keys repeat the keys’ functions (both the ones obtained with a SHORT pressing as well as those with a
LONG pressing) and they correspond to the following indicator keys:
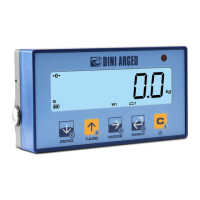
KEY ”none”MODE FUNCTION
MODE FUNCTION
MODE FUNCTION
Radio remote control configuration:
- "rd x": In this configurations it's necessary to link the remote contol to the instrument.
- "rd.br x": All supplied radio remote controls function with the instrument.
In the "rd 1" and "rd 6" configurations it's possible to combine 3 remote controls.
It's possible to link a new remote control with TARE key and ZERO key pressed at length (3 seconds).
When the instrument displays "aut.rd?" by pressing ENTER key of the keyboard the new remote control is linked.
With C key of the keyboard, if the serial number exists, the remote control is removed.
In the “multifunction” configuration, by pressing at length the C key, it’s possible to put the instrument in stand-by; by
pressing C on the keyboard or any key on the remote control one returns to the weighing mode.
9.9 DATE/TIME ADJUSTMENT (OPTIONAL OR INCLUDED DEPENDING ON THE MODEL)
The indicator can be fitted with the date/time board (optional or included, depending on the model); in this case, the
“CLoCk” message is shown when instrument is turned on.
To set the date/time follow the procedure below:
- Turn on the scale, press the TARE key while the firmware version is displayed (the display shows the “tyPE” menu).
- Press ZERO many times (to scroll ahead through the parameters) or TARE (to scroll backwards) until one finds the
“F.ModE” parameter.
- Press ENTER/PRINT to enter the menu.
- Scroll (through ZERO or TARE keys) to find the “CLoCk” parameter.
- Confirm with ENTER/PRINT: in this order one will be asked to enter the day, month, year, hour, and minutes. The entry
of each parameter must be confirmed with ENTER/PRINT.
- Press the C key many times until the message “SAVE?” appears on the display.
- Press ENTER/PRINT to confirm the changes made or another key to not save.
NOTES
- With the 17-key indicator, it is possible to programme the date and time during the weighing, pressing in sequence the
F and 8 keys.
-
If the supplied cable is disconnected or the battery has been replaced, the indicators supplied with a date/time board
can keep the date/time for 5 minutes
- The “CLoCk” parameter is displayed if there is the date/time option.