E
Eric TranSep 7, 2025
Why is smart key not detected by Directed Automobile Accessories?
- PprussellSep 7, 2025
The smart key was not detected, which prevents the system from shutting down the vehicle.
Why is smart key not detected by Directed Automobile Accessories?
The smart key was not detected, which prevents the system from shutting down the vehicle.
Why Directed DIRECTECHS DS3+ Bypass and CAN were skipped?
The programming button was pressed 5x times to skip bypass and 5x times to skip the CAN on Directed Automobile Accessories.
Why Directed DIRECTECHS DS3+ OBDII feature not supported?
The diagnostic data bus was not detected by Directed Automobile Accessories, therefore the SmartStart features will be limited.
Why Directed DIRECTECHS DS3+ Runsafe was not disabled?
If the Directed Automobile Accessories system was not disabled, no UNLOCK command was received prior to opening the door, or the 45 second timer expired in takeover mode.
What to do if Directed DIRECTECHS DS3+ shows bypass processing error?
If the Directed Automobile Accessories module experiences a bypass processing error, reset the module and try again. If the condition persists, further assistance is needed.
What to do if Directed DIRECTECHS DS3+ shows J1850 not detected?
If the Directed Automobile Accessories module experiences a J1850 detection failure, check the J1850 wire connection and wake up the data bus by turning the ignition on and try again.
What to do if Directed Automobile Accessories shows CAN2 not detected?
If the Directed Automobile Accessories module experiences a CAN2 detection failure, check the CAN2 Orange/Green and Orange/Brown wire connections. Wake up the data bus by turning the ignition on and try again. If your installation doesn't need this connection, skip this step by pressing the programming button 5 times.
What to do if Directed DIRECTECHS DS3+ shows CAN1 not detected?
If the Directed Automobile Accessories module experiences a CAN1 detection failure, check the CAN1 Tan and Tan/Black wire connections. Wake up the data bus by turning the ignition on and try again. If your installation doesn't need this connection, skip this step by pressing the programming button 5 times.
What to do if Directed DIRECTECHS DS3+ module has no power?
First, ensure the D2D harness is connected and that there's 12V present between the red and black wires. If 12V is present, the module might be defective.
How to troubleshoot a Directed DIRECTECHS DS3+ Automobile Accessories module with no power?
If the Directed Automobile Accessories module has no power, ensure the D2D harness is connected and that there's 12 Volts between the red and black wires. If the voltage is present, the module might be defective.
Explains web, desktop, and mobile app configuration options for the DS3/DS4+ modules.
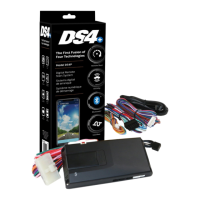
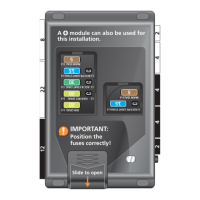
Discusses firmware updates, installation notes, and critical warnings for the installation.
Table mapping vehicle models to keyless access control unit locations.
Details for connecting the optional starter disable feature.
Wiring details for the 8-pin data harness (H1).
Wiring details for the 22-pin analog input/output harness (H2).
Wiring details for the 12-pin main harness (H3).
Wiring details for the 10-pin relay harness (H4) and 2-pin RF port harness (H5).
Wiring details for the 4-pin D2D harness (H6) and 2-pin sensor harness (H7).
Instructions for entering and completing the remote pairing process.
Details on temperature sensors, combo sensors, and RF systems.
Information on using the system with Directed SmartStart.
Configuring manual transmission ready mode initialization and completion sequences.
Using programmable outputs for clutch bypass or starter functions.
Additional connection requirements for manual transmission.
Interpreting LED indicators during module programming and error codes.
Understanding LED feedback for synchronization, status, commands, and shutdown codes.
Steps for tach learning with data or hardwired tach sources.
Instructions for initializing and using Virtual Tach for remote start.
Special settings for hybrid vehicles when using Virtual Tach.
Methods for sending commands like lock, unlock, and remote start.
Procedure for seamless vehicle takeover after remote start.
Explains vehicle takeover and pit stop/idle mode features.
Overview of features controllable via the SmartStart application.
| Type | Remote Start System |
|---|---|
| Channels | 3 |
| Remote Confirmation | Yes |
| Weight | 0.5 lbs |
| Relay Outputs | 3 |
| Compatibility | Compatible with most vehicles |
| Voltage Range | 12V |
| Operating Temperature | -40°F to 185°F |
| Outputs | 12-pin harness |