54
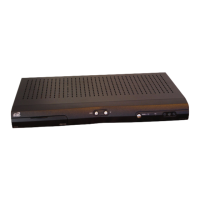
Wally User Guide
9
Customizing Your Wally
Changing Audio Settings
You can change the following audio settings for your Wally:
• Dolby Digital Passthrough – If your Wally outputs its audio to an audio device that supports Dolby
®
Digital
playback, you should enable this setting to ensure that Dolby Digital audio (which supports surround sound)
can be decoded by your audio receiver. Note that not all programs include Dolby Digital audio. This setting is
disabled by default.
• Volume Leveling – Volume leveling helps prevent annoying volume uctuations, such as loud commercials.
This setting is enabled by default.
1 Double-press on the remote to display the Menu screen.
2 Select Settings, then Audio Outputs.
3 On the Audio Output screen that displays, select the setting that you want to change.
Note: If you need more information about a setting, click the
icon to the right of it.
Changing the Alternate Audio Language
Some programs, such as movies, include an alternate audio track that you can listen to as you watch.
The availability of alternate audio is indicated at the beginning of the program. Some programs also include
descriptive video, which is a feature for the visually impaired that describes what’s happening on-screen during
a program. An alternate audio language applies only to the audio portion of programs that support it and doesn’t
change the language used in the menus displayed on your Wally.
Follow this procedure to change the alternate audio language:
1 Double-press on the remote to display the Menu screen.
2 Select Settings, then Secondary Audio.
3 On the Secondary Audio Settings screen that displays, select the language that you want for secondary audio.
Your change is automatically saved.
Getting Receiver Updates
Your Wally will power itself off (that is, enter standby mode automatically) after a set period of inactivity. Follow this
procedure to change the length of inactivity or disable this feature (not recommended).
Note: Changing this setting does not interfere with any scheduled event timers.
1 Double-press on the remote to display the Menu screen.
2 Select Settings, then Standby.
3 On the Inactivity Standby Settings screen that displays, select Inactivity Standby Timeout and choose a
desired option. Your change is automatically saved.