8860 Installation and Programming Guide | Digital Monitoring Products 1
GET STARTED
8860 7-Inch Touchscreen Keypads oer an easy to use touchscreen interface with an on-board camera, optional
panic keys, an internal speaker, a simple terminal connection to a 4-wire keypad bus, and other features. The 8860 has
enhanced Wi-Fi communications to Dealer Admin™ for video system integration and image capture when arming and
disarming at the keypad. Keypads can be mounted on a flat surface with appropriate fasteners.
What’s Included
▶ One 8860 7-Inch Touchscreen Keypad
▶ Hardware pack
What You’ll Need
▶ 7/64” (2.5mm) drill bit for drywall mounting
▶ 1/4” (6 mm) drill bit for masonry mounting
▶ #2 Phillips screwdriver
Procedure
This guide walks you through the required steps needed to install an 8860 keypad. They are:
1. Update the panel firmware.
2. Program the panel.
3. Install the keypad.
4. Connect the keypad to Wi-Fi.
5. Program the keypad.
6. Train your customer.
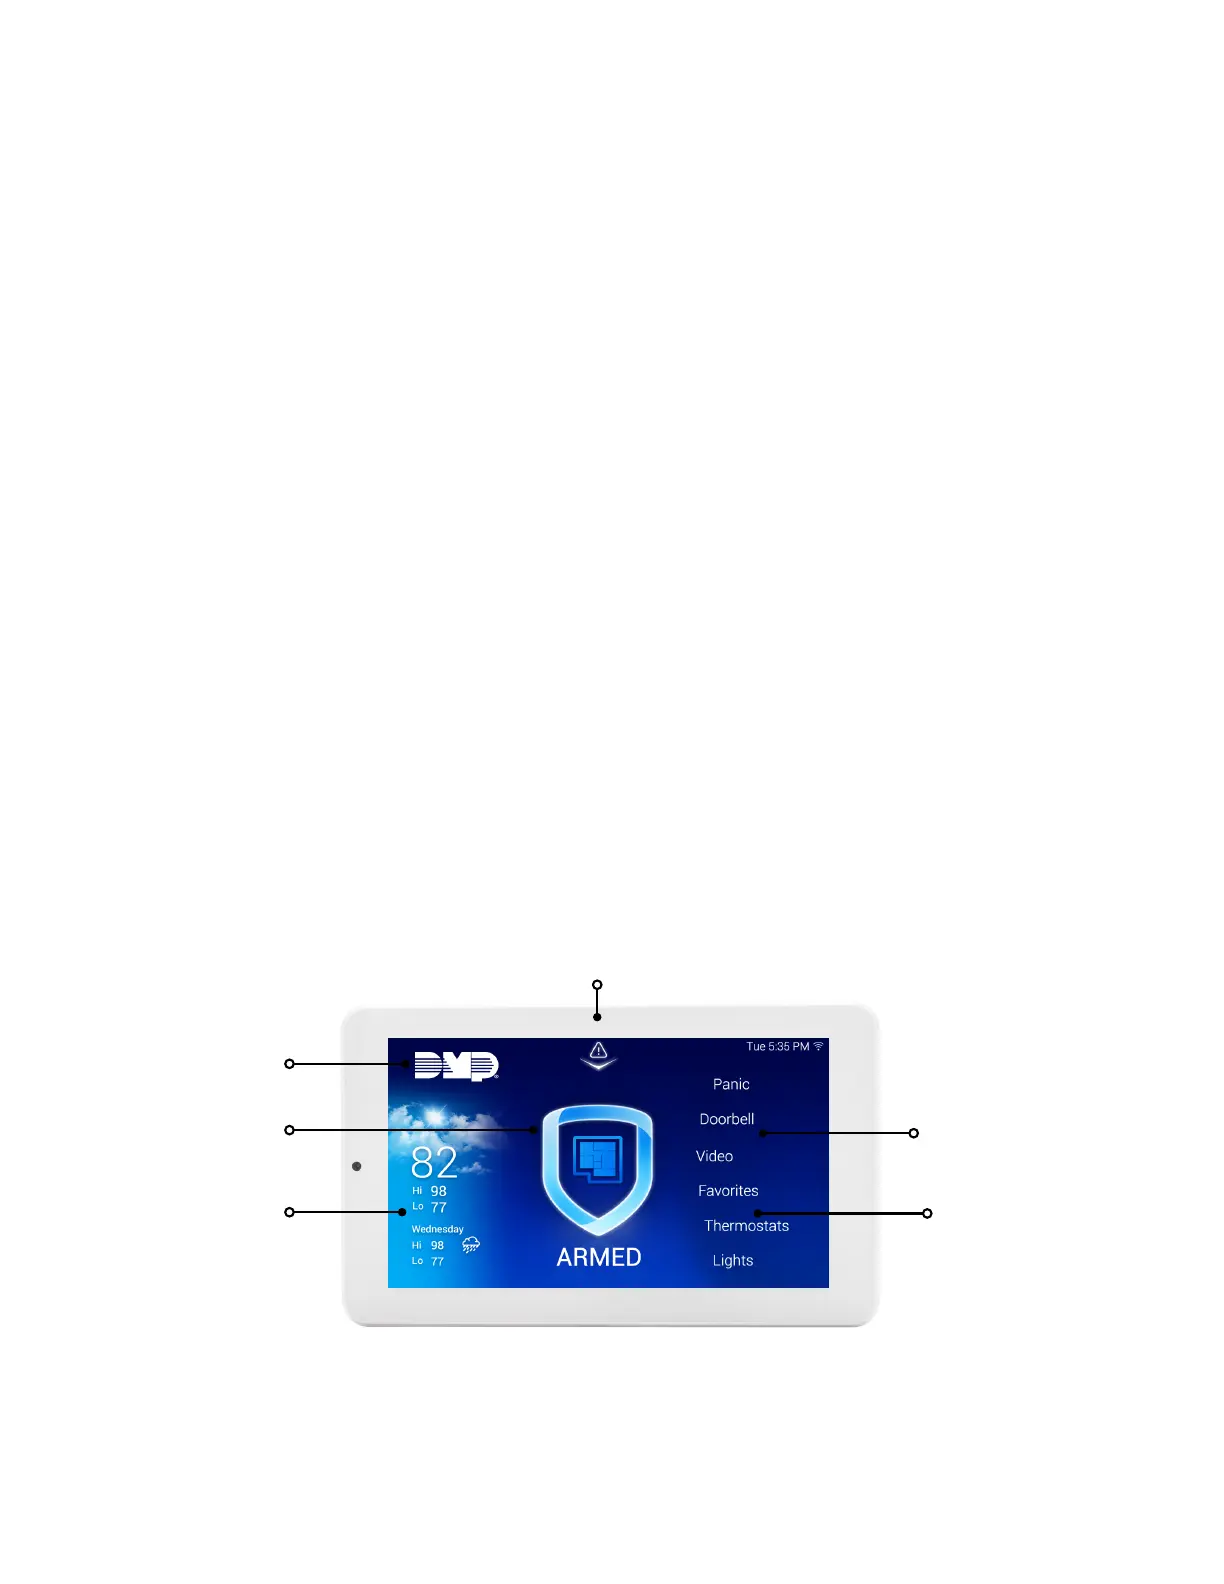
Keypad Layout
Figure 1: Keypad Layout
Dealer Logo
Carousel Menu
Local
Weather
Interactive
Arming/
Disarming Home
Shield
Drag the menu to
scroll
Drag down the attention list
to view events