8860 Installation and Programming Guide | Digital Monitoring Products 6
Mount the Keypad
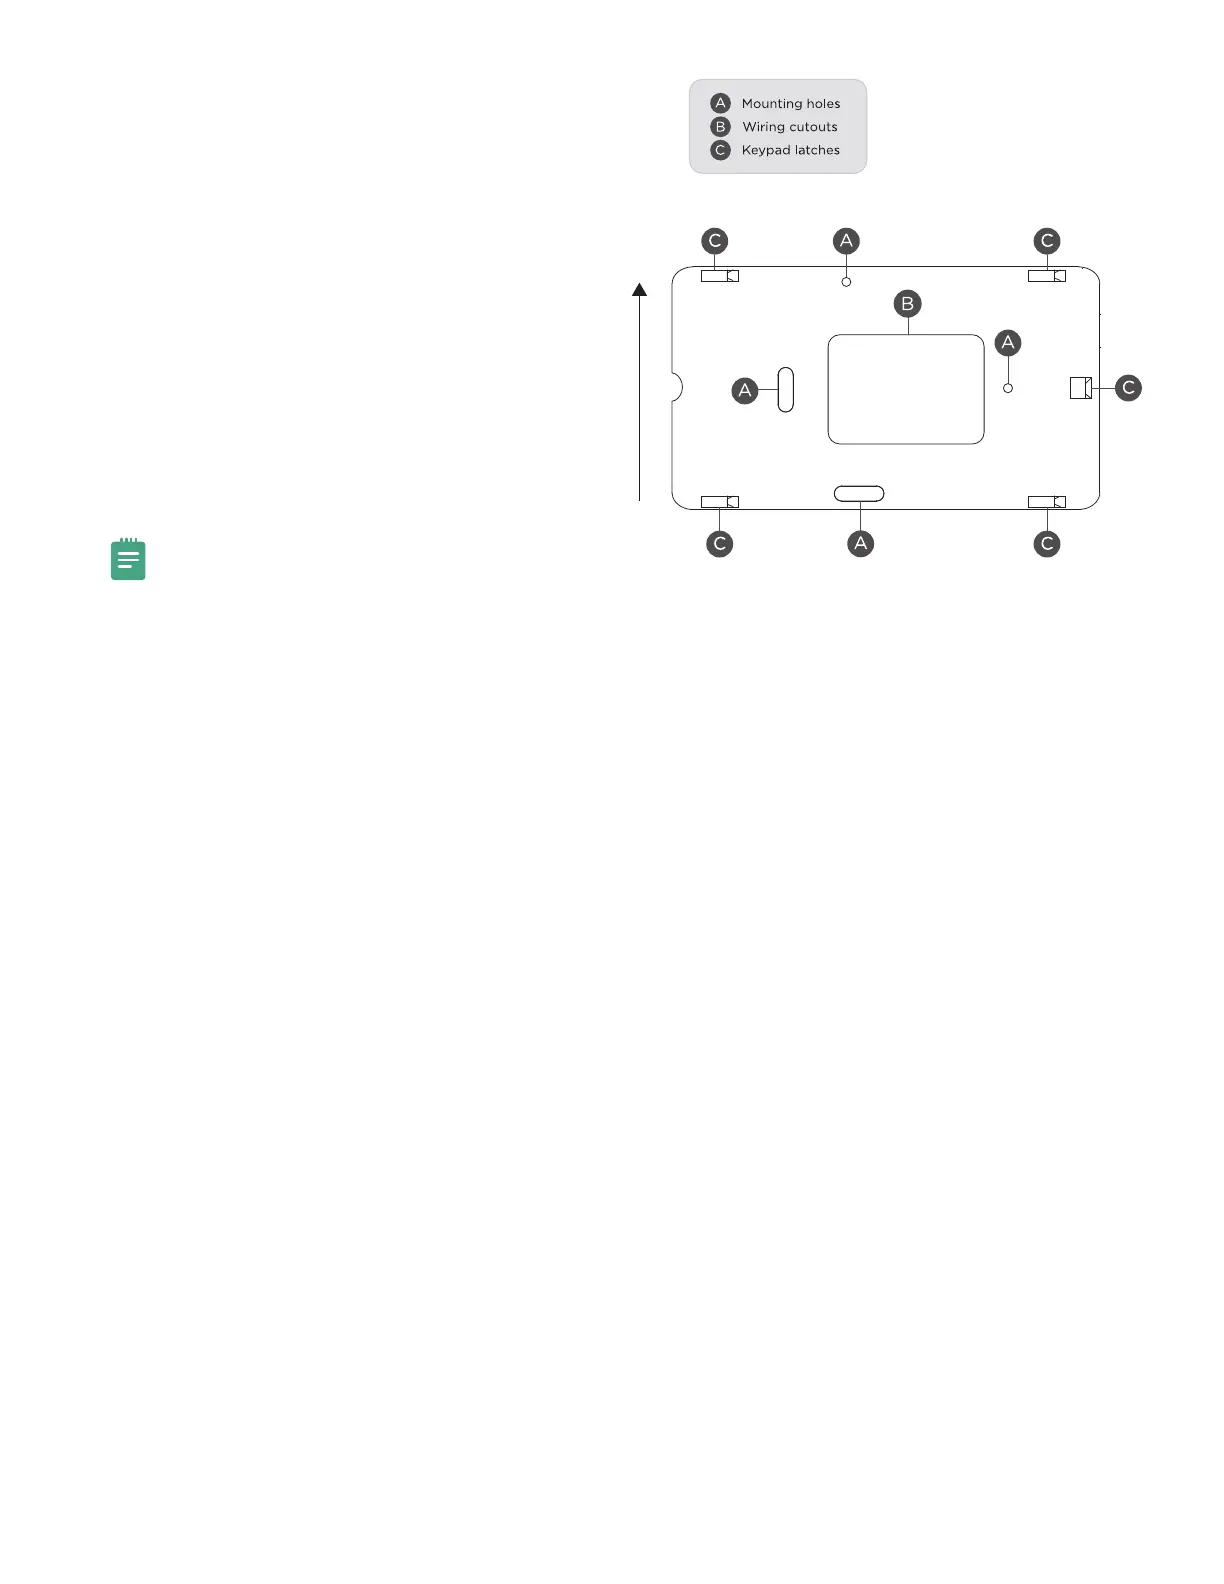
1. Route the keypad wires through the cutouts in
the base. See Figure 1.
2. Use the keypad base to mark the holes for the
screws on the mounting surface. The base should
be placed at standing height and the hooks on
the base should be facing up.
3. Set the base aside and drill the holes.
4. Use the included screws to secure the keypad
base to the surface. Do not overtighten.
5. Attach the wire harness to the keypad.
6. Slide the keypad onto the base and press the
keypad into place. The on-board camera should
be on the left.
Note: Once you have mounted the keypad, remove
the plastic film on the screen. Failure to do so will
aect the touch functionality of the keypad.
3
TOP
BOTTOM
Figure 3: Mounting Hole Locations