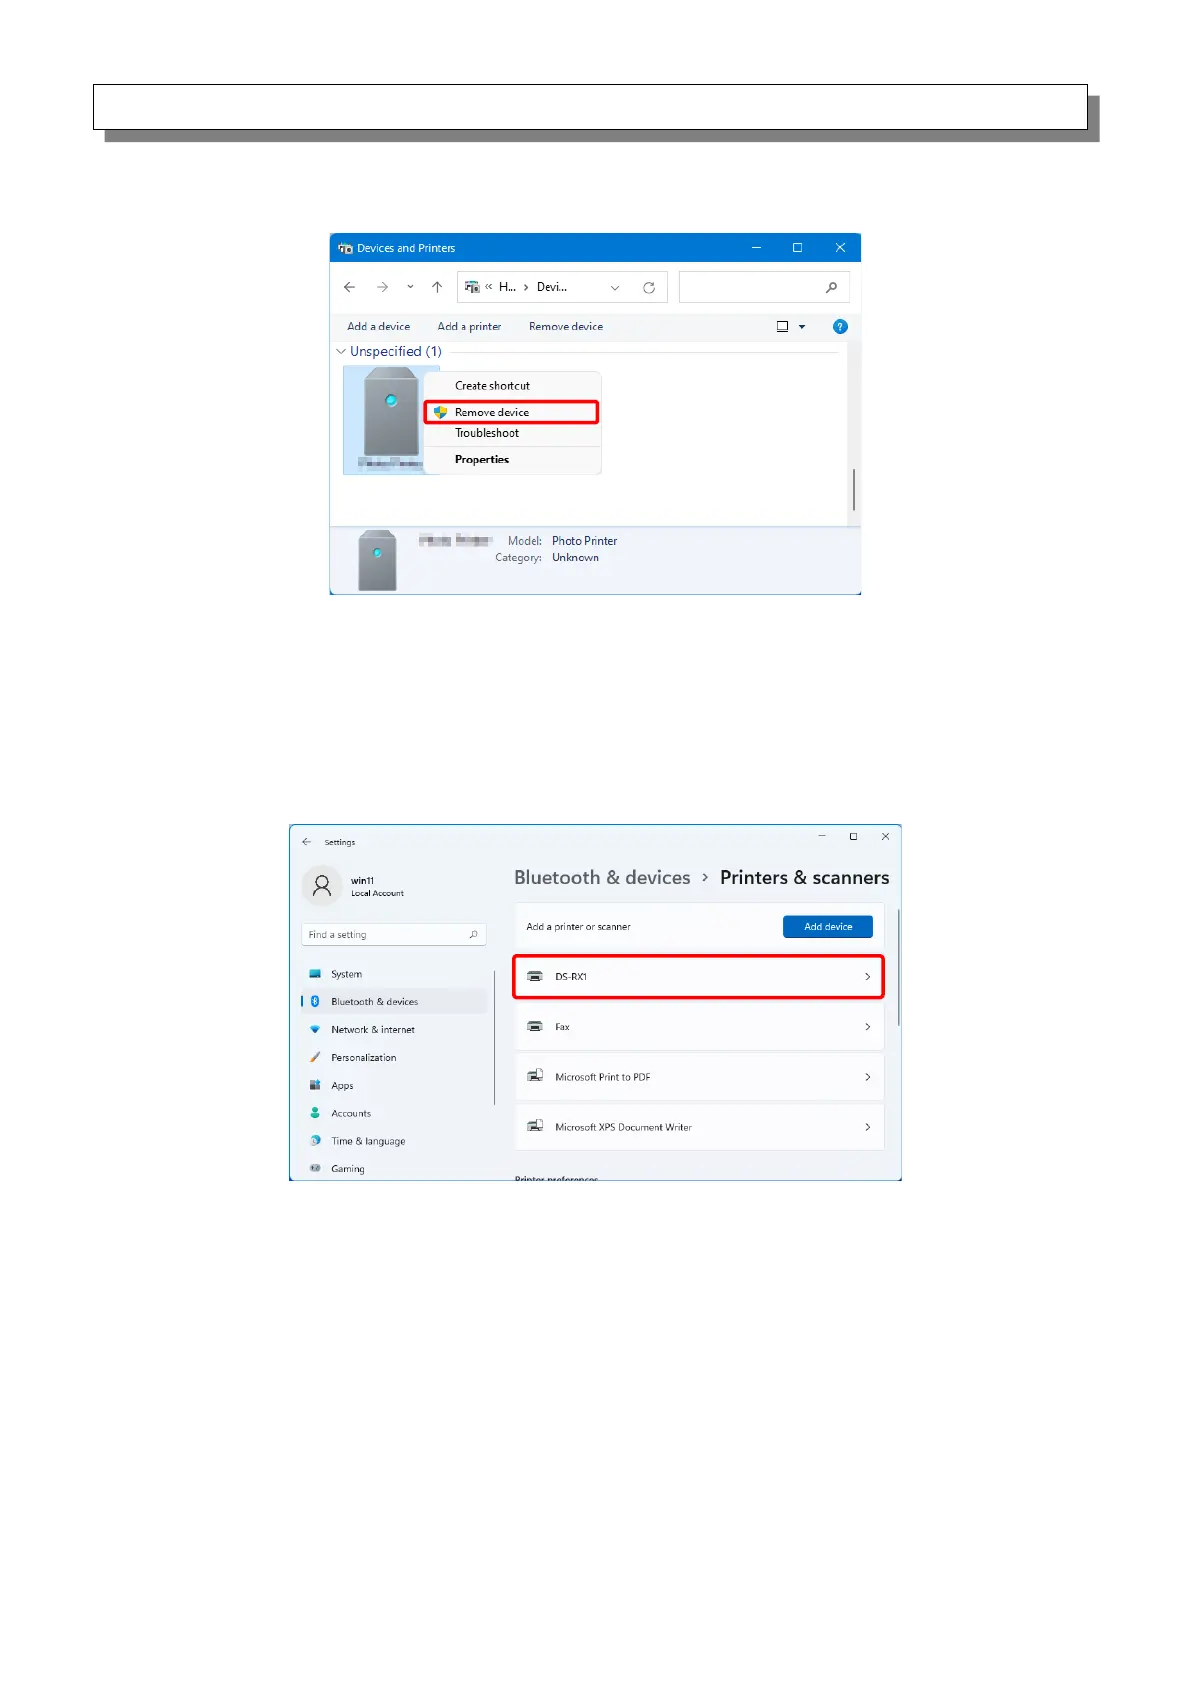
1. Right-click “Dai Nippon Printing DS-RX1” of the “Unspecified” device in “Devices and Printers”,
and click “Remove device” from the pull-down menu.
Figure 1.4.2 Delete “Photo Printer”
2. Disconnect the USB cable connected to the printer.
3. Restart your computer.
4. After starting up the computer, connect the USB cable again and turn on the printer.
In Printers & scanners, make sure that DS-RX1 is present.
This completes installation of the printer driver.
Figure 1.4.3 Printers & scanners
After the installation of the printer driver is complete, always restart the computer.