38
EN
Service Procedures Water Heater
I
Make sure that the electrode wire is pushed tightly
onto the ignitor on the control board and the cover
is placed back over the connection.
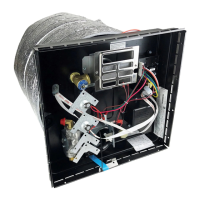
8.14 Replacing the Relay
I
Gas/Electric Combination (Standard and EXT)
Models Only
36 Replacing the Relay
1. Perform the steps in “Shutting Down the Water
Heater” on page 32.
2. Locate the relay access cover and remove.
I
If you do not see a relay access cover, the relay is at
the rear of the Water Heater.
3. Note the orientation of the wires on the relay.
4. Disconnect the wires from the relay.
5. Remove the two screws attaching the relay to the
bracket.
6. Remove the relay.
7. Reverse steps 1–6 to install the new relay.
8.15 Replacing the Electrode
I
Gas Only or Gas/Electric Combination (Standard
and EXT) Models Only
1. Perform the steps in “Shutting Down the Water
Heater” on page 32.
2. Remove the incoming gas supply line.
3. Disconnect the dual red wire attached to the E.C.O.
4. Disconnect the electrode wire from the ignitor
located on the control board.
5. Remove the three screws securing the burner
assembly/gas solenoid valve in place.
6. Remove the burner assembly/gas solenoid valve.
7. Remove the mounting screw for the electrode
bracket.
8. Remove the electrode.
9. Reverse steps 1–8 to install the new electrode.