44
EN
Service Procedures Water Heater
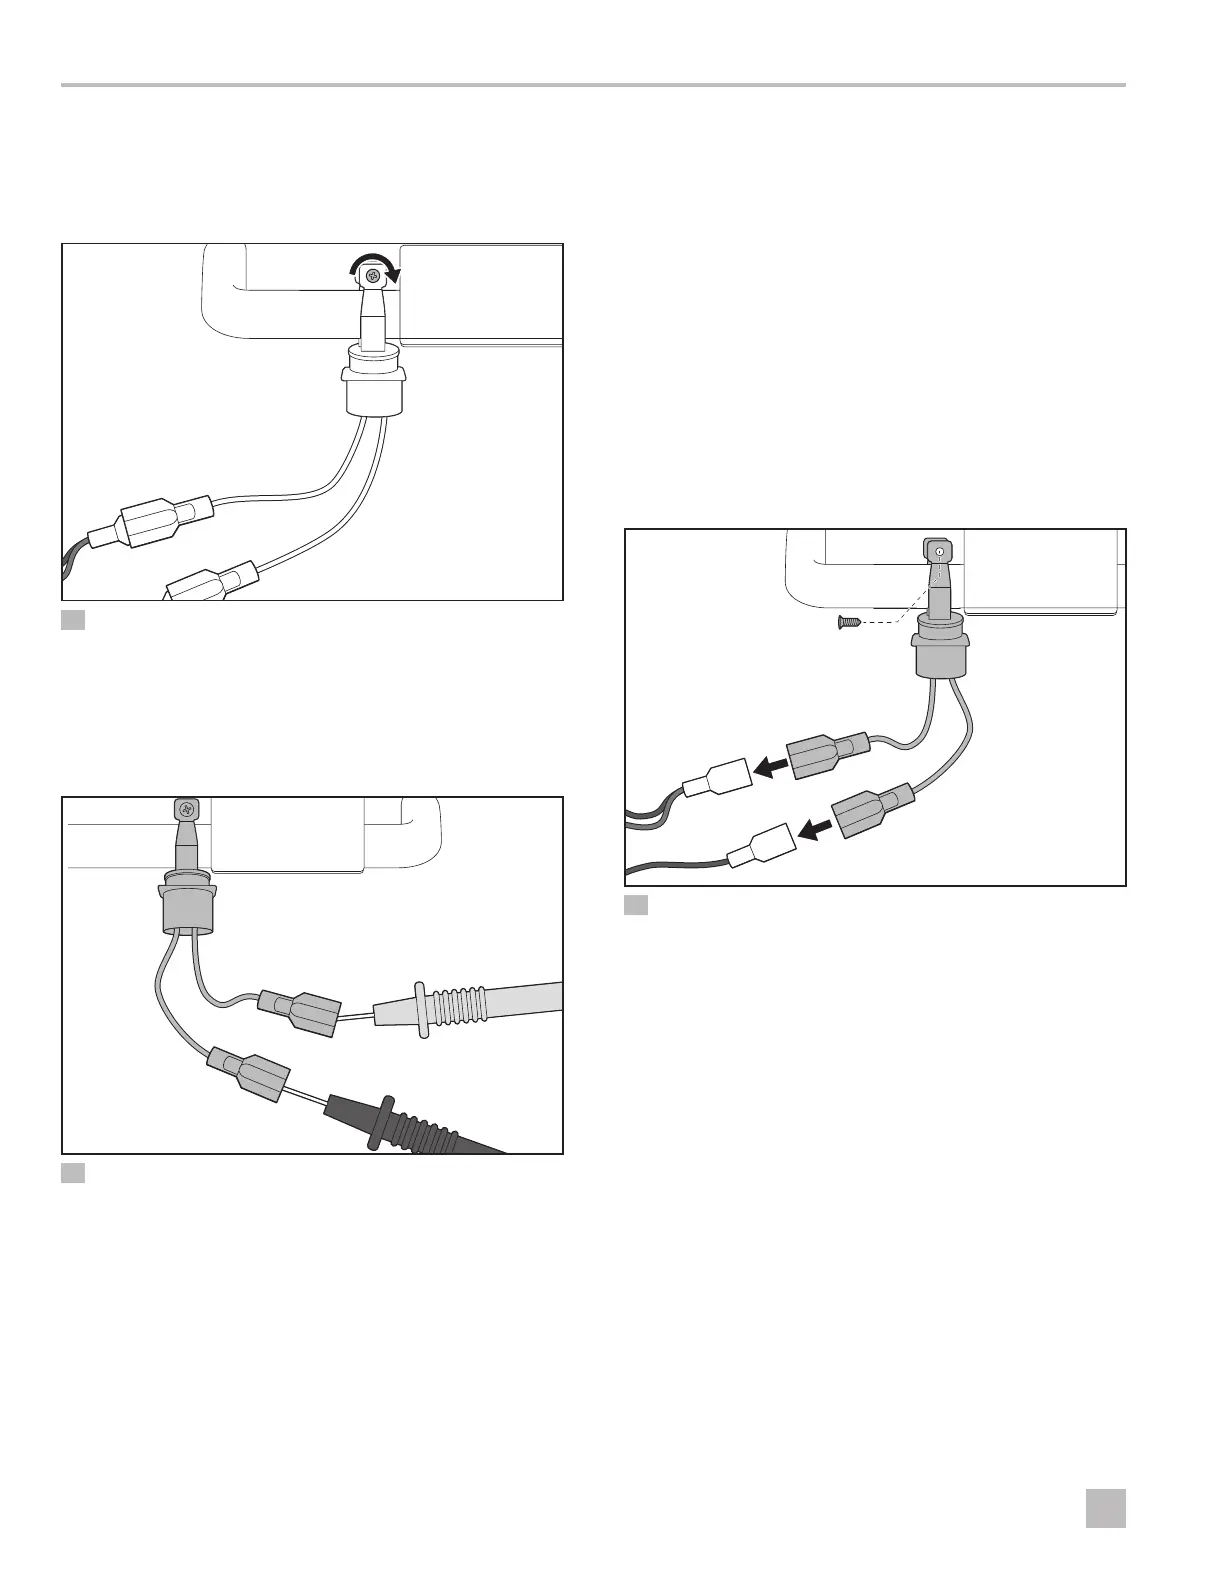
8.25 Tightening the Cold-Weather
Thermostat Set Screw
I
On Demand Models Only
49 Tightening the Cold-Weather Thermostat Set Screw
8.26 Performing a Cold-Weather
Thermostat Continuity Test
I
On Demand Models Only
50 Performing a Cold-Weather Thermostat Continuity Test
1. Place the control switch in the Off position.
2. Disconnect the two wires connected to the white
leads coming off of the cold-weather thermostat.
3. Set your multi-meter to the Ohms resistance setting.
4. Attach the leads of the multi-meter, one to each lead
of the cold-weather thermostat.
When the ambient temperature is below
approximately 40°F (4.5°C) you should have
continuity across the two leads of the cold-weather
thermostat.
I
Consult the operating manual for your multi-meter
for specific device function.
If the reading shows continuity/closed circuit, above
40°F (4.5°C), the cold-weather thermostat is faulty.
8.27 Replacing the Cold-Weather
Thermostat
I
On Demand Models Only
51 Replacing the Cold-Weather Thermostat
1. Place the control switch in the Off position.
2. Disconnect the two wires connected to the white
leads coming off of the cold-weather thermostat.
3. Remove the screw holding the clip onto the heat
exchanger.
4. Remove the cold-weather thermostat.
5. Reverse steps 1–4 to install the new cold-weather
thermostat.