39
EN
Water Heater Service Procedures
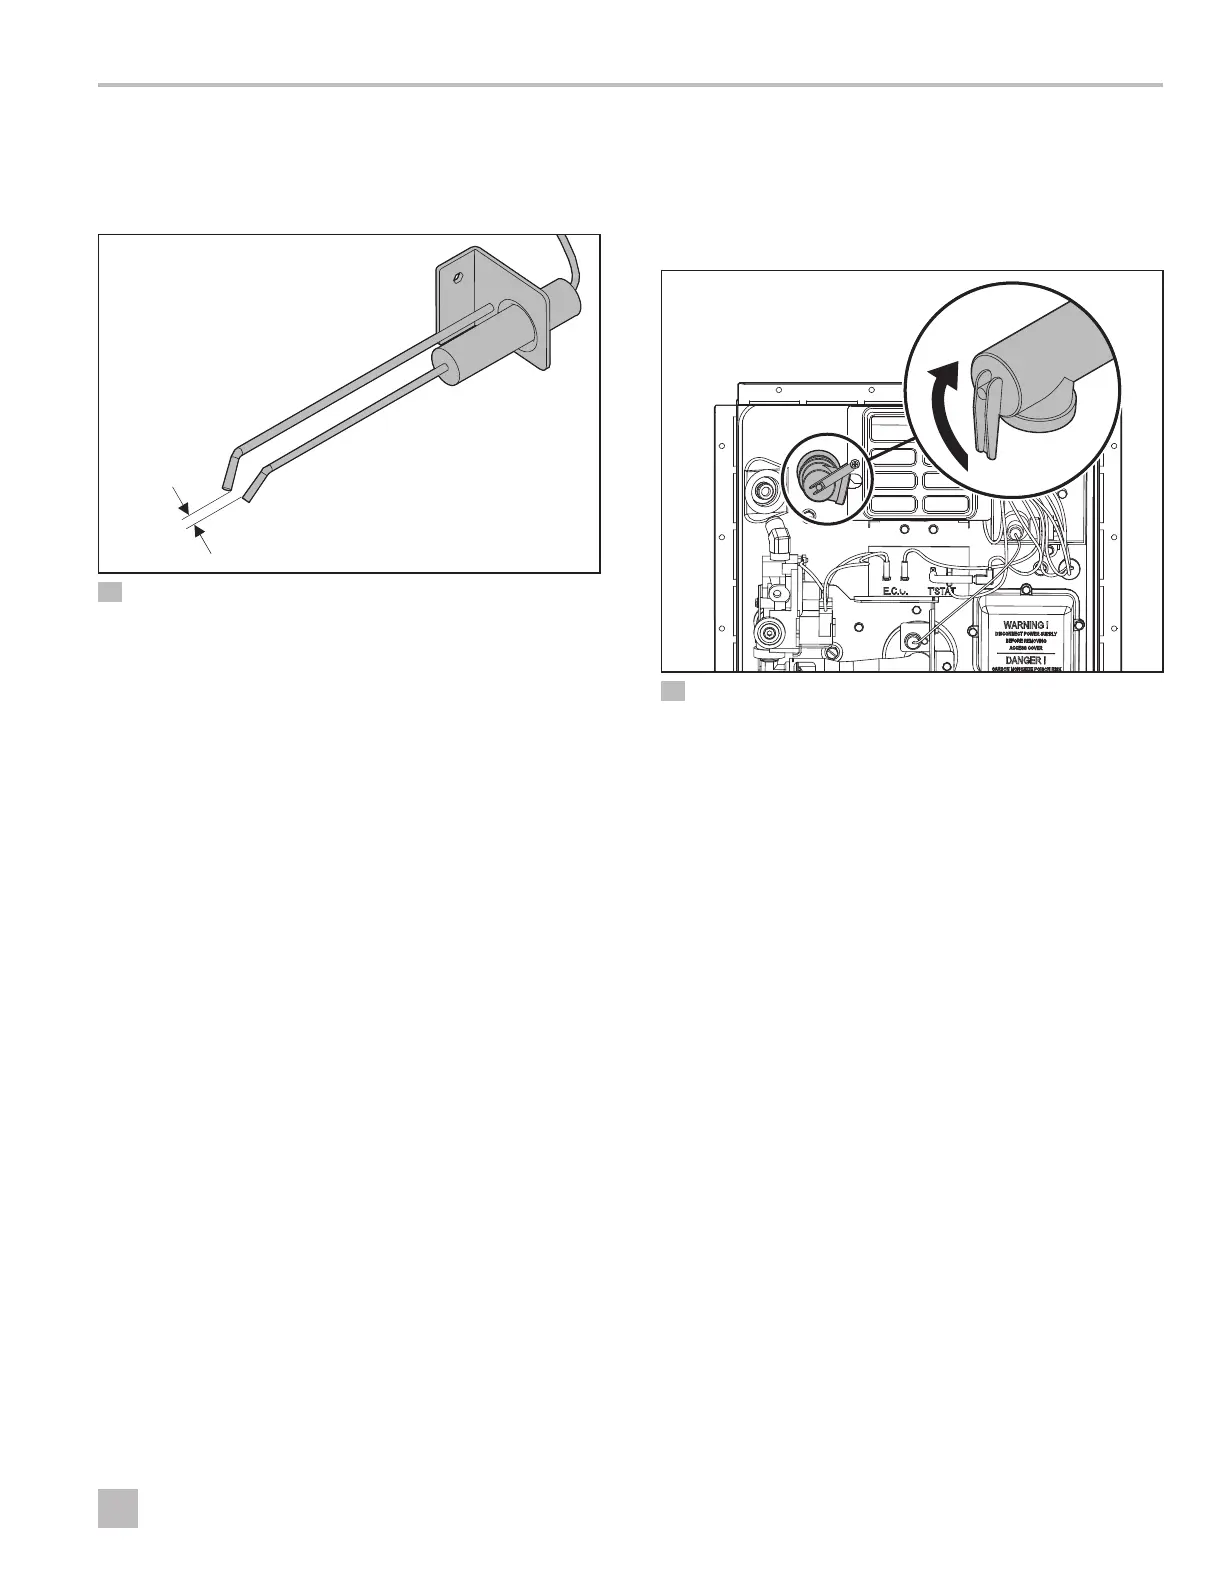
8.16 Adjusting the Electrode Gap
I
Gas Only or Gas/Electric Combination (Standard
and EXT) Models Only
q
w
37 Adjusting the Electrode Gap
q
Gap: 1/8 in.
(3 mm)
w
Ground Wire
1. Perform the steps in “Replacing the Electrode” on
page 38 to remove the electrode.
2. Confirm the electrode has a 1/8 in. (3 mm) gap from
the end of the electrode to the ground wire.
3. Adjust the gap, as necessary, by gently bending the
ground wire to meet the electrode.
I
Do not bend the wire with the white porcelain
insulator. The insulator may crack causing spark
failure.
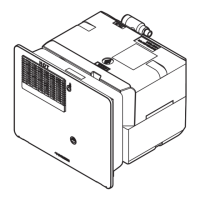
8.17 Re-establishing the Thermal
Expansion Air Pocket
I
Gas Only or Gas/Electric Combination (Standard
and EXT) Models Only
38 Re-establishing the Thermal Expansion Air Pocket
1. Perform the steps in “Shutting Down the Water
Heater” on page 32.
2. Let the water in the Water Heater cool or let the
water run until it is cool.
3. Turn off the main water supply (the pump or water
hook up source).
4. Open the hot-water faucet closest to the Water
Heater to release built-up pressure.
5. Pull the handle of the P/T relief valve straight out and
allow water to flow until it stops.
6. Push the P/T relief valve handle in allowing it to snap
shut.
7. Close the faucet.
8. Turn on the water supply.
9. Turn on the Water Heater and test.
I
At least once a year manually operate the P/T relief
valve to check functionality.
10. If the P/T relief valve exhibits excessive weeping,
repeat Steps 1–9.