- 33 -
4
5
3
1
2
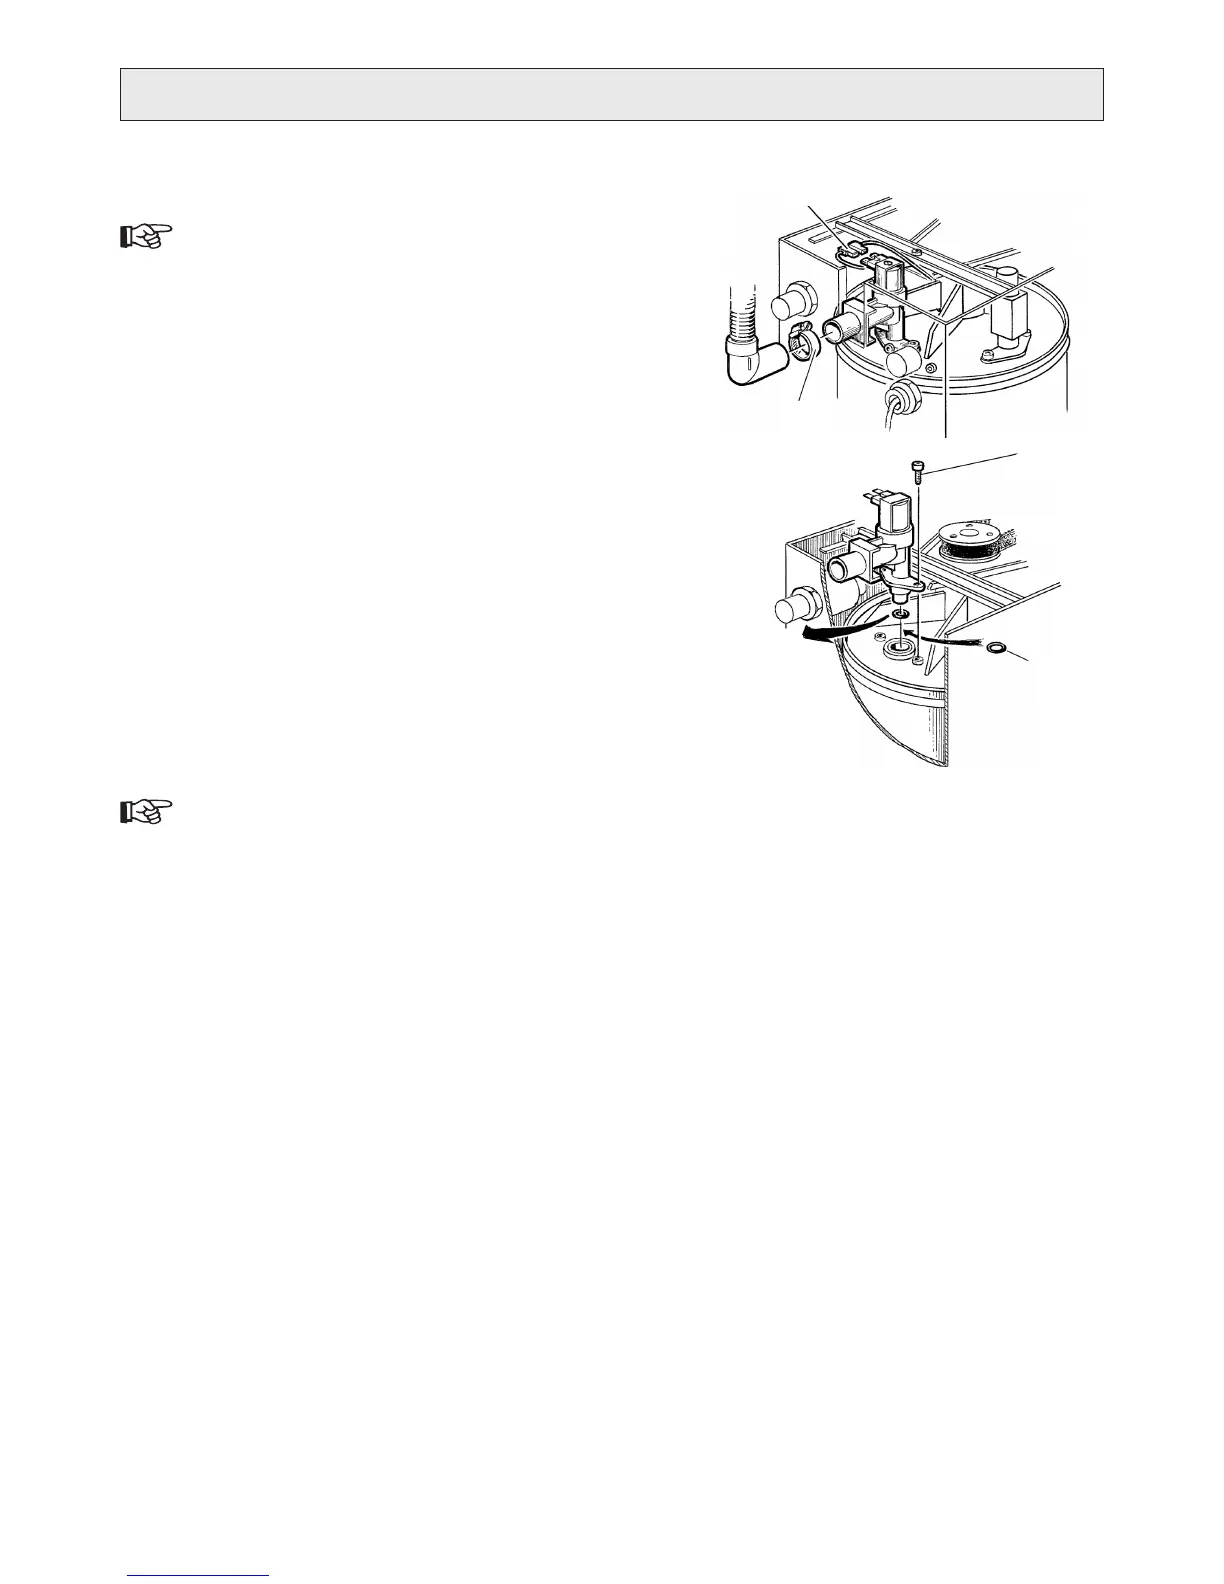
CHANGING FLUSH VALVE
The numbers within brackets refer to g. O.
Disconnect the water purier from electricity.1.
Remove the top cover (two screws at rear).2.
Disconnect the wires from the ush valve (3. ).
Remove the hose clip securing the waste water hose 4.
and remove the hose ().
Remove the ush valve, with plastic foil, from the brass 5.
gable by removing the two screws from the bracket
holding it ().
Make sure the bracket and screws do not fall down 6.
inside the product, also that the o-ring is removed with
the valve (4). Consider changing the o-ring as well ()
(separate article number).
Mount the lubricated o-ring on the new ush valve.Put 7.
the plastic foil on the valve and mount the bracket.
Press the ush valve assembly gently into position in 8.
the brass gable. Be careful, sharp edges of the brass
gable might cut the o-ring.
Secure the valve in place with the two screws.9.
Connect the wires to the ush valve.10.
Connect the waste water hose with the hose clip.11.
Connect to electricity and the product will start to ush.12.
Check for leakages.13.
Put back the top cover.14.
CHANGING FILTER CONTAINER
Disconnect the water purier from electricity.1.
Remove the front cover.2.
Before pulling out the prelter assembly, release the 3.
lter container by turning it clock-wise, with help of the
lter spanner.
Pull the prelter assembly out as far as it will come and 4.
Remove the lter container – remember it will be full
of water.
Put the o-ring correctly in the new lter container’s 5.
groove. Consider changing the o-ring as well (separated
article number).
Insert the old lter into the new container.6.
Fit the new container by turning it anti-clockwise. Push 7.
the assembly to the inner position and tighten.
Connect to electricity and the product will start to ush.8.
Check for leakages.9.
Put back the top cover.10.
SERVICE
O