Downflo II, Model DFT 2-8 through 4-128
13
\MRFSPX
MRJPEX[EWLIV
MRJPEX[EWLIV
MRPSGO[EWLIV
LI\RYX
\MRFSPX
MRJPEX[EWLIV
\MRFSPX
MRJPEX[EWLIV
MRPSGO[EWLIV
MRJPEX[EWLIV
MRPSGO[EWLIV
LI\RYX
\MRFSPX
MRJPEX[EWLIV
LSTTIVEGGIWWGSZIV
JSYVTSVXLSPISRP]
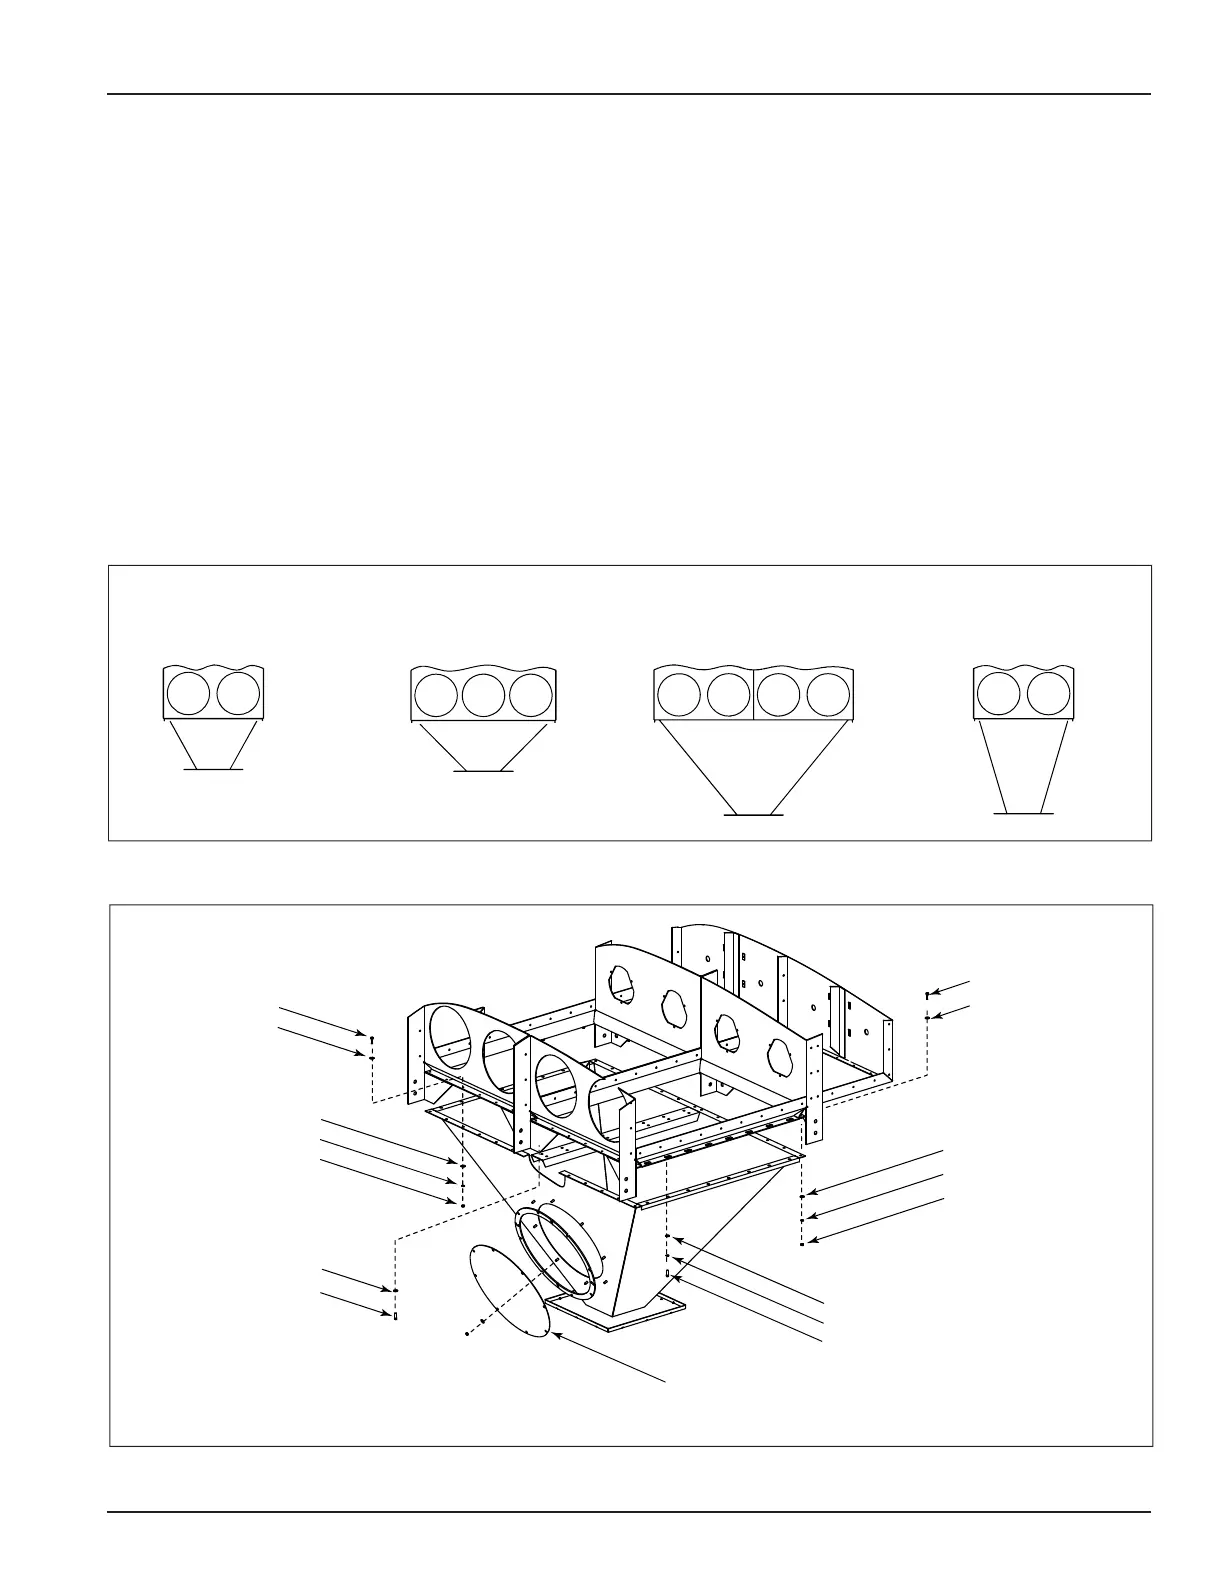
Hopper Installation
Hopper Styles
Hopper Installation
There are four ledge-free hopper styles offered for
the Downflo II. A single-module wide that spans
two portholes; a single-module wide that spans three
portholes; a taller, steeper, single-module wide
module which spans two portholes, and a double-
module wide spanning four portholes. All styles
transition to a single, 10-inch square discharge.
1. Stand the hopper on the discharge end.
Note: Remove hopper access covers on double
module hoppers if necessary.
2. Apply sealant around the hoppers top flange
toward the inside of the bolt pattern.
3. Lift the collector and position over the hopper
and lower slowly.
4. Use drift pins to align holes.
5. Secure collector to hopper using 3/8-16 x
1 1/4-in bolts, flat washers, and nuts. Tighten all
hardware securely.
6. Replace all access covers and tighten securely.
WMRKPIQSHYPI
WTERRMRKX[S
TSVXLSPIW
WMRKPIQSHYPI
WTERRMRKXLVIITSVXLSPIW
HYEPQSHYPI
WTERRMRKJSYVTSVXLSPIW
WXIITWMHIHWMRKPI
QSHYPIWTERRMRK
X[STSVXLSPIW