Pre-Installation Installation Training
A70622-D1
69/192
Step 3: Installation
Arriving at customer site & installation :
Meet your contact and confirm the plan for the installation
• Confirm the plan for the installation according to your last exchange with your contact
and with the information present in the Pre-installation form.
• Respect the safety or quality rules to follow during your stay on the customer site.
• Localize the materials and consumables delivered by MI.
• Localize the production line where the installation has to be performed.
• Name of the operators already trained or operators who have to follow the basic
operator instruction.
• Check the certified power plug.
• Check the compressed air if required.
• Check the grounding available near the printer.
• Check the possibility to fix the stand on the floor.
• Check the possibility to install the guarding tunnel
• Check the possibility to install a fume extractor
• Start and check the printer before to start the installation.
• If you replace an old machine, note the cable connections.
• The printer has to be installed far from permanent crossing of mobiles or people.
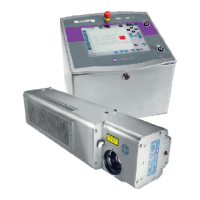
Installing the Laser
It is mandatory to have a classe 1 installation
• Inform the customer that you will perform some laser tests and a safety area has to be
delimited around the head (2 m
2
) : use safety sign, barrier line.
• Install the LASER with required accessories (phocell, alarm,tacky, extractor…).
• Plug the safety line into the LASER
• Mount the guarding tunnel if required.
• Perform the installation with vibration free on the printer cabinet, marking head,
umbilical, accessories when the production line is active.
• Perform installation within MI specification (T°, Printing distance, level print
head/cabinet).
• Check the umbilical positioning (no vibration, correct bent, no axis rotation and correct
speed-acceleration if movement…).
• Check the cable routing and attached each cable in a professional way (check the
grounding and shielding).
 Loading...