CONTACT US AT www.DRpower.com 27
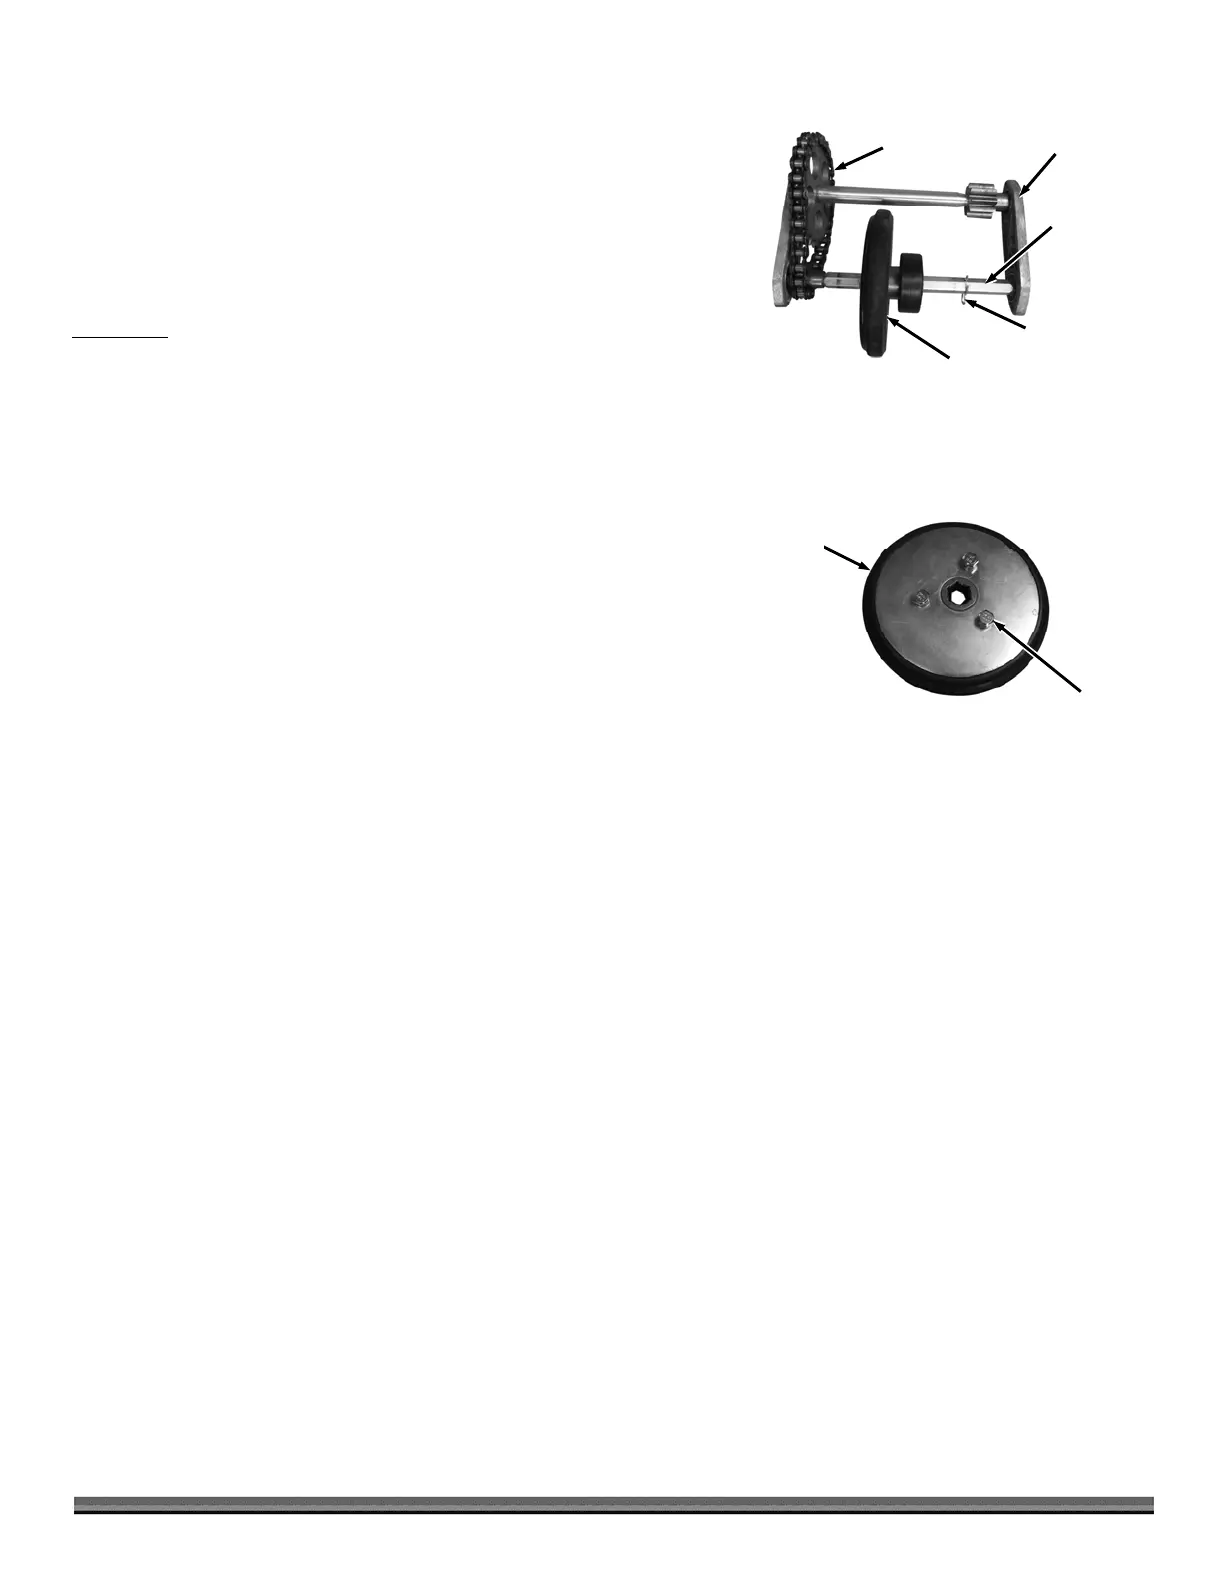
15. Remove the Pin from the Hexagon Shaft (Figure 77).
16. Hold the two Shafts in place as you pull the right side Bearing Seat away
from the Assembly.
17. Remove the Rubber Wheel/Shift Bearing Assembly from the Hexagon Shaft.
18. Use a 10mm Wrench to remove the three Bolts that secure the Rubber
Wheel to the Shift Bearing Assembly and remove the Wheel (Figure 78).
Assembly
1. Install the new Rubber Wheel onto the Shift Bearing Assembly in the
orientation shown (Figure 78).
2. Slide the Rubber Wheel/Shift Bearing Assembly onto the Hexagonal Shaft
(Figure 77). IMPORTANT! – Ensure that the heads of the Bolts are facing
the Chain and the Shift Bearing is facing away from the Chain.
3. Position the Bearing Seat with Bearings onto the Shafts.
4. Install the Pin into the Hexagonal Shaft.
5. Install the Friction Wheel Assembly into the machine (Figure 76).
IMPORTANT! - As you position the Friction Wheel Assembly into the
machine, ensure that the Chain is on the left side of the machine and the
Shift Fork Pin is inserted into the Shift Bearing slot.
6. Install the Long Drive Shaft, Short Drive Shaft, Shaft Sleeve and Differential
into the machine. You may need to use the dead Blow Hammer to push
the longer Shaft into the Short Shaft.
7. Install the rear Strut (Figure 75).
8. Install the right side Wheel Bearing Assembly (Figure 74).
9. Install the left side Wheel Bearing Assembly (Figure 73).
10. Install the Traction Cable onto the Traction Drive Bracket and Pin (Figure 72).
11. Install the Transmission Cover (Figure 71).
12. Install both and Shaft Keys and Wheels onto the Axle Shafts (Figure 70)
13. Install the Wheel Retainer Clips (Figure 69).
14. With the help of another person, tip the Snow Blower down onto the Wheels.
15. Add Oil and gas to the Engine as described in “Adding Oil and gasoline” in Chapter 2.
Rubber
Whee
Figure 78
Bolts
Pin
Figure 77
Bearing
Seat
Chain
ssembly
Rubber Wheel/Shift
Bearing Assembly
Hexagonal
Shaft