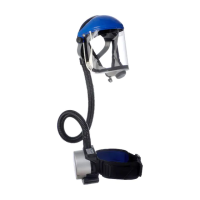
Use Instructions for NIOSH-approved full facepieces 11
(3) Leak test under water
● Immerse the test head including the facepiece with exhalation
valve test plug in the water.
● Produce a positive pressure of approx. 10 mbar (approx. 10cm
H
2
O). Slowly turn the test head under the water surface. Emerging
bubbles indicate untight places.
● Take the test head with the facepiece out of the water, repair the
facepiece or replace leaking components.
● Remove the exhalation valve test plug and mount the exhalation
valve.
● Repeat leak test (1).
Checking the opening pressure of the exhalation valve
● Check the opening pressure using one of the mentioned test
devices.
The opening pressure must amount to at least 4.2 mbar
(approx. 4.2 cm H
2
O) at a constant flow of 10 l per minute.
● If the opening pressure is not reached, turn the valve disk to get
rid of any particles lodged between crater and valve disk.
● Repeat the test.
If the opening pressure is still not reached, replace the spring
(figure A2, 17) and repeat the test.
Maintenance
● Check all parts for deformation and damage and replace them if
necessary.
● After maintenance work and/or replacement of components again
check the leak tightness.
Replacing the visor (figure F)
● Remove the screw from the flap and take off the flap.
● Unhook the cap from the visor frame (Figure F1-1) on both sides.
● Use your thumb to press against the bottom part of the cap, then
remove the cap from the fastening noses (Figure F1-2).
● Pull the cap upwards and away from the facepiece.
● Remove the screws of the visor frame (Figure F2).
● Spread the frame apart, tilt it towards the front and pull apart
sideways.
● Detach the visor from the rubber frame.
● Moisten either the facepiece body or the visor frame to facilitate
the assembly.
● Insert the new visor centered by aligning it to the center marking
on the visor and form-fitting in the facepiece body.
● Apply pressure onto the visor frame until it snaps into place, then
tighten with new self-locking screws until there is no more gap.
● Put the cap onto the connection piece, lock it into place on the
fastening noses and hook it into the visor frame.
● Close the flap and fasten the screw.
Replacing the nose cup (figure G)
● Take hold of the nose cup at the tip of the nose, then pull it off the
pin and out of the speech diaphragm groove.
● Put the new nose cup onto the pin to center it.
● Press the ring of the nose cup into the speech diaphragm groove
- at first at the bottom and then all around the speech diaphragm.
9021721_5.book Seite 11 Donnerstag, 21. Mai 2015 11:44 11