91 FR
2 Présentation du produit
11
Guide de démarrage rapide
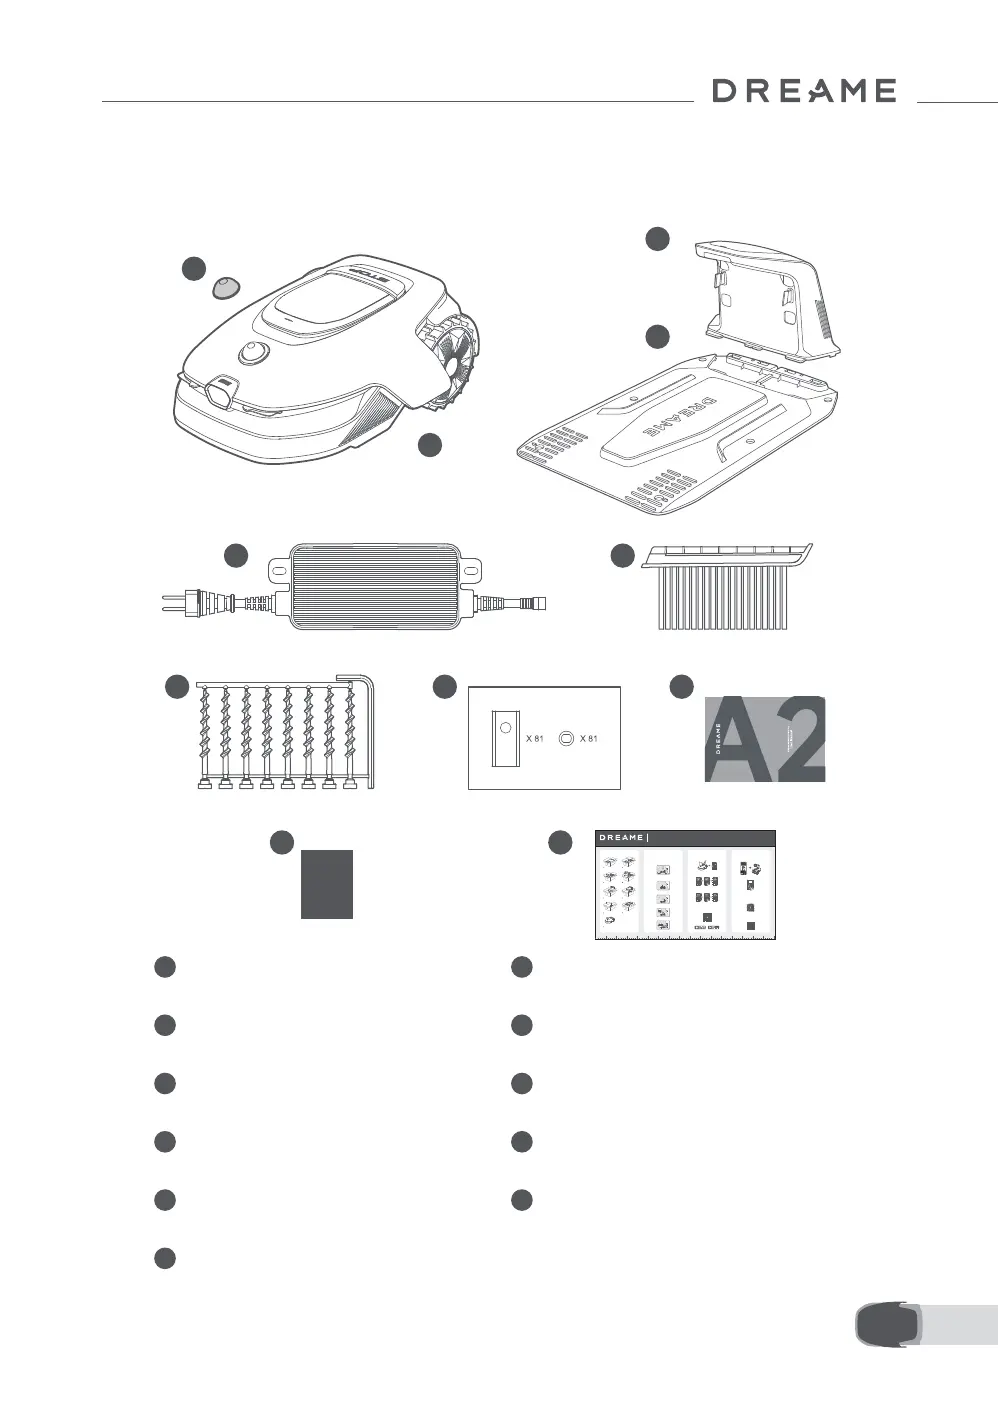
1
Couvercle de protection LiDAR 2 Le robot
3
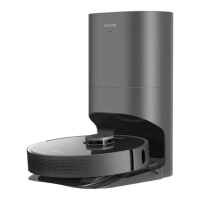
Tour de charge
(avec un câble d'extension de 10 m)
4 Plaque de base
5 Alimentation 6 Brosse de nettoyage
7
Vis × 8, Clé hexagonale
8
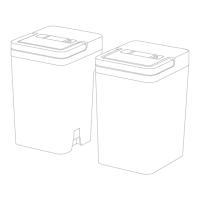
Lames et supports de rechange × 81
9 Manuel d'utilisation 10 Chion non pelucheux
1
2
3
4
5 6
8 97
10 11
01/ 02/
1
Open the box carefully.
Auspacken
Déballage
Die Box bitte vorsichtig önen.
Ouvrez la boîte avec précaution.
2
Take out the accessory box.
Nehmen Sie die Zubehörbox heraus.
Sortez le coret d'accessoires.
• An open and at area, with no obstacles within 1 m to the left, right and in front of the charging
station.
Eine oene, ache Fläche mit keinen Hindernissen innerhalb von 1 m links, rechts und vor der Ladestation.
Une zone ouverte et plate, sans obstacles à 1 m à gauche, à droite et en face de la station de charge.
• Near a power outlet.
In der Nähe eines Steckdosen.
Près d'une prise électrique.
• With strong Wi-Fi signal.
Mit starkem Wi-Fi Signal.
Avec un fort signal Wi-Fi.
Please scan the QR code to download the Dreamehome app on your mobile device.
After the installation, please create an account and log in.
You can also download Dreamehome app from App Store or Google Play
Install the charging station
Installation der Ladestation / Installer la station de chargement
1. Secure the baseplate to the ground with supplied screws using the hex key.
Befestigen Sie die Basisplatte mit den mitgelieferten Schrauben und dem Sechskantschlüssel auf dem Boden.
Fixer la plaque de base au sol avec les vis fournies en utilisant la clé hexagonale.
1. Press Stop button to open the cover of the control panel. Press and hold the Power button on the
control panel for 2 seconds to turn on A1 Pro.
Drücken Sie die Stopptaste, um die Abdeckung des Bedienfelds zu önen. Halten Sie die Einschalttaste auf dem Bedienfeld 2
Sekunden lang gedrückt, um A1 Pro einzuschalten.
Appuyer sur le bouton Arrêt pour ouvrir le couvercle du panneau de contrôle. Appuyer sans relâcher sur le panneau de contrôle
pendant 2 secondes pour allumer l'A1 Pro.
2. Turn the knob clockwise to go down and anticlockwise to go up to select your language. Press
the knob to conrm.
Drehen Sie den Drehknopf im Uhrzeigersinn nach unten und gegen den Uhrzeigersinn nach oben, um Ihre Sprache auszuwählen.
Drücken Sie den Drehknopf zur Bestätigung.
Tourner le bouton dans le sens horaire pour descendre, dans le sens anti-horaire pour monter, et sélectionner votre langue.
Appuyer sur le bouton pour conrmer.
3. Turn the knob to select number from 0 to 9. Turn it clockwise to increase the number from 0 to 9
and turn it anticlockwise to decrease the number. Press the knob to set the next digit.
Drehen Sie den Drehknopf, um eine Zahl zwischen 0 und 9 auszuwählen. Drehen Sie ihn im Uhrzeigersinn, um die Zahl von 0 bis
9 zu erhöhen, und gegen den Uhrzeigersinn, um die Zahl zu verringern. Drücken Sie den Drehknopf, um die nächste Zier
einzustellen.
1. Enable Bluetooth function on your mobile device.
Aktivieren Sie die Bluetooth-Funktion auf Ihrem mobilen Gerät.
Activer la fonction Bluetooth sur votre appareil portable.
2. Scan the QR code inside the cover or select A1 Pro manually via the App.
Scannen Sie den QR-Code auf der Innenseite der Abdeckung oder wählen Sie A1 Pro manuell über die App aus.
Scanner le QR code à l'intérieur du couvercle ou sélectionner manuellement l'A1 Pro via l'application.
3. Press and hold the knob on the control panel for 3 seconds and A1 Pro will enter Bluetooth pairing
mode.
Halten Sie den Drehknopf auf dem Bedienfeld 3 Sekunden lang gedrückt, woraufhin A1 Pro in den Bluetooth-Kopplungsmodus wechselt.
Appuyer sans relâcher le bouton sur le panneau de contrôle pendant 3 secondes et l'A1 Pro entrera en mode d'association Bluetooth.
4. Pair A1 Pro with your mobile device via Bluetooth.
Wenn Sie Probleme haben, während Sie es verwenden, bitte schauen Sie sich das folgende Tutorial-Video an.
Si vous rencontrez des problèmes lors de l'utilisation, veuillez
regarder la vidéo tutoriel ci-dessous.
Tourner le bouton pour sélectionner un nombre entre 0 et 9. Le tourner dans le sens horaire pour augmenter le nombre de 0 à 9,
et dans le sens anti-horaire pour le diminuer. Appuyer sur le bouton pour régler le chire suivant.
Bitte scannen Sie den QR-Code, um die Dreamehome App auf Ihr mobiles Gerät herunterzuladen.
Nach der Installation erstellen Sie bitte ein Konto und melden sich an.
Sie können die Dreamehome App auch im App Store oder bei Google Play herunterladen.
Vous pouvez également télécharger l'application Dreamehome de l'App Store ou Google Play.
Scanner le QR code pour télécharger l'application Dreamehome sur votre téléphone portable.
Après l'installation, créez un compte et connectez-vous.
Setzen Sie die Reinigungsbürste in die Ladesäule ein und richten Sie dabei die Zunge an der Nut aus.
Insérer la brosse de nettoyage dans la tour de chargement en alignant la languette sur la rainure.
Verbinden Sie das Netzteil mit dem Verlängerungskabel und schließen Sie es an eine Steckdose an.
Raccorder l'alimentation à la rallonge et la brancher sur la prise d'alimentation.
3. Insert the cleaning brush into the charging tower by aligning the tongue with the groove.
Insert the charging tower to the baseplate until you hear the click.
Insérer la tour de chargement sur la plaque de base jusqu'à ce que vous entendiez le clic.
2. Insert the charging tower to the baseplate until you hear the click.
4. Connect the power supply to the extension cable and then connect to a power outlet.
3
Extract the power supply unit.
4
Lift out the charging station.
Entfernen Sie die Netzteil. Hieven Sie die Ladestation heraus.
Retirez l'unité d'alimentation. Leverez le station de charge.
5
Clear away all protective materials.
6
Take out A1 Pro.
Entfernen Sie alle Schutzmaterialien. Nehmen Sie A1 Pro heraus.
Enlevez toutes les matériaux de protection. Sortez la A1 Pro.
7
Take out the cleaning brush.
8
Finally, take out the baseplate.
Nehmen Sie die Reinigungsbürste heraus. Schließlich nehmen Sie die Basisplatte heraus.
Sortez le balai de nettoyage.
9
Remove the protective cover.
Entfernen Sie die Schutzabdeckungen.
Retirez les couvertures protectrices.
Enn, sortez la plaque de base.
2s
A1 Pro aktivieren / Activer A1 Pro A1 Pro mit dem Internet verbinden / Raccorder l'A1 Pro à Internet
Activate A1 Pro
Connect A1 Pro to the internet
Quick Start Guide
Unpacking
Vorbereitungen
Préparatifs
Preparations
03/
Laden Sie die App herunter
Téléchargez l'application
Download the App
04/
If you encounter any problems during use,
please watch the tutorial video below.
Please do not hesitate to contact us if you have
any other questions.
Bitte zögern Sie nicht, uns zu kontaktieren, wenn Sie weitere Fragen haben.
N'hésitez pas à nous contacter si vous avez d'autres questions.
Email:aftersales@dreame.tech
Website: https://global.dreametech.com
Join our ocial Facebook group
where you can discuss your questions with other fellow users.
Tutorial-Video und Kontakt
Vidéo de tutoriel et contact
Tutorial Video and Contact
video below
10CM5CM 15CM 20CM 25CM 30CM 35CM 40CM 45CM 50CM 55CM 60CM 65CM 70CM 75CM 80CM 85CM
2.1 Qu'est-ce qui est dans la boîte