Valve attachment
18
Actuator type 90° T T
min
DP…(R)600/900 (Ex) 23mm 13mm
DP…(R)1200/1800 (Ex) 23mm 12mm
The end stop screws are mechanical limits for manual operation and may not be
approached during motor operation!
Turn handwheel clockwise to mechanical stop, then slowly rotate one turn counter-
clockwise. The output drive plug sleeve must be fitted in the actuator. After finish bor-
ing, slide output drive plug sleeve on valve shaft and secure if required.
Apply a thin film of sealing agent (e.g. Marston Durapress) at output mounting flanges
prior to assembly. Adjust actuator in accordance with the possible angular steps and
slide it carefully onto the output drive plug sleeve.
In case the dog of the hollow shaft does not engage into the respective keyway of the
output drive plug sleeve, rotate the handwheel until hollow shaft engages. Slowly ro-
tate handwheel until flange bores align, then fasten actuator using flange screws. If
more than one handwheel turn is required, put the actuator to the initial position, lift it
and place it again onto the output drive plug sleeve by moving one indent.
4.8
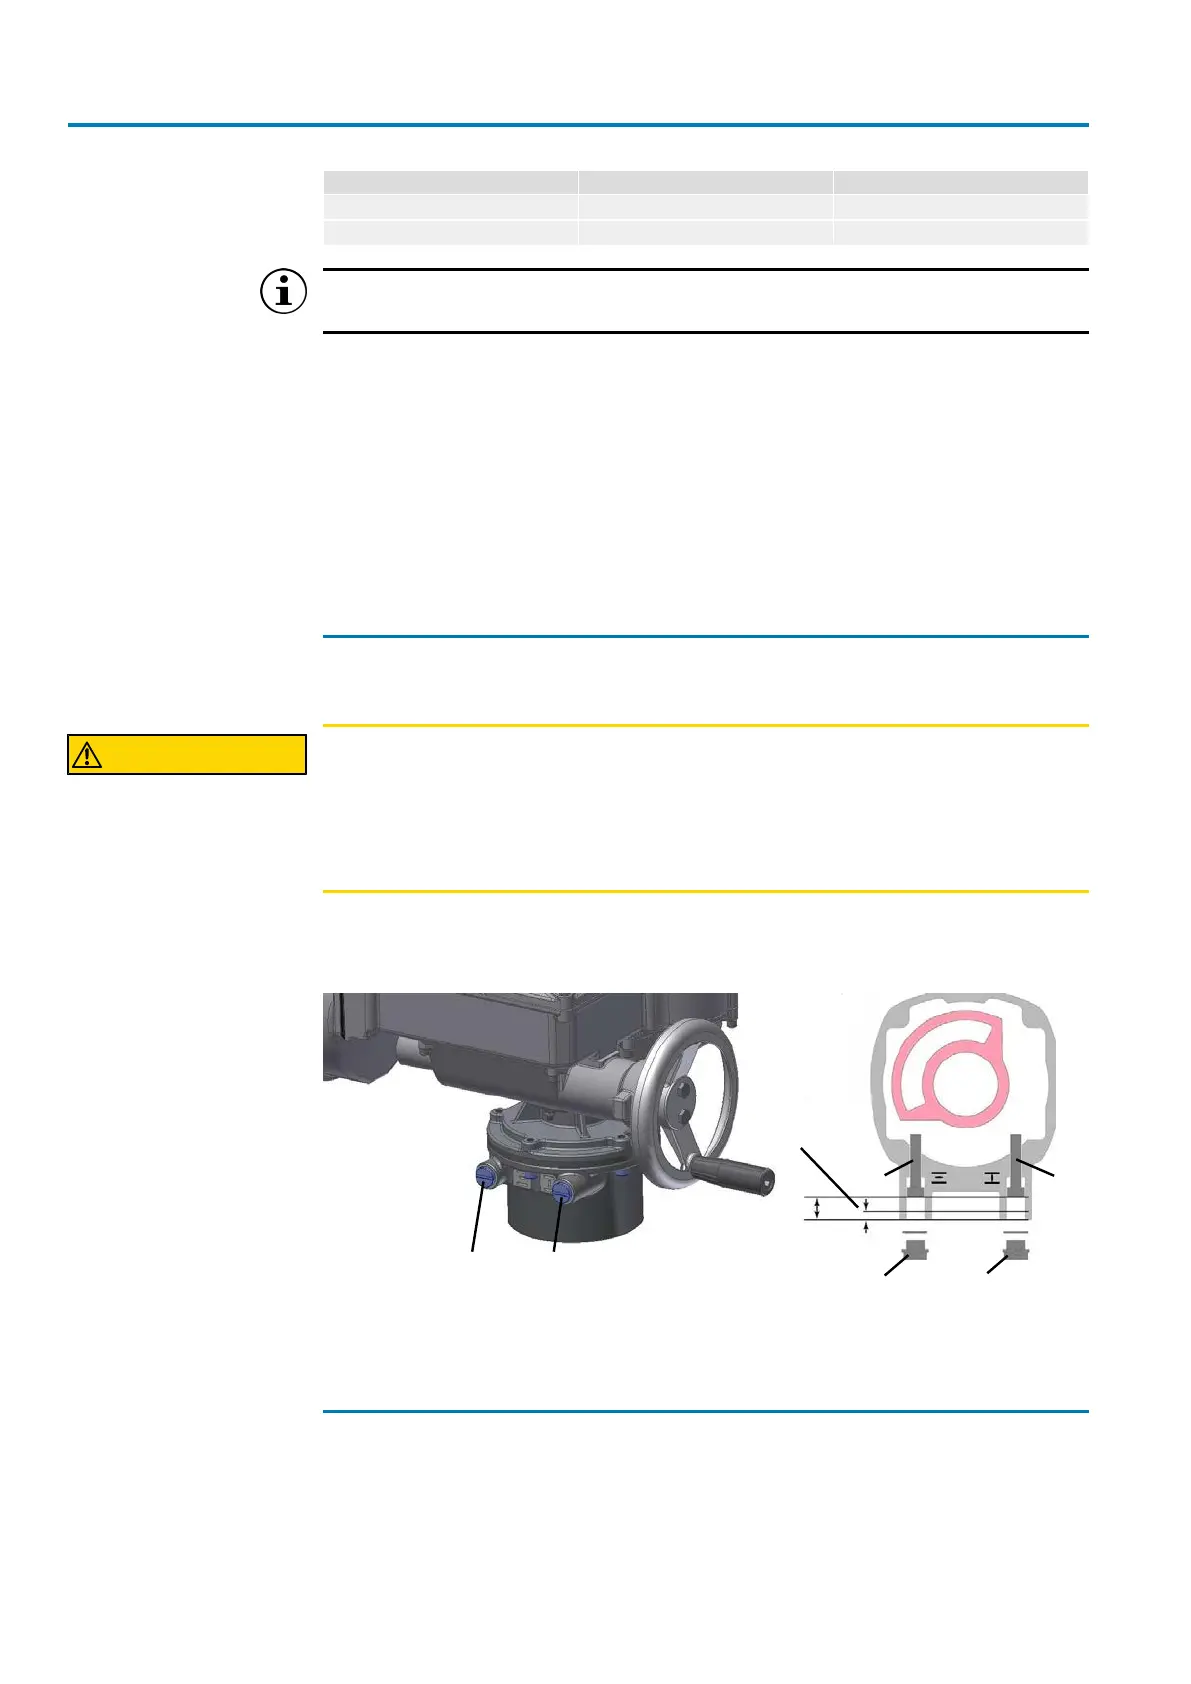
Setting the mechanical end stop screw for part-turn actuators
DP…(R)75 – 1800 (with planetary gearing))
CAUTION
Exposed, rotating parts (discs/balls) at the valve!
Pinching and damage by valve or actuator.
à End stops should be set by suitably qualified personnel only.
à Never completely remove the setting screws [2] and [4] to avoid grease leakage.
à Observe dimension T
min.
Caution: The end stop setting sequence depends on the valve: We recommend start-
ing with end stop CLOSED for butterfly valves and with end stop OPEN for ball valves.
Figure12: Cross section of compartment for end stop screws
[1] Screw plug for end stop OPEN [2] Setting screw for end stop OPEN
[3] Screw plug for end stop CLOSED [4] Setting screw for end stop CLOSED
4.8.1
Set end stop CLOSED
How to proceed 1. Remove screw plug [3].
2. Move valve to end position CLOSED with handwheel.
3. If the valve end position is not reached:
ð Slightly turn setting screw [4] counterclockwise until valve end position
CLOSED can be correctly set.