Commissioning
25
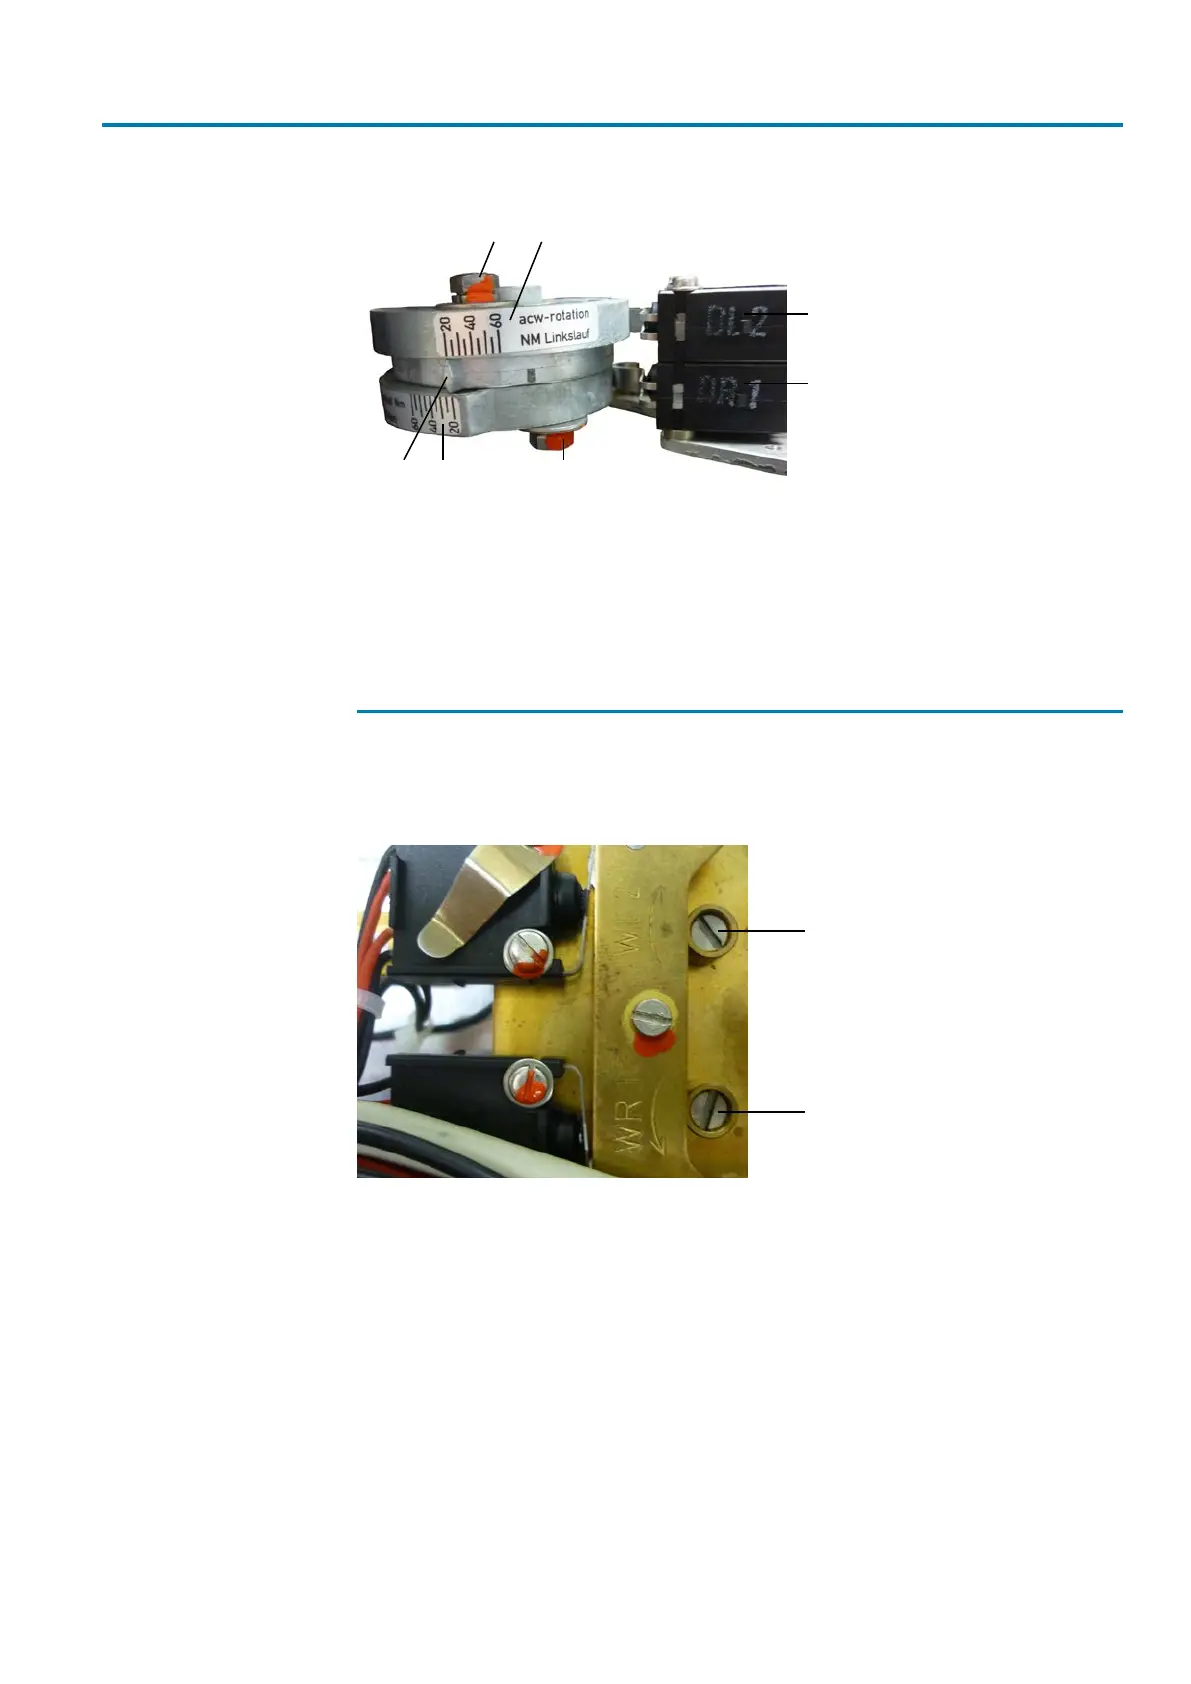
Figure15: Torque setting
[1] Transit screw for torque adjustment
OPEN
[2] Scale with setting range for torque in
direction OPEN
[3] Torque switch for direction OPEN (in
standard version)
[4] Setting mark
[5] Scale with setting range for torque in
direction CLOSE
[6] Transit screw for torque adjustment
CLOSE
[7] Torque switch for direction CLOSE (in
standard version)
7.3
Setting the limit positions
For setting the limit positions for OPEN and CLOSED, use the setting screws as
shown in the figure below.
Figure16: Limit switches in standard version
[1] Setting screw for limit position OPEN [2] Setting screw for limit position
CLOSED
For setting a limit position, operate the actuator into the desired position. Press the
screw downward by means of the screwdriver and turn in direction of the arrow. The
limit position is set when the cam operates the appropriate limit switch. After the set-
ting procedure, release the screw.
Setting screws for limit positions engage in short intervals while being turned. There-
fore, make sure not to modify the selected position while operating the desired switch.
Once the respective limit switch has tripped, refrain from turning the setting screw! Re-
peat the complete setting procedure if you have accidentally turned too far.
If optional switches are fitted for intermediate position signalling, they are operated by
means of the shaft cams of the mechanical position indicator. Approach the respective
intermediate position for setting. Then turn the handwheel by approx. 30° into the op-
posite direction. To set the respective cam on the shaft of the mechanical position in-