21
DEHUMIDIFIER INSTALLATION, OPERATION, AND MAINTENANCE MANUAL
INSTALLATION
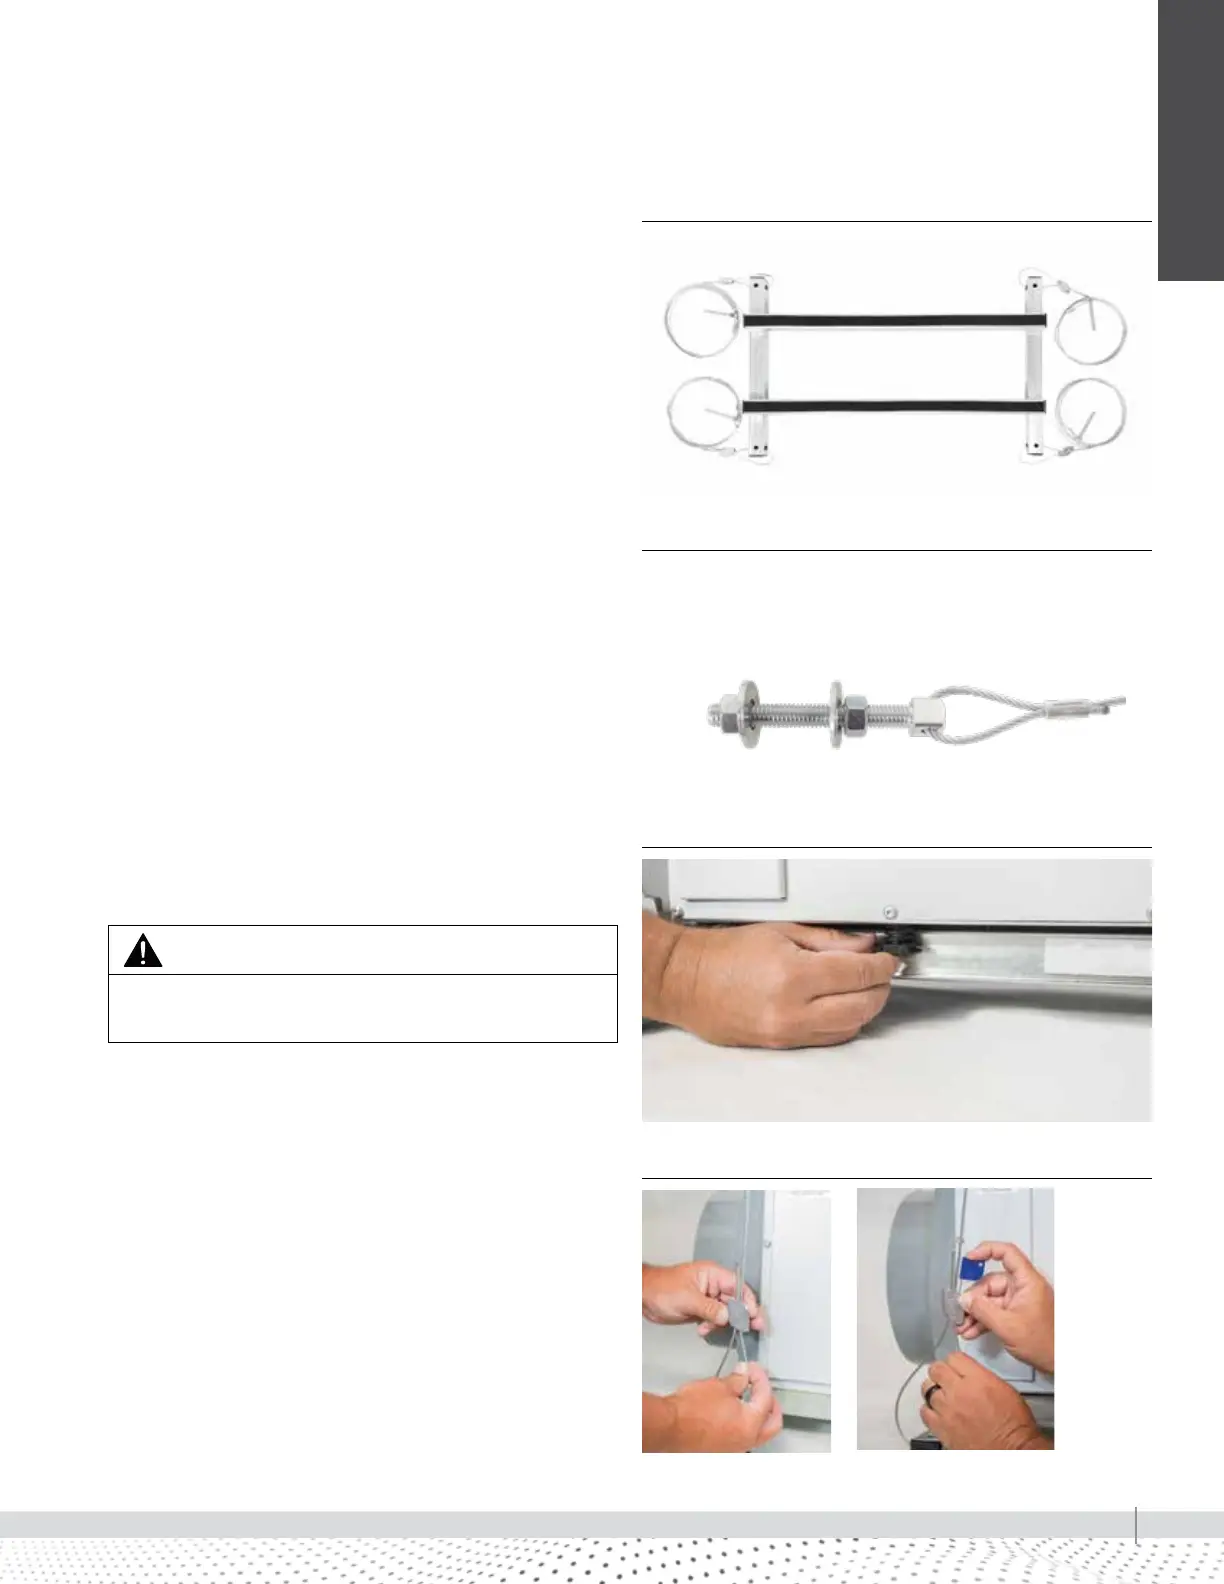
RL-3, RL-4, and RL-6 trapeze mount
INSTALLING A DRISTEEM DEHUMIDIFIER
USING A DRISTEEM HANGING KIT
1. Open box and remove the contents.
Contents include:
• Hanging bracket with cables and bolts
• 8 nuts, 8 washers
• Gripple key
• Installation instructions
2. Unfold the hanging bracket so the support bars
are perpendicular to the hanging bars (see Figure
21-1).
3. Use two washers and two nuts on each cable bolt
when mounting the hanging bracket to a structure.
Make sure the structure can support the weight of
the hanging bracket and dehumidifier (see Figure
21-2).
4. Extend the dehumidifier feet approximately ¾" to 1"
(19 to 25 mm) (see Figure 21-3).
5. With the feet extended, center the dehumidifier on the
hanging bracket, with the feet outside of the support
bars.
6. Adjust the height of the hanging bracket by either
pulling on the cable or inserting the Gripple key to
release tension (see Figure 21-4).
CAUTION
Bracket and dehumidifier must be supported when key is used
to release the cable.
7. Set a level on top of the dehumidifier to make sure it is
level in both directions.
FIGURE 21-1: RL-3, RL-4 AND RL-6 TRAPEZE MOUNT
FIGURE 21-2: RL-3, RL-4 AND RL-6 TRAPEZE MOUNT
FIGURE 21-3: EXTEND FEET
FIGURE 21-4: ADJUST CABLE AND KEY
 Loading...