23
DEHUMIDIFIER INSTALLATION, OPERATION, AND MAINTENANCE MANUAL
INSTALLATION
90-2436
90-2437
INSTALL BRACKETS FOR SUSPENDING UNIT
The brackets are designed to accommodate up to 1/2" (13mm) threaded rod.
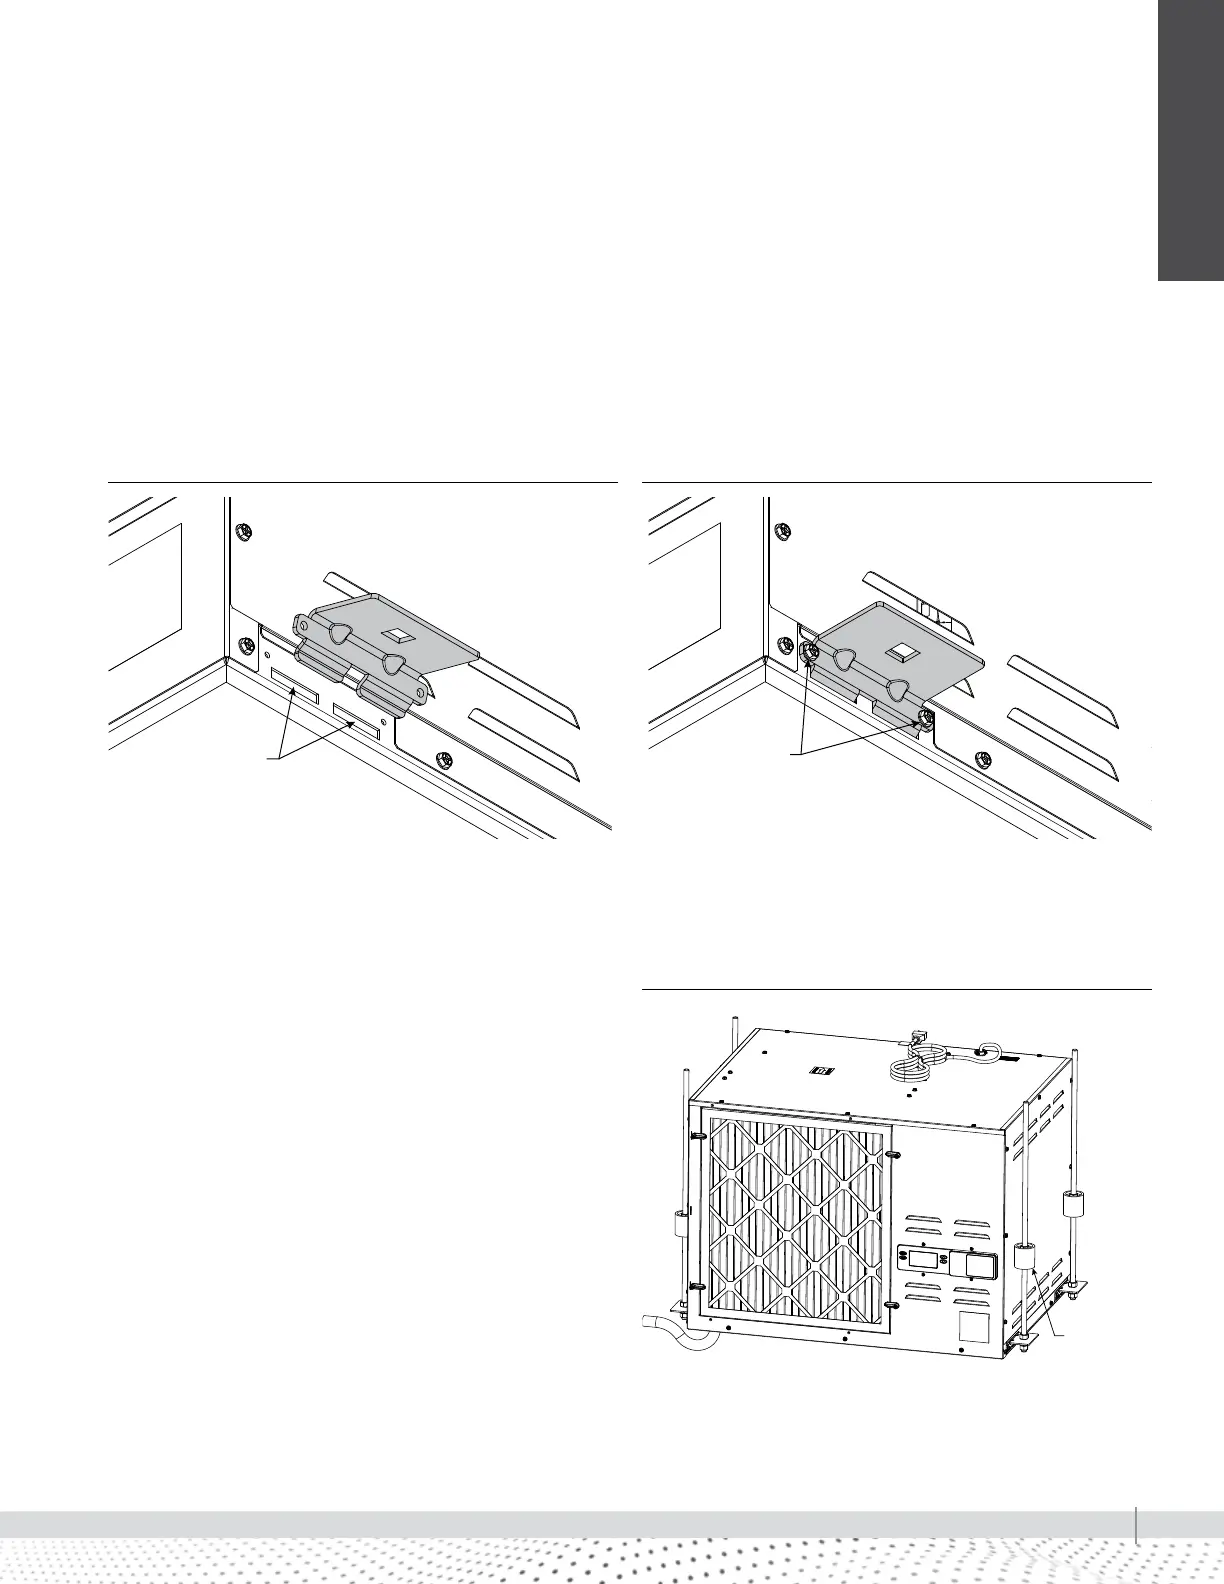
1. Insert bracket into slots on the base. See Figure 23-1.
2. Rotate the bracket up toward the dehumidifier and secure the bracket to
the side of the dehumidifier using #12 sheet metal screws (provided). This
can be done with a 5/16" (8 mm) hex socket. See Figure 23-2.
3. Repeat for remaining three brackets.
FIGURE 23-1: INSTALL MOUNTING BRACKET IN BASE FIGURE 23-2: SECURE BRACKET TO DEHUMIDIFIER
Insert bracket into
openings on bottom
of unit (4 places)
Rotate bracket into
place and secure
with screws provided
HANGING THE RL-14 DEHUMIDIFIER
Use the threaded rod to suspend the unit from appropriate
ceiling structure. See unit weights in Table 10-1. Install
vibration isolators if located in an area where noise could
be a concern. Level unit right to left and front to back so
that unit drains properly. See Figure 23-3.
FIGURE 23-3: SUSPENSION
4x vibration
isolators
(optional)
RL-14 mounting