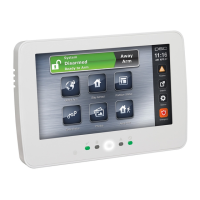
Programming Labels
1.
From the HS2TCHP keypad, press Options, press Installer Menu [Installer Code],
then press Label Programming.
2.
From the Label screen, press the item that you want to label (e.g., zones, partitions,
etc.).
3.
Enter the label name for the selected item.
4.
Press Save when complete.
Optional Settings
The following settings are available through the Options menu.
Enable/Disable Fire, Medical, Panic Buttons
1.
Press Options, Installer Menu [Installer Code], Keypad Programming, then
Options.
2.
Enable/disable the desired Fire, Medical and Panic buttons.
Extra Power Option
The Extra Power option will increase the brightness of the display. To enable the option:
1.
Press Options, Installer Menu [Installer Code], Keypad Programming, then
Options.
2.
Enable or disable the extra power option.
Note: Enabling the Extra Power option will put the keypad into a higher current mode and the
keypad will draw 300 mA. In Extra Power mode, reduce the maximum wire length from 101 m (332
ft.) to 54 m (177 ft.)
Change the Background Image
1.
Press Options, Installer Menu [Installer Code], Keypad Programming, then Back-
ground Image.
2.
Select image to use from SD card as background image.
3.
To exit, press the Back or the Home button.
Dark Text Enable/Disable
1.
Press Options, Installer Menu [Installer Code], Keypad Programming, then
Options.
2.
Select the desired text color by enabling or disabling Dark Text. (This will make
the text white).
Note: This feature affects only the text on the Classic (square) button home page.
Perform a Firmware Upgrade
1.
Insert an SDcard in the HS2TCHP with the new firmware.
2.
Press Options, Installer Menu [Installer Code], Keypad Programming, then Firm-
ware Upgrade.
3.
Select OK to perform a firmware upgrade (if a new firmware version is available).
Keypad Programming
To enter keypad programming:
1.
Press Options then Keypad Mode. The virtual keypad is displayed.
2.
Press [*][8][Installer Code].
3.
Enter one of the following keypad programming sections:
l [860] Keypad Slot Number. This section is for display only.
l [861]-[876] to program keypads 1-16 respectively.
Once a keypad is selected, the following programming options are available:
[000] Keypad Partition Mask
Validentries are01-08. Globalkeypadmodenot supported I___I___I
[011] Keypad Input/Output Programming
Zoneor PGM Number Default 000 I___I___I___I
[012] Local PGM Output Pulse Activation Time
I___I___I Minutes(00-99) I___I___I
Seconds (00-99)
[021] First Keypad Options
Default Value Option ON Off
ON I__I 1 FireKey Enabled FireKey Disabled
ON I__I 2 Medical KeyEnabled MedicalKeyDisabled
ON I__I 3 PanicKey Enabled PanicKey Disabled
ON I__I 4
DisplayAccessCodeWhenPro-
gramming
DisplayXs When Programming
AccessCodes
[022] Second Keypad Options
Default Value Option ON Off
ON I__I 1 LocalClockDisplay ON LocalClock Display OFF
OFF I__I 2 LocalClockDisplays 24-hr ClockDisplays AM/PM
ON I__I 3 AutoAlarm Mem Scroll ON Auto Alarm Mem ScrollOFF
ON I__I 4 For FutureUse For FutureUse
OFF I__I 5 PowerLEDEnabled PowerLEDDisabled
ON I__I 6
PowerLEDIndicates AC Present
ON
PowerLEDIndicates AC Present
OFF
ON I__I 7 Alarms Displayed WhileArmed Alarms Not Displayed WhileArmed
OFF I__I 8 Auto-ScrollOpenZonesON Auto-ScrollOpenZones OFF

 Loading...