-5-
2011-09
24 / 28
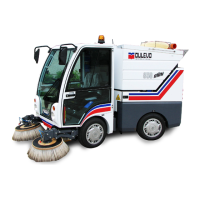
850 mini
5.5.c - LANCIA ACQUA AD ALTA PRESSIONE
AVVERTENZA:
La pressione dell’acqua che fuoriesce dalla lancia
ad alta pressione è estremamente alta.
Mai dirigere il getto d’acqua in direzione di persone.
Il getto d’acqua o oggetti scagliati da quest’ultimo
possono ferire gravemente persone o causarne la
morte. Usare un equipaggiamento antinfortunistico
appropriato come guanti, dispositivi di protezione
degli occhi, ecc...
Consultare il proprio responsabile.
Per utilizzare la lancia ad alta pressione agire come
segue:
a) Verificare che il serbatoio acqua sia pieno.
b) Verificare che il rubinetto (16) sia chiuso.
c) Aprire lo sportello destro (1) e prendere la lancia (2)
posizionata all’interno della cabina.
d) Sganciare dalla propria sede il raccordo (3) posto sul
tubo dell’avvolgitore (4) e avvitarlo sulla lancia (2) ser-
randolo a fondo.
e) Ruotare in posizione “A” il rubinetto idraulico (5) per
deviare l’olio idraulico verso il motore (6) del gruppo
pompa acqua.
f) Avviare il motore della macchina, premere il pulsan-
te (7) per abilitare le funzioni di lavoro, quindi preme-
re l’interruttore (8) per azionare la pompa.
Ruotare il pomello (9) in senso orario fino a fine cor-
sa (massima velocità spazzole).
g) Sganciare il fermo (10) per estrarre il tubo
dall’avvolgitore (4).
h) Imbracciare la lancia e puntarla nella direzione della
parte da lavare e premere il grilletto (11); mediante
l’ugello (12) si può variare il tipo di getto.
i) Fermare il funzionamento della pompa premendo l’in-
terruttore (8).
l) A fine lavoro chiudere il rubinetto (5), premere il gril-
letto (11) della lancia (2) e mantenerlo premuto fino a
scaricare la pressione presente nel tubo.
m) Svitare il raccordo (3) dalla lancia (2), ruotare la leva
(13) per riavvolgere il tubo quindi riposizionare la lan-
cia (2) e il raccordo (3) nelle rispettive sedi;
Bloccare l’arrotolatore (4) riagganciando il fermo (10).
NOTA:
A basse temperature scaricare l’acqua dalla pompa
e dall’impianto aprendo il rubinetto (14) e
procedendo allo scarico dell’impianto come indicato
nel “capitolo 6”.
5.5.c - HIGH PRESSURE WATER NOZZLE
WARNING:
High pressure water nozzle discharges water at
extremely high pressure.
Never point the water jet in the direction of people.
The water jet or dislodged objects can cause serious
personal injury or death.
Wear gloves, eye protection and other appropriate
personal protection equipment.
Check with your supervisor.
In order to use the high pressure nozzle comply with
the following:
a) Make sure that the water tank is full.
b) Check that valve (16) is closed.
c) Open the right door (1) and take the nozzle (2) placed
inside the cab.
d) Release the threaded connector (3) placed on the
winder (4) hose from its seat and screw it on the nozzle
(2) tightening it completely.
e) Rotate the hydraulic valve (5) to the position “A” in
order to deviate the hydraulic oil towards the motor
(6) of the water pump group.
f) Start the engine, push the button (7) to enable the
work functions, then press the switch (8) to run the
pump.
Rotate the knob (9) clockwise to the end of stroke
(brooms maximum speed).
g) Release the clamp (10) in order to take out the hose
from the winder (4).
h) Take the nozzle and aim it to the part to be washed
and press the trigger (11); the kind of jet can be
changed through the nozzle (12).
i) Stop the pump by pushing again switch (8).
l) At the end of the work close the valve (5), press the
trigger (11) of the nozzle (2) and keep it pressed to
vent the pressure from the hose.
m) Unscrew the threaded connector (3) from the nozzle
(2), rotate the lever (13) to rewind the hose then place
again the nozzles (2) and the threaded connector
(3) in their seats;
Lock the winder (4) by hooking the clamp (10) again.
NOTICE:
When the temperature is low, drain water from the
pump and from the system by opening the tap (14)
and proceed with system drainage as indicated in
“chapter 6”.