-6-
2011-09
7 / 40
850 mini
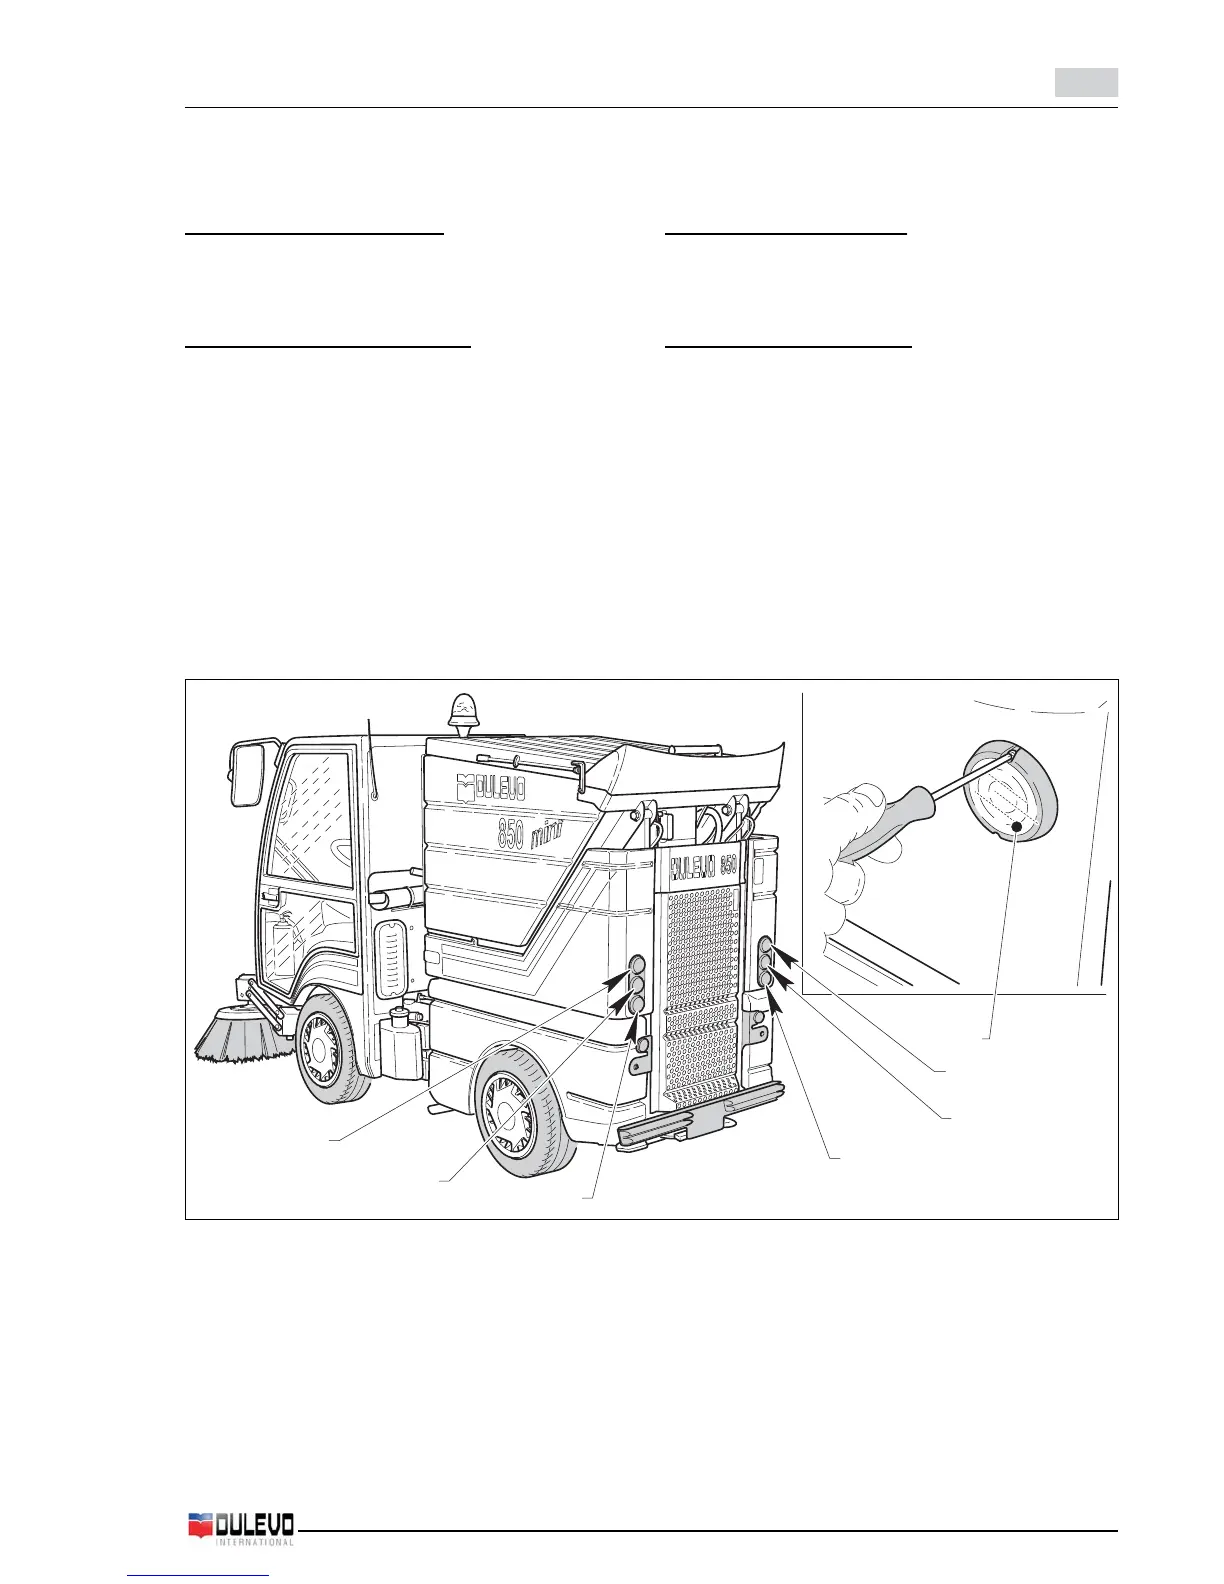
Plafoniera (in cabina):
- N.° 1 lampada 12V 5W attacco IEC SV 8,5 - 8
Indicatori di direzione laterali
- Svitare le due viti del trasparente (1) e toglierlo.
- Spingere leggermente e ruotare la lampada (2) bru-
ciata per estrarla dall’incastro a baionetta, quindi so-
stituirla.
Lampade gruppo luci posteriore
- Per sostituire una lampada del gruppo luci posteriori
è necessario togliere il trasparente (3) svitando le
relative viti.
- Spingere leggermente e ruotare la lampada bruciata
per estrarla dall’incastro a baionetta, quindi sostituir-
la.
La posizione delle lampade è la seguente:
Lampada (4): luci di posizione - luci di stop.
Lampada (5): luci indicatori di direzione.
Lampada (6): luce di retronebbia.
Lampada (7): luce di retromarcia.
- Rimontare il trasparente (3) riavvitando le relative viti.
3
4
5
6
4
5
7
Roof lamp (in the cab):
- N.°+1 lamp 12V 5W coupling IEC SV 8,5 - 8
Lateral Direction Indicators
- Unscrew the two plugs of the transparent cover (1)
and remove it.
- Slightly push and turn the burnt out lamp (2) to remove
from its bayonet, then replace it.
Back-up lights lamps group
- To replace one lamp in the back lights group it is
necessary to remove the transparent cover (3) by
unscrewing the relevant screws.
- Slightly push and turn the burnt out lamp to remove it
from the bayonet coupling, then replace it.
The position of the lamps is the following:
Lamp (4): running lights - stop lights.
Lamp (5): direction indicator lights.
Lamp (6): fog-guard light.
Lamp (7): back-up light.
- Reassemble the transparent cover (3) by screwing
back the relevant screws.