SECTION 2 - MAINTENANCE & ADJUSTMENTS
BACKGAUGE SQUARENESS
The backgauge must be parallel to the cutting line.
If there is any misalignment adjust the backgauge
accordingly. Test cutting table squareness before
testing the backgauge.
TESTING FOR BACKGAUGE SQUARNESS
1. Cut several sheets of paper at the same time.
Align them against the right side of the cutting
area and evenly against the backgauge.
2. Remove and discard the pieces closest to the
operator.
3. Turn the remaining sheets over and push them
against the left side of the cutting area and
against the backgauge.
4. Observe any excess trimmings from the cut. If
there are any pieces left over, perform the
backgauge alignment.
BACKGAUGE ALIGNMENT
1. Determine what correction is necessary (see
“Testing for Backgauge Squareness”).
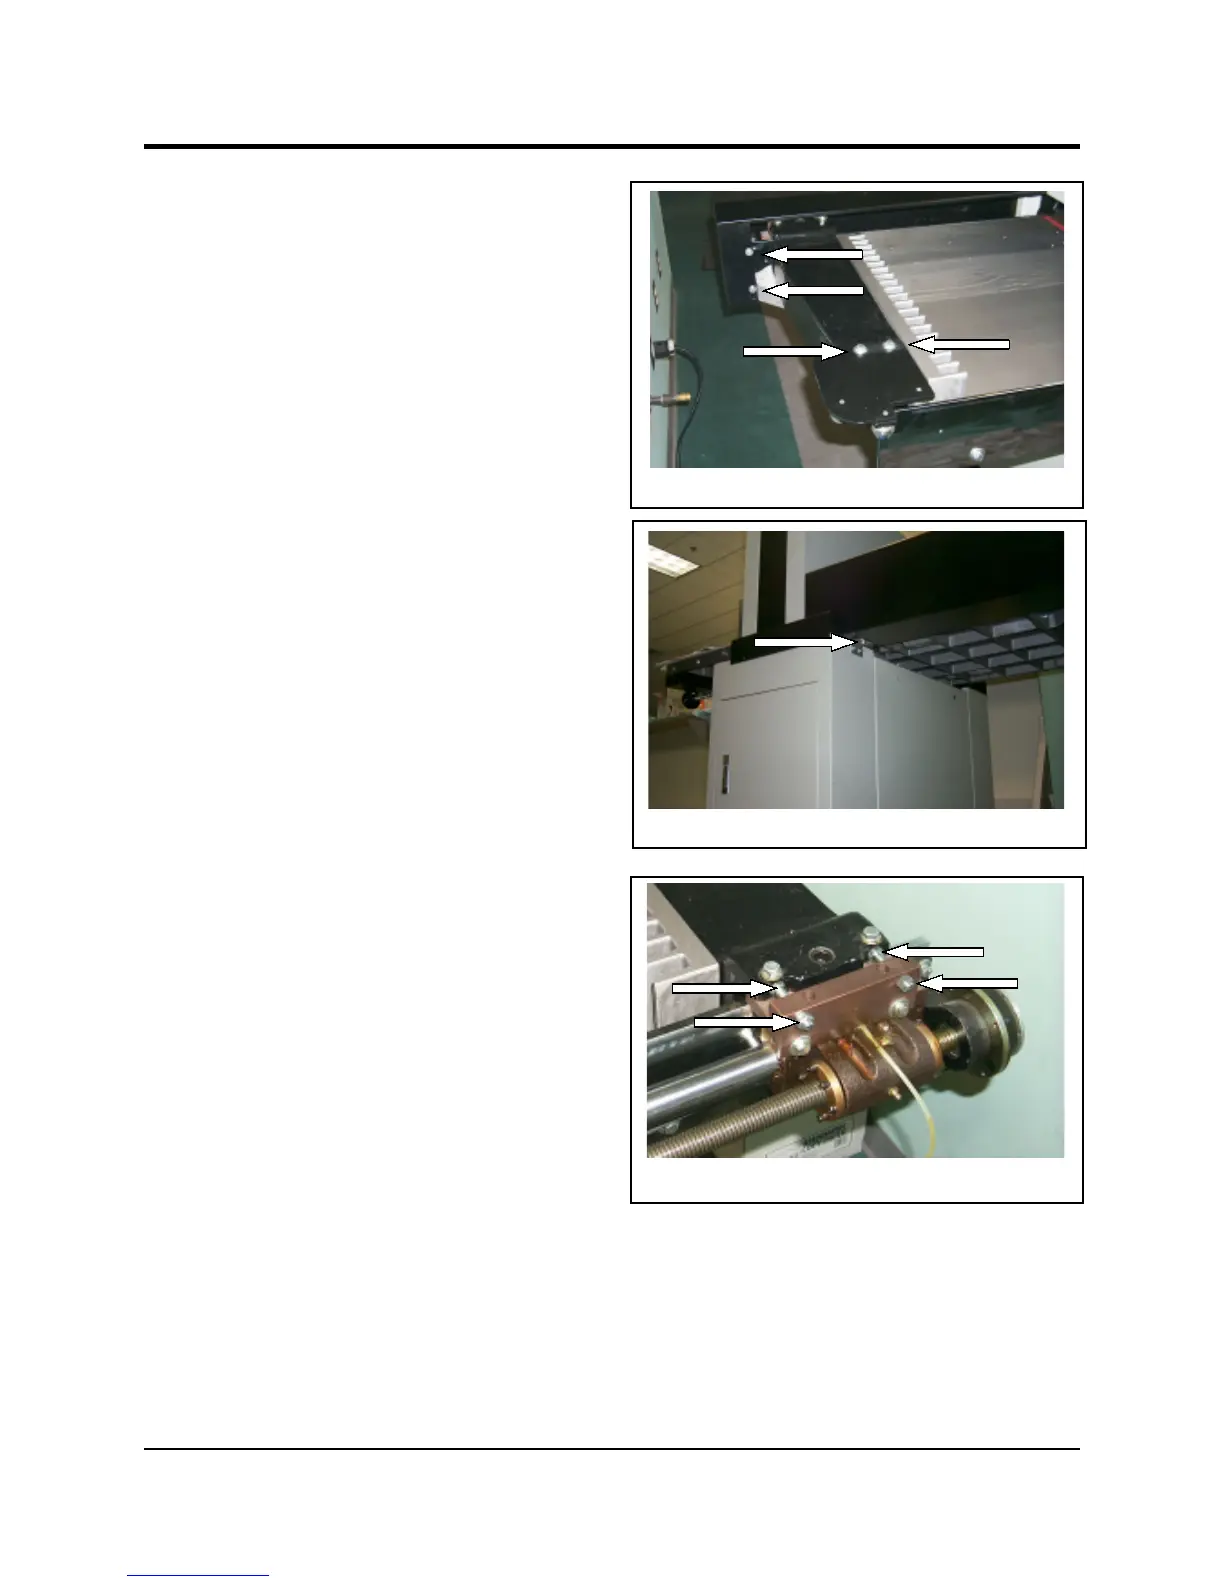
2. Remove the two screws A, see Figure 3.
3. Remove screw A and remove the backgauge
drive cover, see Figure 4.
3. Loosen, but do not remove, the two bolts B on
the left side of the backgauge, see Figure 3.
4. Loosen, but do not remove, the two nuts B on
the right side of the backgauge, see Figure 5.
5. Adjust the two bolts as necessary to “square
up’ the backgauge to the cutting line.
6. Test for squareness. When satisfactory, lock
the bolts from steps 3 and 4.
7. Reinstall the backgauge drive cover.
CUTTING ACCURACY
See the Electrical Section for details on setting the
“Rear Calibration Point.”
Figure 3 - Backgauge Drive Cover Rear Bolts
A
B
A
B
Figure 4 - Backgauge Drive Cover Rear Bolts
A
A
A
B
B
Figure 5 - Backgauge Adjusting Bolts
660P Cutter
2 - 5
https://www.supplychimp.com
 Loading...