8 Adjusting the flame monitor
D−LX 200, D−LX 720 91
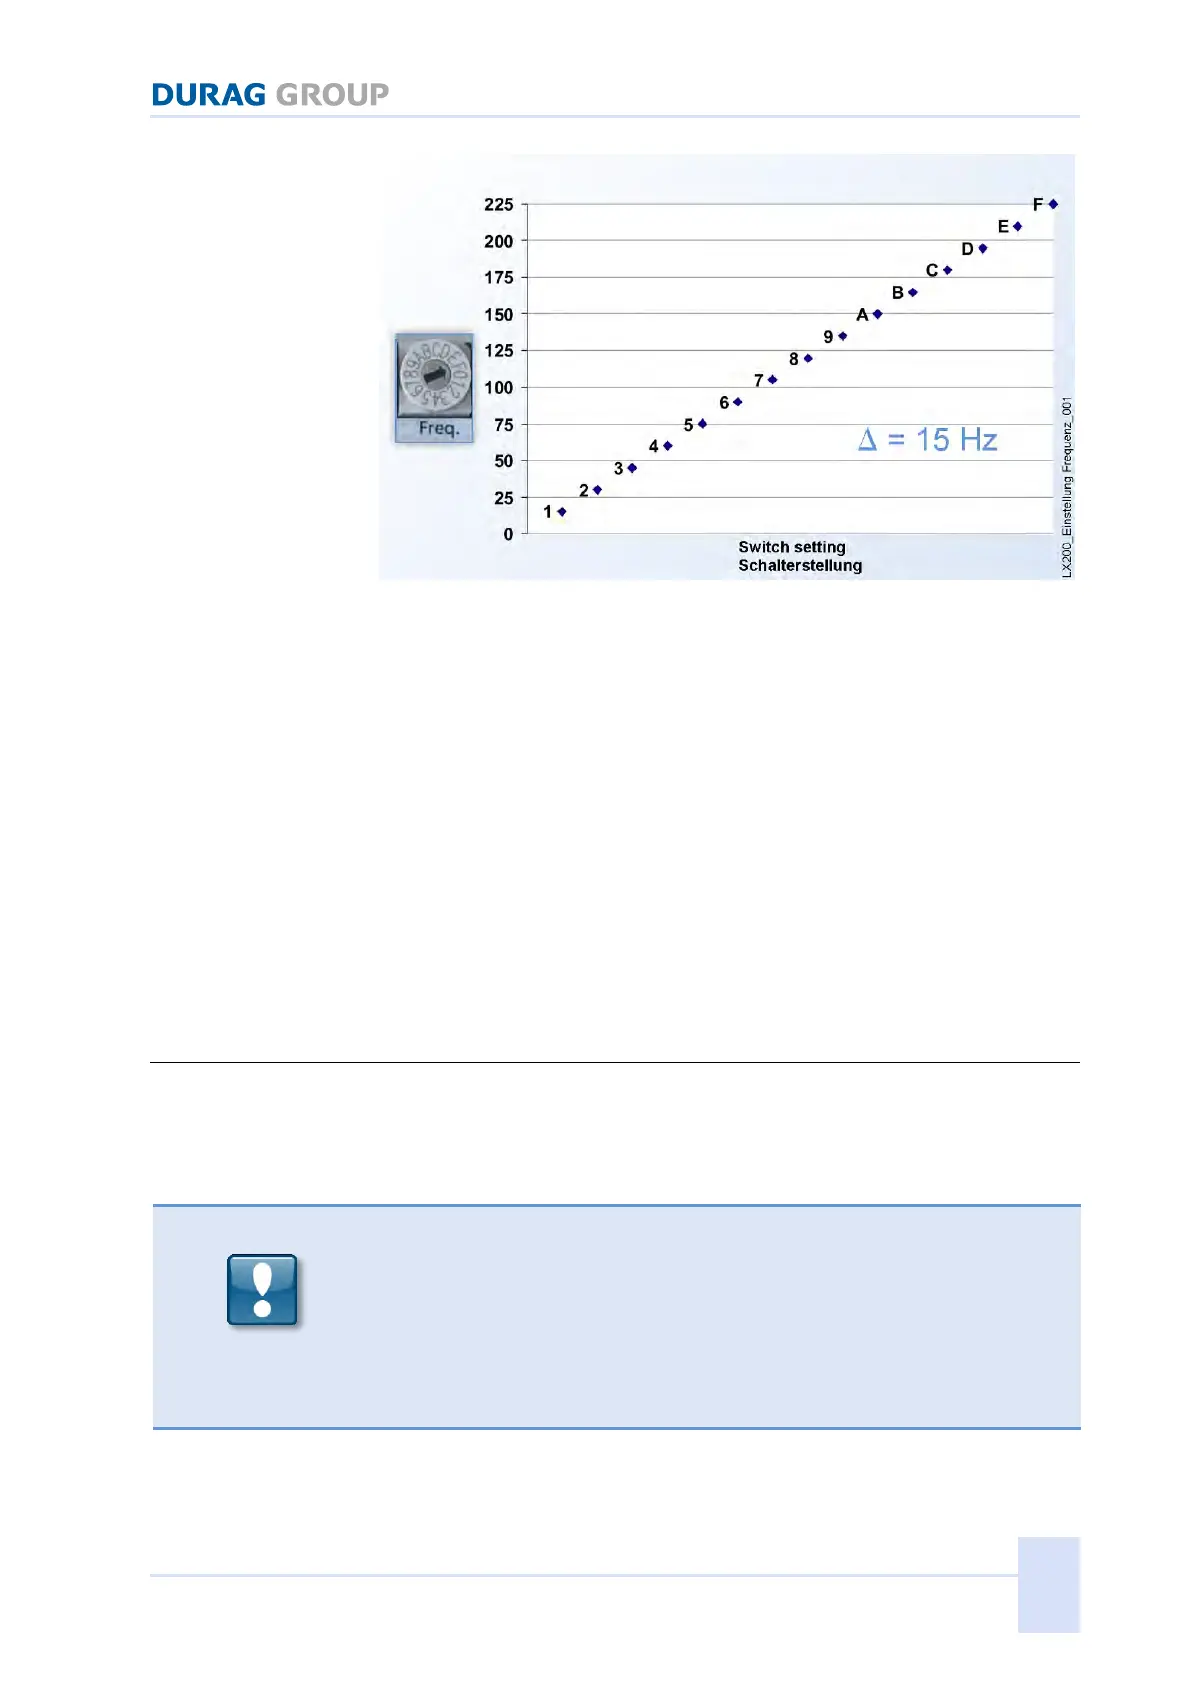
Figure 8.4: Setting the flicker frequency [Hz] of the flame
With the threshold of the flicker frequency, switch position 0 (zero) means a
deactivation of the threshold. The detection of periodic signals is deactivated.
With a switch position > 0 (zero) a threshold is established. The measured
flicker frequency of a flame must exceed this threshold in order for a flame ON
signal to be given (see Figure 8.4).
Example:
If the flame flicker frequency falls below 150 Hz with the switch at position A,
the Compact Flame Monitor shows "Flame OFF" (even when the intensity
threshold is exceeded).
After finishing the adjusting:
Check the seal inside the plug-in cover for damages. Set in the plug-in cover,
so that it is lying plane on the hood. Align the plug-in cover by turning it in the
hood if necessary. Tighten the plug-in cover by both hexagon socket screws.
For this reason the box is waterproof and the IP protection is ensured. The
power supply can be switched on again.
8.3 Setting the amplification characteristics curve
One characteristic feature of the D−LX 200, D−LX 720 is that the internal
amplification adjusts automatically to the signal strength of the flame. The
sensibility of the amplification adjustment matches (by pre-selecting the correct
gain characteristic curve) precisely the appropriate firing process.
Before removing the hood the power to the device must be disconnected!
If live circuit boards become disconnected from their plug connectors when
removing the hood or
if disconnected circuit boards are reconnected when live,
serious damage is caused to the electronic components!
If circuit boards have come loose, it is imperative to ensure that the plug
connectors are not transposed when plugging them in again.
For setting the amplification characteristics curve you have to remove the hood
completely. For this you have to unscrew the four hexagon socket screws in
the front end of the hood.
 Loading...