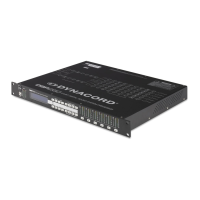
DSP 260
14 Owner‘s Manual
32 – 6dB Pad
Input levels to the DSP 260 can be reduced 6dB prior to the A/D converter to compensate for higher-level
output from mixers and other audio devices. For ideal signal to noise performance when connecting the
DSP 260 to high output level devices engage the 6dB pad rather than turning down the output of the
connected device. The DSP 260‘s Input level Meters (2) will indicate incoming signal level and whether
attenuation is required.
3.3 Installation
For proper operation, all directions regarding installation and connection must be followed.
Mounting
The DSP 260 should be mounted in a rack-mount enclosure or rack rails. The unit is 1RU tall by 14”
(353mm) deep. Proper clearance for air circulation around the unit must be provided. Do not block any
vent holes on the unit. All four mounting points provided by the rack ears must be secured.
Power Connection
The DSP 260 must be connected to A.C. power only by means of the provided IEC A.C. cable or by a
power cable provided by the dealer / installer to match the configuration of your country or region. The
DSP 260 must only be connected to a properly wired, three pin, grounded A.C. outlet. A.C. power must
range from 100 – 240VAC, 50 – 60Hz. The DSP 260 internal power supply is an auto-ranging design; no
adjustments are necessary to configure it for proper A.C. power.
Audio Cables
Always use correctly shielded audio cables when connecting to the DSP 260.
Balanced Input / Output Connections
To minimize induced noise caused by audio cables and to maximize the length of cables used, balanced
connections are strongly advised for both Inputs and Outputs. The XLR jacks provided on the DSP 260 are
configured as pin 1 ground, pin 2 hot (+), pin 3 cold (-). Cable shielding must be connected to pin 1. XLR –
XLR cables or ¼” tip-ring-sleeve – XLR cables can both be used for balanced connections to the DSP 260.