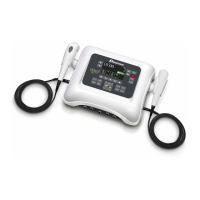
Dynatron® 850plus & 550plus
MICROCURRENT - Treatment Instructions
44
5. Change FREQUENCY, if desired.
To change the frequency, use the Time toggle key to select FREQ, then use the Time
up/down arrow keys to change the frequency. You can press the Time toggle key again
to return to the Time display, if desired. However, if you make no key presses for 10
seconds, the display automatically returns to the Time display.
6. Change the INTENSITY setting.
This setting is displayed in micro amperes in the Power-Intensity display. Use the
up/down arrow keys to change the intensity.
For Electrodes treatments, the CHANNEL 1 indicator light is green. For probes
treatments the MICRO channel light is green and the Channel 1 light is yellow. Changes
you make will affect output to both the probe and Channel 1.
7. Press START.
For electrode treatments, when you press START, the treatment timer begins counting
down and stim is delivered through Channel 1.
For probe treatments, after pressing Start you must press and release the button on the
probe to activate current through the probe; the device beeps once to signal that current
delivery has started (it is not necessary to hold the button down while treating). The
treatment timer begins counting up in seconds from zero to provide a convenient means
of timing the delivery of current at a given point. Press and release the button again to
stop the current through the probe; the treatment timer returns to zero and the device
beeps twice to signal that current delivery has stopped. Continue starting and stopping
current delivery in this way.
NOTE: SAVE DEFAULTS. If the treatment you have just set up is the most common
microcurrent setup you use, you can save the treatment parameters as new defaults for
your own machine. After setting up the treatment, simply press and hold the START key
for two seconds. At the end of two seconds, you will hear a beep indicating the treatment
parameters have been saved. The next time you select the MICRO modality, these
parameters are selected automatically.
Separate default parameters may be saved for both treatments with electrodes and with
probes. See “Setting Defaults” in this manual for further instructions.
8. Turn AUDIBLE TONE on/off, and/or adjust volume.
The audible tone allows you to monitor conductance, if desired. As conductance
increases (as resistance is decreased), the tone becomes higher in pitch.
The audible tone is defaulted to ON for probes treatments and OFF for electrodes
treatments, but may be changed. After the microcurrent treatment has started, the
MICRO key acts as a toggle key to turn the tone on and off. Press MICRO to turn the
tone on or off.
You may also adjust the tone volume after the treatment has started. To adjust the
volume, PRESS and HOLD the FUNCTION key and at the same time use the Power-
Intensity arrow keys to raise or lower the volume until a comfortable volume setting is
found. The Power-Intensity display will temporarily show an