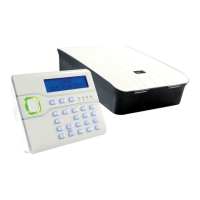
i-on16 Installation
Page 17
2. Press or to show other languages on the
bottom line of the display. for example:
3. Press to select the language you wish to use.
From this point on, the display operates in the
selected language. If you want to change the
language later use Installer Menu - System
Options - Language.
4. Press or to show other countries, for
example:
5. Press to select the country you want.
6. Either: Press to load the Profile.
Or: Press to start with a blank system
Note: Profile may not be EN50131 compliant.
(The factory default is EN50131 compliant.)
The control unit loads your choice of profile,
and then shows:
Note that the alert LEDs round the navigation
glow red. This is because the control unit lid is
off and the tamper is active.
Note: You can set the time and date from within the
Installer Menu by using System Options – Set Time &
Date.
At this point you can carry on to commission the
system.
Step 8. Commission the
System
After installing the control unit you should
commission the alarm system as follows:
1. Use the Installer Menu see Chapter 4 for
software to teach the control unit the identity of its
radio detectors and any other peripherals. See the
installation instructions supplied with each detector
or peripheral.
2. Install detectors and peripherals at their
selected locations.
3. Use the Installer Menu – Test option to:
a) carry out a walk test of the detectors.
b) test the operation of any other peripherals.
4. Program the system to suit user
requirements.
5. If necessary, record speech messages on the
I-SD01 and test them (see Appendix I).
6. Assemble and close the end station:
a) Hook the lid of the control unit into the bottom of
the back box.
b) Close the lid and then tighten the two fixing
screws.
NOTE: It is possible, for convenience, to place links
over tamper contacts to inhibit tamper alarm during
installation. Because of this feature make sure you
test all lid tampers before completing installations,
to ensure that no links are left fitted.
Figure
Close the Control Unit
7. Leave the Installer Menu.
At this point the LED around the navigation keys
will still show red. This is because the system is
still waiting for you to acknowledge the tamper
alarm caused when you applied power for the
first time.
8. Press .
9. Key in the default user code ‘1234’.
10. Press .
The red LEDs should go out, and the rim of the
navigation keys glow green. The system is now
ready to hand over to the user.
11. Instruct the user on how to operate the system.
See the i-on16 Administrator’s Guide. If
necessary, show them how to set the time and
date on the system.
Remember to leave the i-on16 Administrator’s
Guide with the user.

 Loading...