Do you have a question about the ECS A13G Series and is the answer not in the manual?
Details the primary functional aspects and specifications of the motherboard, including processor support, FSB, and onboard features.
Provides information about the NVIDIA nForce MCP61 Value chipset and its capabilities.
Describes memory support for DDR2 modules and lists available expansion slots like PCI Express and PCI.
Details onboard IDE channels, Serial ATA, Audio Codec, and various I/O ports including USB and LAN.
Covers BIOS firmware functionality, optional LAN, USB 2.0 compliance, and motherboard dimensions.
Lists the items included in the motherboard package and optional accessories available for purchase.
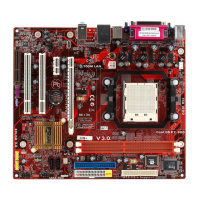
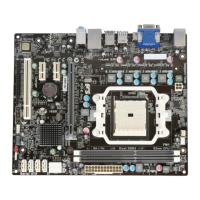
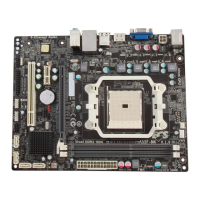
Illustrates and labels the various connectors, slots, and components on the motherboard for identification.
Explains the function and connection points for each rear I/O port, including PS/2, USB, VGA, LAN, and audio.
Provides an overview and initial steps for installing the CPU into the Socket AM2.
Detailed step-by-step guide for installing the CPU, applying thermal grease, and connecting the fan.
Introduces the motherboard's memory support and the procedure for installing DDR2 DIMM modules.
Step-by-step instructions for correctly seating DDR2 memory modules into the DIMM sockets.
Explains jumper configurations and the procedure for clearing the CMOS memory.
Guides on installing the motherboard into a system chassis and connecting power and fan connectors.
Information on connecting various optional devices and headers to the motherboard.
Details on connecting front panel audio ports and the PC speaker header.
Instructions for connecting front-mounted USB ports and the infrared port header.
Guidance on installing and connecting other system devices like floppy drives and IDE devices.
Specific instructions for connecting floppy disk drives and IDE devices to the motherboard.
Details on connecting Serial ATA hard drives and analog audio input for CD/DVD drives.
Lists the types and locations of expansion slots available on the motherboard.
Instructions for installing expansion cards into PCI Express and PCI slots.
A list of compatible PCI-E 8X VGA cards for the motherboard.
Explains the purpose of the BIOS Setup Utility and how to access it upon system startup.
Details the configuration options for basic system information like date, time, and drive settings.
Covers settings for system date, time, IDE channels, and floppy drive characteristics.
Provides access to advanced system settings related to boot order, system tests, and CPU features.
Configuration for CPU features and the priority of bootable devices like floppy and hard drives.
Defines the boot order for Hard Disk, CD-ROM, and Network devices.
Settings for CPU cache, boot device order, and system behavior during POST.
Configuration for keyboard behavior, system security, and various system options like APIC and OS selection.
Allows configuration of advanced chipset parameters, including GPU and HyperTransport settings.
Specific settings for the onboard GPU, frame buffer size, and HyperTransport link speed and width.
Options for configuring DRAM timing, clock values, and memory hole remapping.
Configuration for PCIE, SATA spread spectrum, and TPM control settings.
Enables/disables integrated peripherals like IDE channels, SATA controllers, and RAID functions.
Detailed settings for IDE channels, including PIO modes, UDMA, and DMA transfer access.
Configuration for IDE transfer modes (UDMA, Prefetch, Block Mode) and RAID setup.
Enables or disables onboard devices such as USB, HD Audio, and LAN.
Settings for onboard floppy controller, serial ports, and parallel port modes.
Controls system power saving modes, ACPI functions, and suspend types.
Options for system wake-up via PCI-E, PCI, USB, or keyboard/mouse, and power-on after failure.
Settings for Plug and Play, PCI slot configuration, and IRQ/DMA assignments.
Monitors system temperatures, voltages, fan speeds, and configures smart fan settings.
Options to load fail-safe or optimized defaults and set supervisor/user passwords.
Instructions on how to save changes and exit the BIOS setup utility, or exit without saving.
Describes the contents of the support CD-ROM, including drivers and utility programs.
Provides instructions for installing drivers and utilities from the support CD-ROM.
Details the automatic software installation process for Windows 2000 and XP operating systems.
Guides for manual software installation (Windows NT) and installing bundled applications from the CD.
| Memory Type | DDR3 |
|---|---|
| Audio | Realtek ALC662 6-Channel HD Audio |
| Form Factor | Mini-ITX |
| Memory Slots | 2 |
| USB Ports | 4 x USB 2.0 |
| Video Outputs | VGA |