11
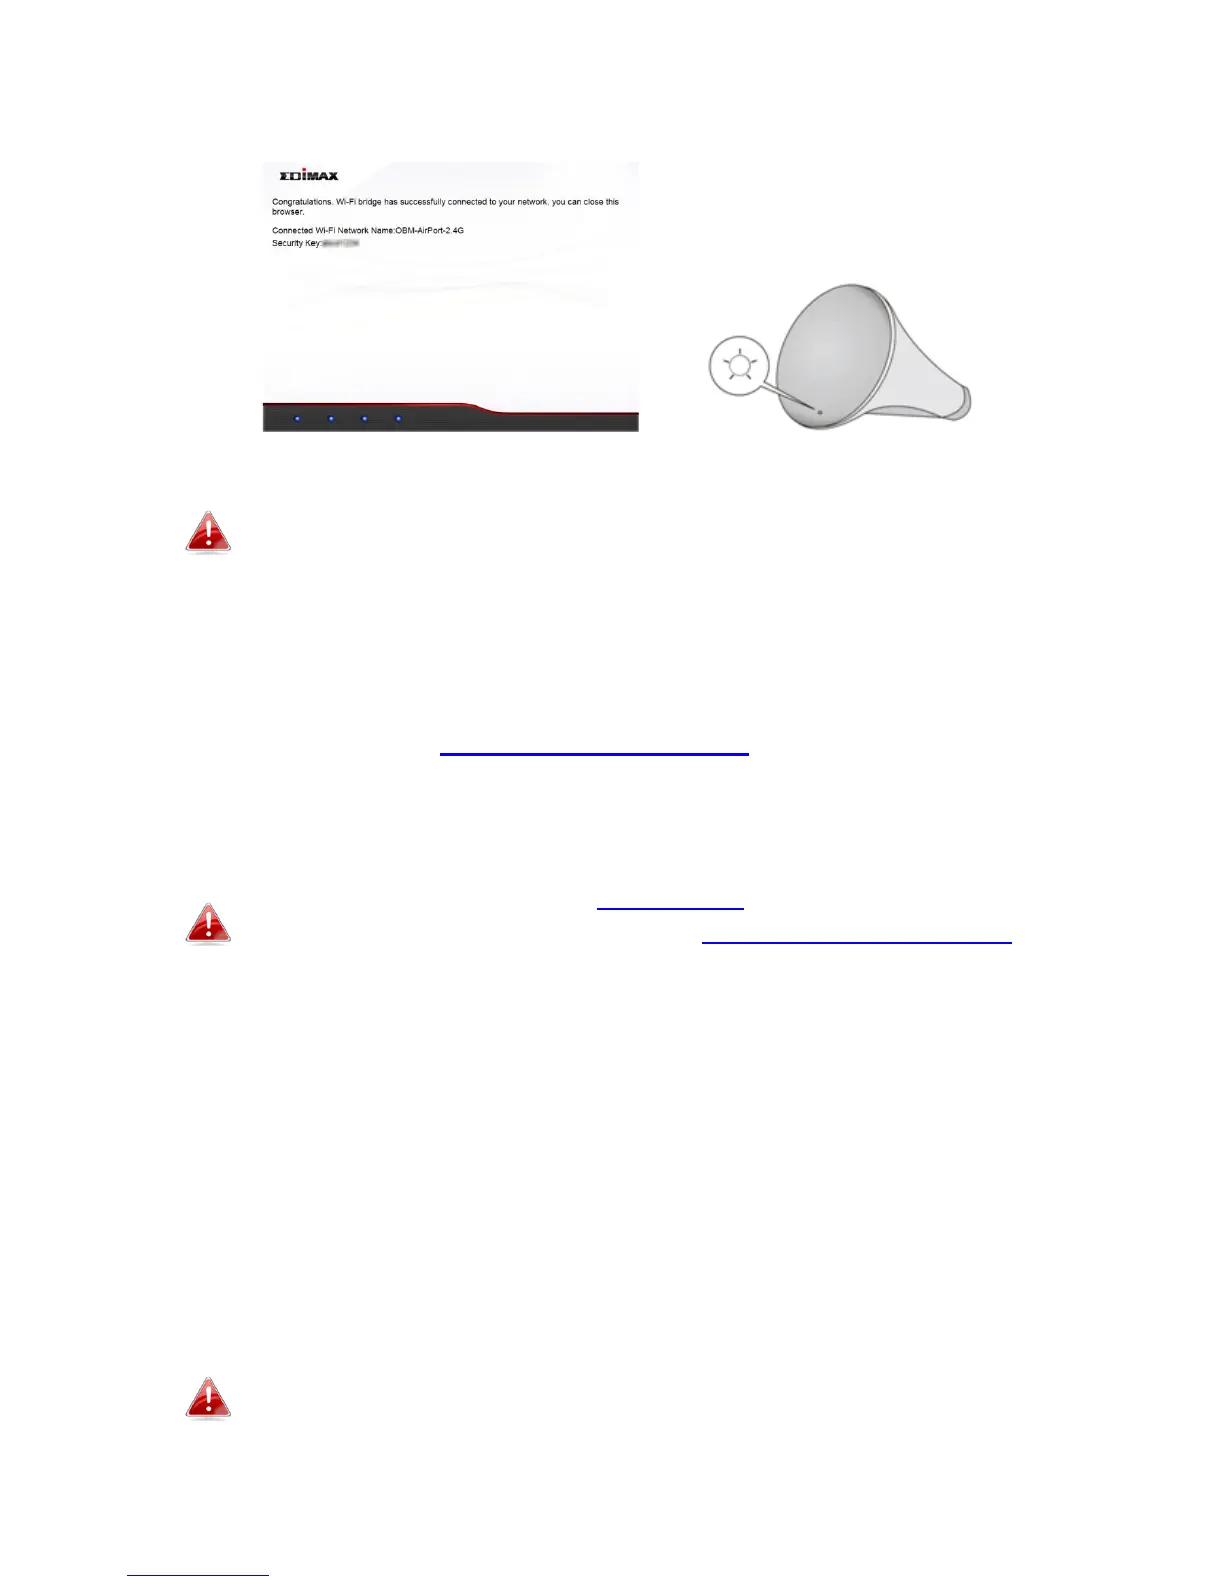
7. A congratulations screen will confirm your wireless bridge has established
a connection.
If you do not see the congratulations screen shown above, check
the LED: if the LED displays on (white) then the wireless bridge
has successfully established a connection. Continue to III. Using
the CV-7438nDM.
When the Wi-Fi bridge’s LED displays on (white), the wireless bridge is now ready
for use with audio speakers or Ethernet devices such as smart TVs, set-top boxes or
game consoles. Please see III. Using the CV-7438nDM.
II-2. WPS Setup
WPS setup is an alternative to II-1. iQ Setup. If you already
completed iQ Setup, please continue to III. Using the CV-7438nDM.
The WPS button is a quick and easy method to establish a secure connection
between your wireless bridge and wireless router/access point. The wireless
bridge can connect to either 2.4GHz or 5GHz Wi-Fi networks via WPS,
depending on which frequency’s WPS is active on your wireless router/access
point.
1. Plug the power adapter into the device’s 5V power port, plug the adapter
into a wall socket or available USB port, and press the power on/off button
to switch the device on. The CV-7438nDM may take several minutes to
boot up – the device is ready when the LED is flashing (red).
The CV-7438nDM requires 1 A of current – please ensure that your
USB port can provide sufficient power. If not, use the 5V DC
adapter.
 Loading...