© Edwards Limited 2012. All rights reserved. Page 19
Edwards and the Edwards logo are trademarks of Edwards Limited.
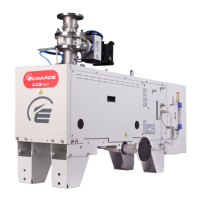
Installation
M518-00-880 Issue A
Use rigid metal (such as stainless steel) pipelines with an outside diameter of ¼ inch for your nitrogen and air
supplies.
Check visually that the rotameter is not damaged when you install the pump. After commissioning and switch-on,
flow should be visible in the rotameter. The rotameter indicates the N2 flow to the CXS pump shaft seals only.
The CXS dry pump is fitted with high vacuum and low vacuum seal purges as standard. Optional purges may be fitted,
refer to your system documentation for the type of purge system fitted.
Medium-Duty and Medium-Duty-Plus pumps have, in addition to the standard seal purges, a gas ballast purge of max
34 slm, and an inlet purge of 16 slm.
An isolation valve is fitted to the purge gas system so that the purge gas is on whenever the pump is on. The air supply
is connected to 1 or more pilot solenoids (dependent on number of accessories) and only flows when the valves are
activated. The EH booster is fitted with a coupling cover purge as standard. The purge is switched on whenever the
booster runs.
3.3.4 Connect and set up cooling water
Do not apply excessive torque to the water fittings when connecting your water supply to the pump otherwise
you may damage them. Use a suitable spanner to prevent the bulkhead fittings on the pump from turning whilst
you tighten up your connectors.
Fit the inlet strainer (supplied) into the supply side of your cooling-water system to prevent damage to the
cooling system within the pump.
Notes: 1. For optimum water cooling, ensure that your cooling-water supply meets the specification given in
Section 2.3. Ensure water supplies are connected in parallel. Refer to Figure 1.
2. For minimum water consumption, regulate the cooling-water flow to the system. If regulated, always
ensure that the minimum flow requirements in Table 7 are followed.
Fit the inlet strainer and then use the following procedure to connect the cooling-water supply and ensure that the
system is receiving the correct water flow rate. Before you start, ensure that the electrical power supply to the CXS/
EH combination system is switched off:
1. Use 3/8 inch BSPT pipe fittings (which you must supply) to fit to the cooling-water supply and return hoses.
2. Remove the dust-caps from the cooling-water inlet and outlet.
3. Connect your water return hose to the cooling-water outlet (Figure 1, item 9), then connect your water supply
hose to the cooling-water inlet (Figure 1, item 11), taking care not to turn the bulkhead fittings on the pump
when you tighten up your connectors.
4. Turn on the cooling-water supply.
5. Switch on the electrical power to the CXS and press the reset button to reset the safety interlock. All the water
valves in the pump cooling system will automatically open for a period of 30 seconds.
Before powering up the system, the cooling-water must be connected and the supply switched on.
 Loading...