© Edwards Limited 2011. All rights reserved. Page 43
Edwards and the Edwards logo are trademarks of Edwards Limited.
Maintenance
A705-40-880 Issue B
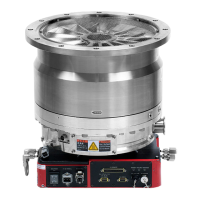
5.9.2 Remove the bearing cover and bearing caps
1. Refer to Figure 3. Wear thermal protective gloves and push down the coolant filler cap (1) and turn it
anticlockwise by a 1/4 of a turn (as shown in detail A) to release the pressure in the cooling jacket.
2. Refer to Figure 9. Remove the ten M10 bolts and spring-washers (15) which secure the bearing cover (5) to the
high vacuum head-plate.
3. Remove the M6 screws and nuts which secure the thermal snap-switch to the support bracket.
4. Remove the bearing cover (5), the bearing cover O-ring (14) and the cooling-jacket O-ring (11). Discard the
O-rings.
5. Remove the three M8 bearing cap retaining bolts (6) which secure the bearing cap (7) on the drive rotor shaft;
ensure that you do not accidentally remove one or more of the bearing carrier bolts (16, see detail A), which are
next to the bearing cap retaining bolts. Remove the bearing cap (7) and the bearing cap O-ring (8).
6. Repeat Step 5 to remove the bearing cap (12) and bearing cap O-ring on the driven rotor shaft.
5.9.3 Clean, inspect and relubricate the rotor bearings
1. Refer to Figure 9. Use a clean lint-free cloth to remove as much old grease as possible from the inside face of
the bearing caps (7, 12) and from the top of the bearings. Do not use your fingers for this operation.
2. Inspect the bearings for obvious signs of wear or the presence of debris. If the bearings are worn, contact your
supplier or Edwards for advice.
3. Inspect the O-ring groove on the high vac headplate. Check that the O-ring grooves are continuous, not corroded
or have scratches on the surface of the O-ring groove. If the O-ring groove is damaged, contact Edwards for
advice; if the pump is part of an ATEX system, do not continue to use the pump.
4. Check the underside of the bearing cover is not damaged. If the underside is damaged and the pump is part of an
ATEX system, do not continue to use the pump.
5. Use a suitable syringe to force approximately 50 g of new Fomblin CR861 grease into the bearings so that a
smooth layer of grease covers the case and bearings. Do not put too much grease in the bearings or the pump
will run hot.
6. Use a 24 mm A/F spanner to turn the drive rotor shaft (9) in the correct direction (13) three or four complete
revolutions.
7. Press any grease forced out of the bearings back into the bearings.
Allow the pump to cool down and release the pressure in the cooling jacket before you remove the
bearing cover. If you do not, hot coolant may be ejected from the cooling jacket and may cause
injury.
If the EDP pump is part of an ATEX system, you must inspect the components in accordance with
the following procedure, and replace any components that are damaged, or do not meet the
inspection criteria.
 Loading...