A705-40-880 Issue B
Page 66 © Edwards Limited 2011. All rights reserved.
Edwards and the Edwards logo are trademarks of Edwards Limited.
Maintenance
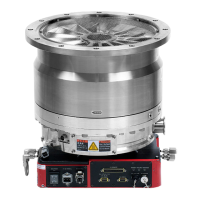
4. Refer to Figure 13. Fit the heat exchanger:
Remove any blanking plugs from the coolant ports on the pump.
Fit the heat exchanger (4) to the pump, and secure with the eight bolts.
Connect the fitting nuts (2, 9) on the cooling-water pipes to the top and bottom end caps (11, 6) of the heat
exchanger.
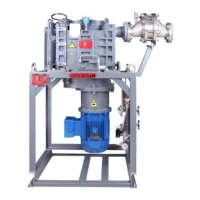
5. Refer to Figure 17. If your pump had a coolant jacket thermal snap-switch fitted:
Remove any blanking plug from the snap-switch port on the pump.
Fit the adaptor fitting (9) to the pump.
Fit the thermal snap-switch (10) and support bracket to the new service module and connect with the
adaptor fitting (9): if necessary, refer to the thermal snap-switch instruction manual for further information.
6. Screw the brass sensor pocket into the new service module, screw the TCV sensor capillary into the sensor
pocket, then fit the TCV sensor stainless steel guard to the service module.
7. Remove any blanking plugs from the shaft seals purge ports on the new service module.
8. Fit the two elbow fittings (6) to the new service module, then connect the shaft-seals purge pipeline (7) to the
two elbow fittings.
9. Fit the coupling hub to the service module.
10.Fit the motor and coupling cover to the service module: refer to Section 5.15.7 to 5.15.9.
11.Remove any blanking plug from the exhaust outlet port on the new service module.
12.Use the seven bolts to secure the exhaust manifold (11) to the service module. Tighten the bolts.
13.Remove any blanking plug from the inlet port on the new service module.
14.Use the four bolts (2) to secure the inlet adaptor to the new service module. Tighten the bolts.
15.Leak test the system.
After you have fitted the new service module and the pump has passed the leak test, prepare the pump for operation
as described in Section 3.
If your pump is part of an ATEX system, you must leak test the pump after re-fitting the valve to
the pump. If you fail to do so, the ATEX certification of your system will be invalid.
Table 16 - O-rings supplied with the replacement service module
Location 'O' ring size
'O' ring size (mm) Inlet adaptor 74.5 inside diameter x 3.0 section
Exhaust manifold/low vacuum headplate (all pumps) 74.5 inside diameter x 3.0 section
Exhaust manifold/middle stage (EDP250 and EDP400 only) 64.5 inside diameter x 3.0 section
Cooling stack (2 off) 79.5 inside diameter x 3.0 section
 Loading...