5.2 WALL BRACKET INSTALLATION
The mounting bracket is used to attach the indoor unit to the wall.
Verify the bracket is installed on a secure surface that is sufficiently dense to support the
unit and prevent unwanted noise and vibration.
If the mounting surface is made of sheetrock, install the mounting screws into studs or use
adequate sheetrock anchors (not supplied) that can support the weight of the unit.
If the mounting surface is made of brick, concrete, or similar material, drill 13/64 in. (5mm)
pilot holes and place the provided sleeve anchors in the holes. Secure the mounting plate
to the wall by tightening the screws into the bracket and sleeve anchors.
Steps:
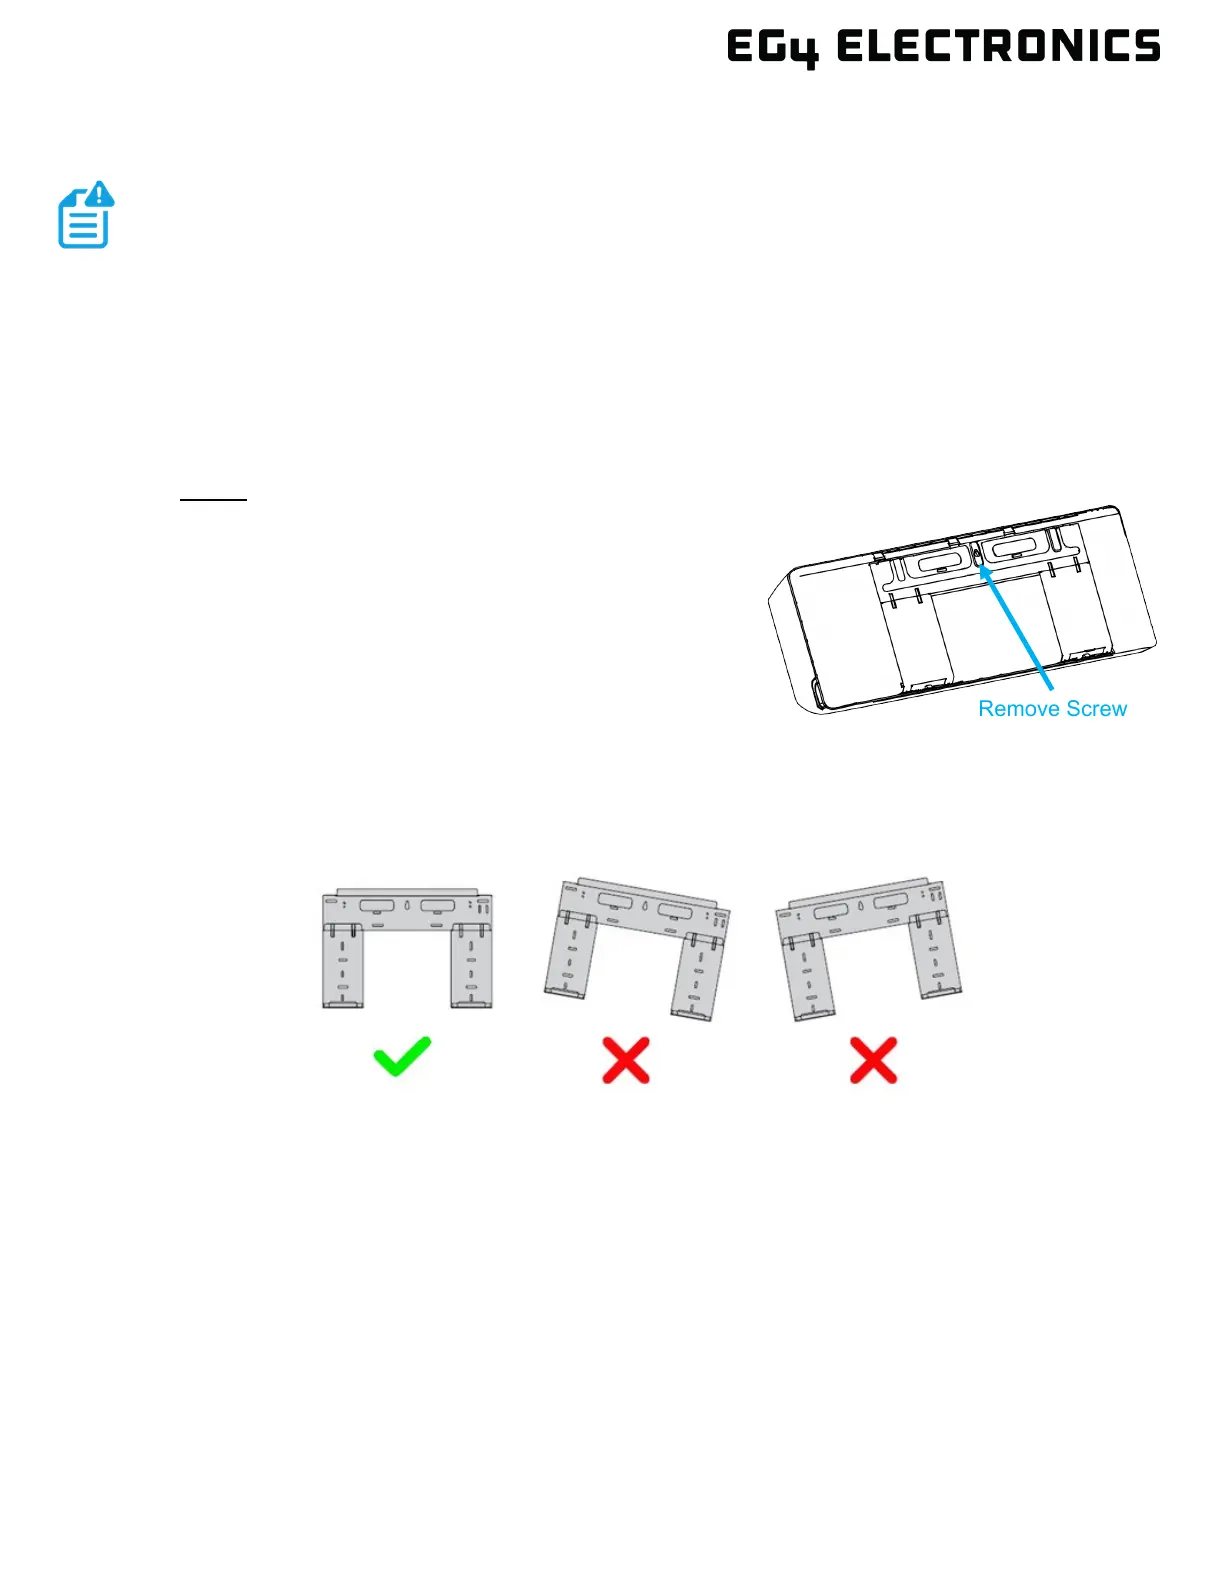
1. The mounting bracket arrives attached to the back of
the indoor unit. Remove the bracket using a Phillips-
head screwdriver prior to the installation.
2. Place the mounting plate against the wall in a location
that meets the standards as defined in Section 5.1.
3. Drill a hole for the center mounting screw that:
a. has a stud or a wall anchor that can support
the weight of the unit
b. corresponds to the screw holes in the mounting plate
4. Secure the indoor mounting plate to the wall using the center mounting hole.
5. Use a level to ensure the mounting plate is level.
6. Mark the remaining installation screw holes. Drill pilot holes and install the screws. If sheet
rock anchors are required, swivel the bracket side to side to install each anchor. Then
realign bracket to anchor and install the screws.