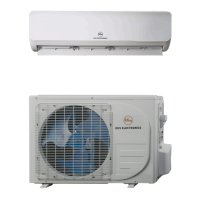
6. Connect the line set quick connector F2 to M2. Tighten to 19-22 ft-lbs. (25-30Nm).
7. Repeat the steps for indoor connector M1 and line set connector F1.
8. Coil the excess tubing behind the outdoor unit.
9. Remove the protective covers from the M2 connector on the outdoor unit and the F2
connector on the line set.
10. Connect the line set connector F2 to the outdoor unit connector M2. Tighten to 19-22 ft-lbs.
(25-30Nm).
11. Repeat the steps for indoor connector M1 and line set connector F1.
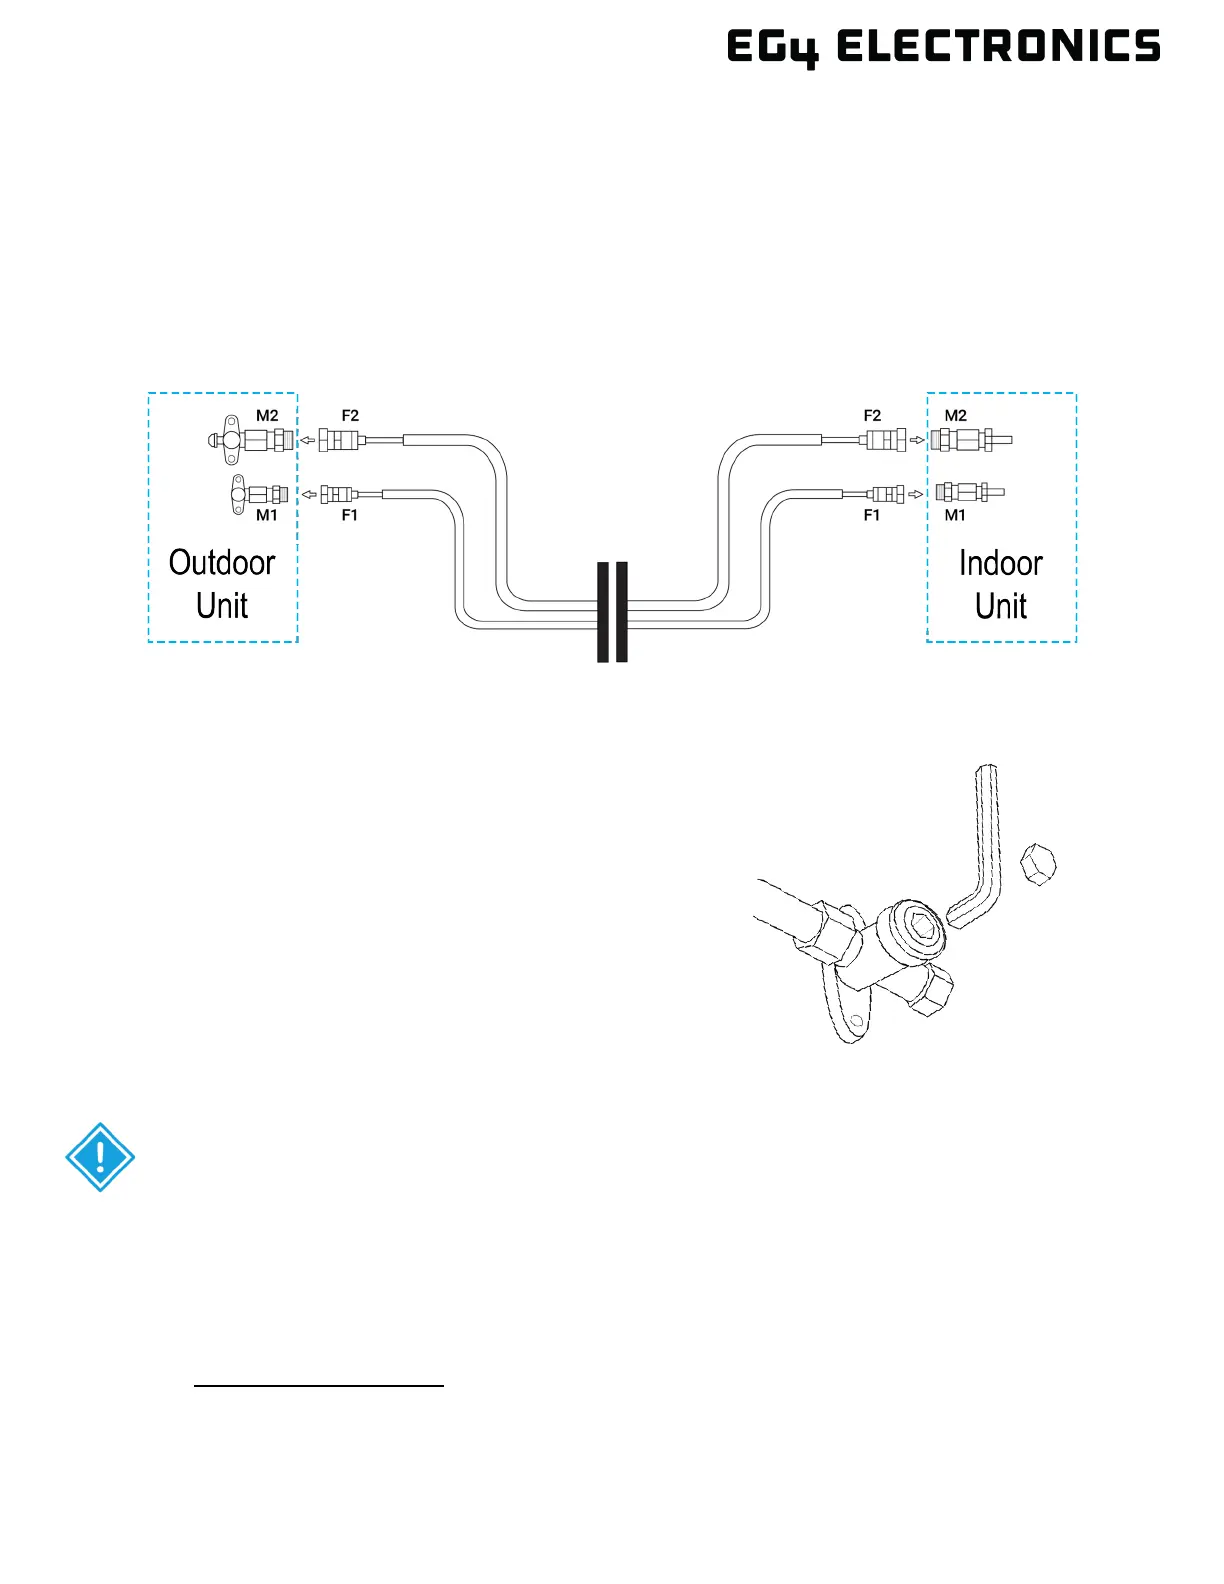
6.7 RELEASE REFRIGERANT INTO THE SYSTEM
Perform the following steps at the outdoor unit.
1. Remove the protective cap from the upper
valve body.
2. Insert a hex key wrench and turn the top valve
counterclockwise until it seats against the outer
seal (stops turning).
3. Reinstall the protective cap and tighten it to 22-
30 ft-lbs. (30-40Nm). Take care not to
overtighten.
4. Repeat the above steps for the bottom valve.
5. After both valves are open and the caps are
reinstalled, complete the leak test in the next
section.
CAUTION: If the valves are not fully opened, it could cause the system to malfunction
and/or cause damage.
6.8 GAS LEAK TESTS
Check all the line set connections (at indoor unit and outdoor unit) for leaks.
There are two different methods to check for gaseous leaks.
Soap and Water Method
Using a soft brush, apply soapy water or liquid detergent to all line set connection points on
the indoor unit and outdoor unit. If any bubbles begin to form, that indicates there is a leak,
and the connection needs to be re-tightened. Tighten the connection and recheck it for leaks.